Rhubarb cobbler

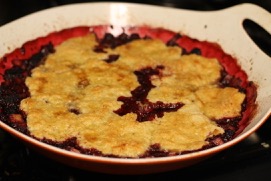
Enjoy this true American deliciousness! The juicy base is both sweet and sour. These flavors nicely complement each other. It is covered with the perfectly crumpling, soft topping … Oh and it is begging for a bit of vanilla ice cream!

Cobbler is an American deep-dish fruit dessert. It became a favorite right after I took my first bite. Cobbler is simple yet it is bursting with rich flavor; there is something about it that surely grabs everyone’s attention.  You can make it with whatever fruit is available in the season. My mother-in-law made it with rhubarb and berries and that is how I keep making it. Foreigners often complain that Americans don’t have a cuisine of their own. Well this one is an American specialty for sure. 

I looked up the history of cobbler so I will try to summarize what I read.  Well, one is certain that it is a North American dessert. It seems like it was invented by the settlers from the Old World when they tried to make one of their amazing pies but they did not have all the tools and ingredients that was available back at home.  As an immigrant, I can relate to this experience.  

The word cobbler might come from the word ‘cobeler’ that meant wooden bowl.  They might have attempted to make a more simple version of a traditional pie recipe in a small wooden bowl by the fire.  Also, another meaning could come from the word cobbler, the person who mends shoes; kind of like how the dough is mended together like a patchwork. However, none of these speculations of the word’s origin is official.  

As I mentioned earlier, I like to make the cobbler with rhubarb, especially in the spring. It is the first fruit, oops I meant to say vegetable here. Yes people often think it is a fruit because of its fruity, sour taste but it is in fact a vegetable. I can’t believe I get excited about rhubarb but it is really the first new plant that shows up at the farmers market in the Midwest … and there is nothing else here for weeks. While it is not a fruit, it can be prepared with sugar to –kind of ‘cheating’- to pretend that it is a fruit.  I also like to add rhubarb because the sour flavor nicely offsets the sweetness of the berries.

Rhubarb is native to Siberia and has been around for thousands of years. It has been grown in Asia for its medicinal properties. With the big migration, it was adopted in Europe as well. The settlers brought it over to the United States in the 1700’s and was known as the pie plant. The whole plant except for the leaves are used. The stalks are used as food. The leaves contain oxalic acid and can be poisonous in larger quantities and are therefore not used.

Besides its fame in the culinary world, rhubarb has favorable health benefits too. It is cooling and detoxifying to the liver which makes it an ideal spring vegetable. Berries are also healthy. Particularly, raspberries and blackberries have a sweet and sour flavor and neutral thermal nature. These qualities make the berries ideal for baking. They nourish the kidneys and the liver and also build and cleanse the blood of toxins.

This is a crowd pleaser! The only complaint I have ever heard was why I didn’t make more! I bring this dessert often to potlucks so I know a lot of people have eaten it. I really think cobbler is as good as pie is or even better. The trick is to get the best rhubarb and the sweetest berries you can find. You can grow them yourself or get them at the farmers’ market. This is really important as the main part of the cobbler is the fruits! Also, make sure you use the exact measurements! Remember, it is still kind of a pie recipe. Can’t just say I take a little bit of this and a little of that …

RECIPE

12 servings

This recipe is straight out of the cookbook Joy of Cooking.

Serving size: 8 people

INGREDIENTS
  • 1 lb rhubarb cut into 1/2 inch pieces (in the store get the thinner stalks)
  • 1 lb berries – I used blackberries and raspberries
  • ½ cup sugar or more only if your fruits are not sweet enough. Only use more if your berries are not sweet. 1/2 cup is plenty otherwise, trust me!
  • salt
  • 2 Tbsp flour or 1 Tbsp of corn starch
  • 1 1/3  cup all purpose white flour
  • 1 tsp baking powder
  • 2 Tbsp sugar
  • 5 Tbsp cold unsalted butter
  • 2/3 cup cream or 1/2 cup milk (honestly milk is fine too)
  • 1 lightly beaten egg for the top
  • extra sugar for the top
  • vanilla ice cream for serving

DIRECTIONS
  1. Preheat the oven to 375 F. 
  2. Have all the ingredients at room temperature except for the butter.
  3. Have ready an oven proof baking dish that is about 2 quarts large in volume and 2 inches deep (ex 11 x 4 x 2 inch).  
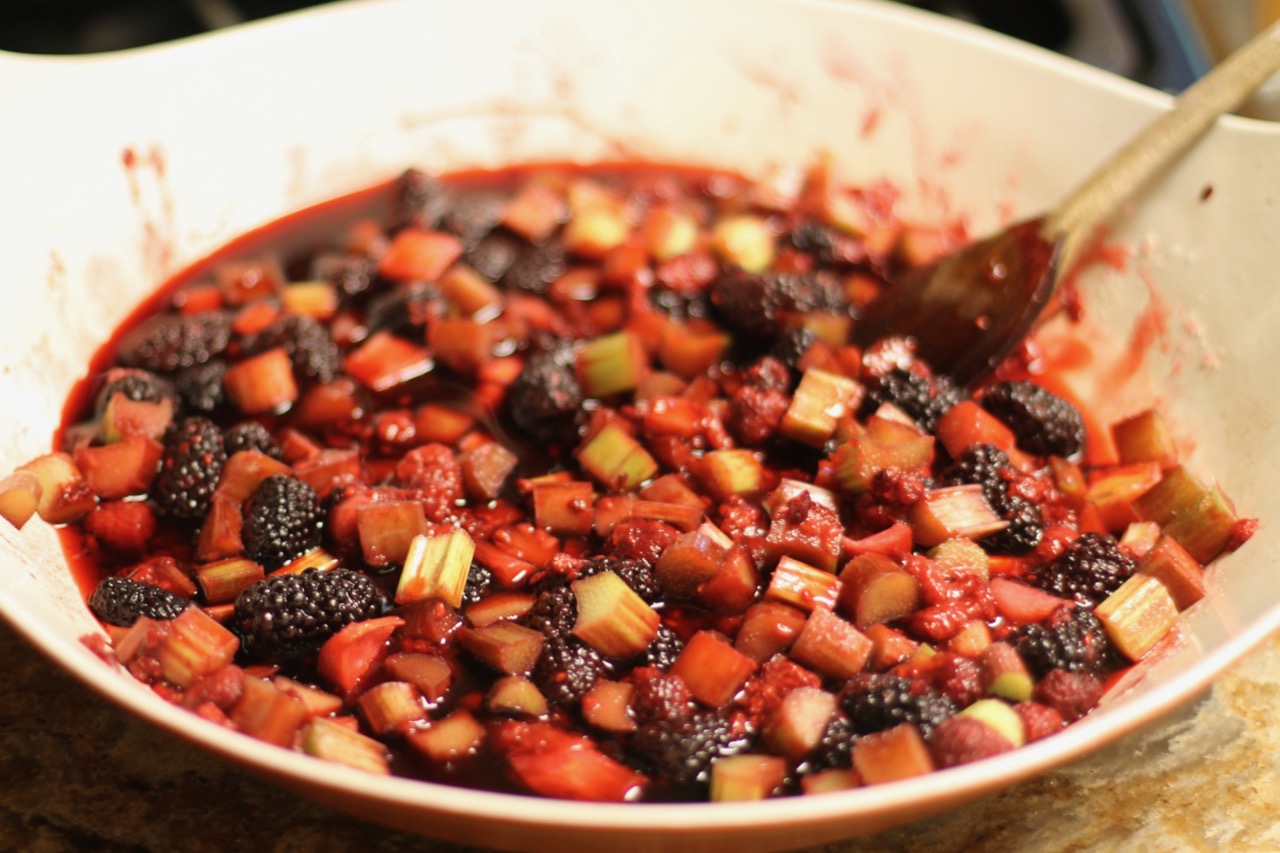
  4. Take fruits and the rhubarb out of the freezer if they are frozen, let them defrost. Wash rhubarb stalks and cut them into 1/2-1 inch long. If they are wide, you will have to cut them in half as well. Place the rhubarb and the berries in the dish. Add pinch of salt, flour or cornstarch and sugar. Mix. Set aside and wait for at least 15 minutes or at least until rhubarb exudes some juice.
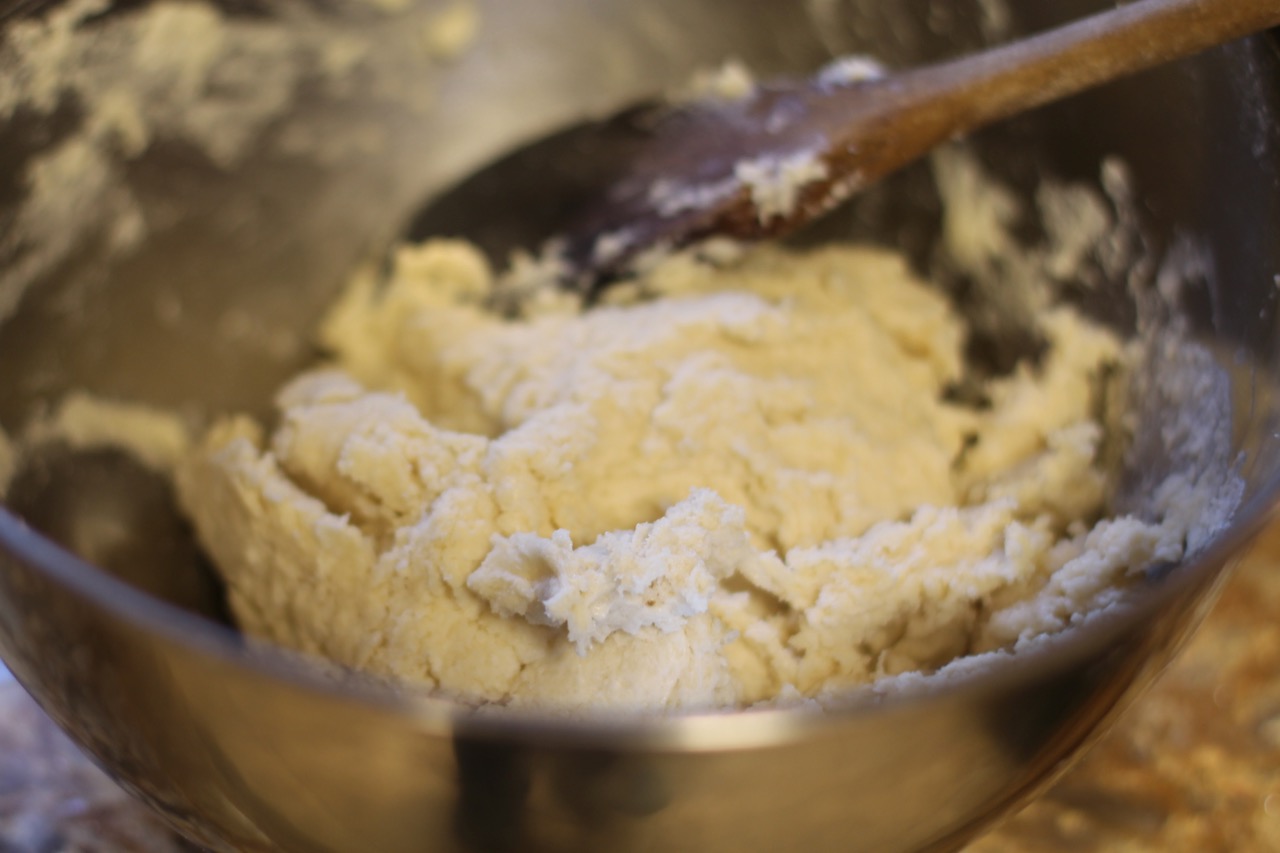
  5. In a large bowl, combine the flour with the baking powder, pinch of salt and sugar. Add the butter with the flour mixture. This is such a satisfying experience for me to do by hand but if you prefer you can use your food processor for this step.  Add the cream or milk stirring with a wooden spoon until the dough comes together. Gently need the dough in the bowl 5-10 times if needed, turning and pressing any loose pieces into the dough.
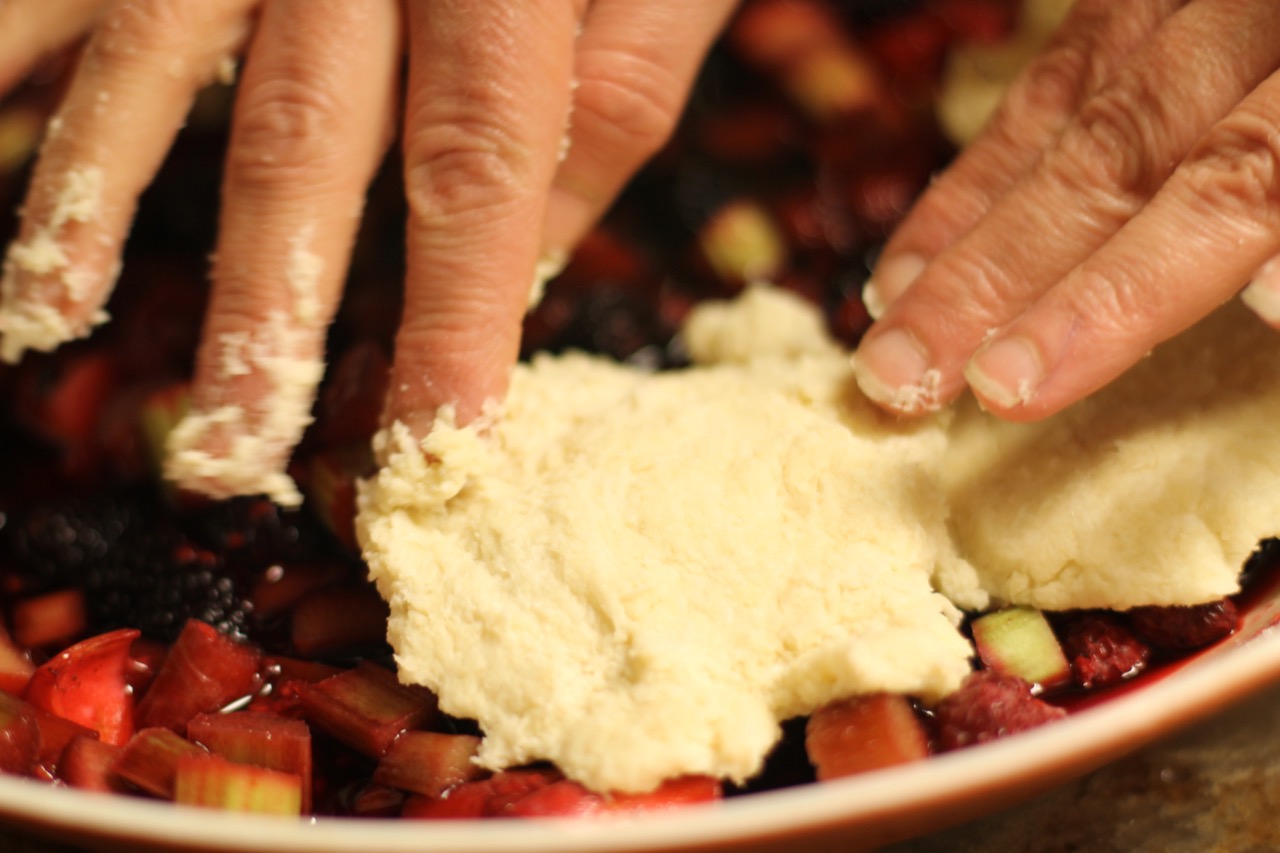
  6. Now we will make a patchwork. Divide the dough into 8 parts and flatten each piece between your two hands about 1/4 inch thick. Place this piece on top of the fruit mix. Keep doing this until you have used up all the dough and the fruits are completely covered.  The dough should be workable but not sticky. If the dough becomes too sticky and hard to work with, put it into the fridge for about 10 minutes to become the proper consistency. This can happen in the summer when it is warm outside.
  7. Lightly brush the top of the dough with the lightly beaten eggs and sprinkle with a little sugar. 
  8. Put the cobbler in the oven and bake for about 35 – 40 minutes or until the top is golden brown and the berries are bubbling. 
  9. Let stand at room temperature for at least 15 minutes before serving. 
  10. You can serve the cobbler with vanilla ice cream if you wish.

enjoy!

Sources

  1. Irma S. Rombauer: Joy of Cooking
  2. Paul Pitchford: Healing with Whole Foods
  3. http://www.etymonline.com/word/cobbler

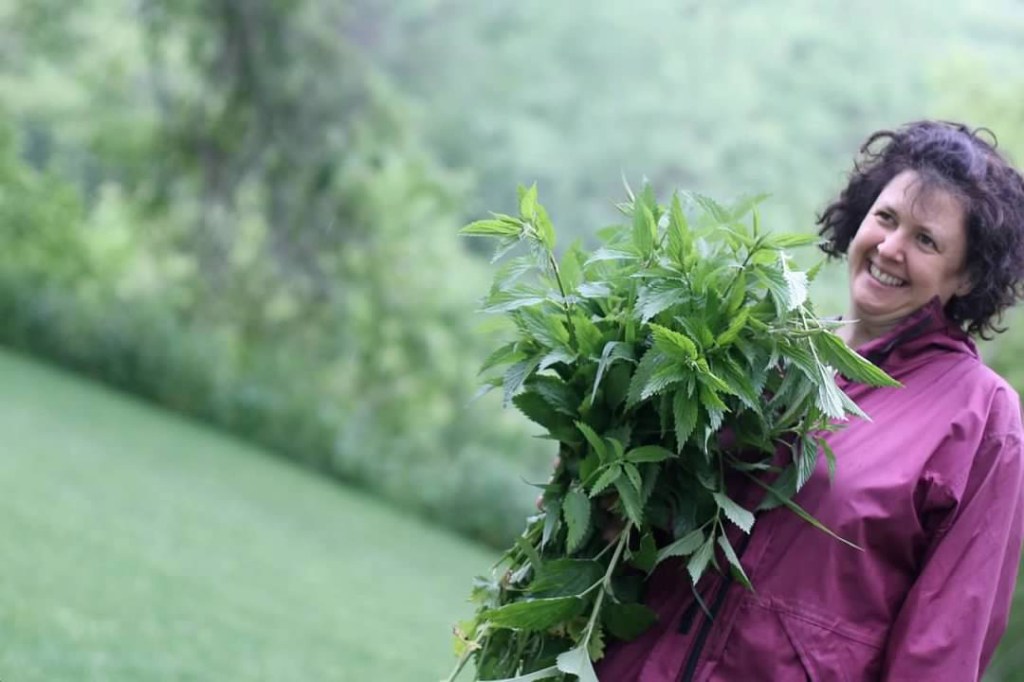
Text and photos by Twincitiesherbs.

Sorrel nettle stew (Sóska csalán fözelék)

Every year, I look forward to spring just so I can make this dish. The main ingredients are sorrel and nettle. The sorrel gives a pleasant lemony flavor and the nettles add the substance, texture and protein to the dish. It is a simple recipe to make, the hardest part is really to find the sorrel and the nettles. Our ancestors regularly ate them in the spring but today unfortunately they are seldom available in stores.

My recipe is based on the Hungarian sorrel stew recipe, sóska fözelék with the addition of the nettles. Years ago, I could not find any recipes that had nettles so I decided to experiment. So I decided to make this dish with sorrel and nettle. I make it with half sorrel and half nettle, of course add as much nettles as you desire. I really like how this recipe turned out.

Before I post the recipe, I would like to talk about nettles and sorrel. Nettle is like the super food of the US and Europe. When I think of Nettles, two things come to my mind: nutritive tonic and the kidneys. It is very high in protein, vitamins, and minerals and makes a nutritious food for sure. With its sharp, tangy taste, sorrel adds zest to dishes. However, it is not just added for its flavor but it is also a nutritious goodness. Sorrel is a green leafy vegetable with packed with vitamins and minerals. No wonder our ancestors frequently included them in their diet.

RECIPE

INGREDIENT

  • 1 lb of washed sorrel or you can use spinach too but the dish will taste differently.
  • 1/2 – 1 lb washed nettles (the nettles should be fresh and stingy but they will not hurt your mouth after you cook them).
  • oil
  • 2 strips of bacon (optional)
  • 1 onion, finally chopped
  • 3 cloves of garlic, mashed
  • 1 tsp sweet Hungarian paprika (powder)
  • few springs of dill, chopped
  • about 2 cups cold water, vegetable or meat stock (preferably home-made)
  • 1/4 cup sour cream
  • 1 tsp salt or to taste
  • freshly ground pepper

PREPARATION

  • Saute the onions in some oil until translucent and can smell the wonderful aroma of the onion.
  • If desired add bacon and render until crisp.
  • Keeping the oil warm add the paprika and the garlic, mix for 1 minute and add cold stock.
  • Add sorrel and nettles.
  • Bring to a boil.
  • Turn the heat down and cook on low heat for about 15 minutes.
  • When done, take off heat and let the dish cool off.
  • Cream with an immersion blender. Here you are trying to create a sauce with a little texture.
  • Add salt, sour cream and black pepper to taste.
  • Serve on mashed potatoes along with fried eggs or hard boiled eggs. Sprinkle dill on top.

enjoy! Jó étvágyat!

SOURCES
  • Paul Pitchford: Healing with Whole Foods
  • Matthew Wood: The Earthwise Herbal

Spinach Quiche

This is a lovely dish that can be made for any occasion. I like to take it to parties because it is tasty and transports easily. It is also great for Easter but can be served any time. 

Quiche is a custard like mixture of cream, eggs, cheese along with vegetables in a shell of savory pastry dough. According to records, it originated in Lorraine, medieval Germany. It was called Kuchen that was made with eggs, cream and lard baked into a primitive base made with flour, water and salt. Along the history, Loraine became part of France when cheese was added and became Quiche as we know it today. I can easily see people in villages coming up with this dish. Just throw a little bit of eggs and some cream into a pie shell along some vegetables and meat and there is a fabulous dish that makes a meal. 

This is not just any old quiche recipe. The pie shell is from Martha Stewart cookbook. It is her pie shell recipe that she uses for her fall pies but it works great here as well. The filling is my creation.

Make sure you get the best quality cheese you can find or afford. Your dish will surely benefit from it. I use French or Midwestern cheeses.

RECIPE

INGREDIENTS FOR THE DOUGH
  • 1 ¼ cup flour
  • pinch of salt
  • 8 T (1 stick) cold butter
  • 7 Tbsp of icy water or more if needed
INGREDIENTS FOR THE FILLING
  • 1 lb vegetables  I used spinach but you can use many others like asparagus, nettle, chard, broccoli etc. -chopped.
  • 4 oz mushrooms like white bottom or crimini, chopped
  • 3 slices of bacon (omit if prepared for vegetarians)
  • 2 cloves of garlic
  • 200 gram of feta cheese (crumpled into small pieces)
  • ½ cup milk
  • ½ cup cream
  • 1/8 tsp nutmeg
  • ¼ tsp fresh ground black pepper
  • ½ tsp tarragon (crumpled between the fingers)
  • 3 whole eggs (lightly beaten)
  • 200 gram graded cheese like Gruyere, Parmesan, divided. Leave some for the top.
PREPARATION
  • Chill water in the freezer for 10 minutes.
  • Preheat oven to 350 F.

MAKING THE SHELL

  • Add the salt to the flour and mix it with the butter quickly in a food processor or with your finger tips.
  • Add the chilled water and mix quickly until there is a nice ball.
  • Wrap the dough in a plastic wrap and put it into the refrigerator for about 1 hour.
  • Take it out of the fridge. Using a rolling pin quickly roll it out into a circular shape so it fits the dish you use to bake the dough in.  Set it into the dish. You can press down into the dish so it fits snugly. 
  • Put it into the fridge for another hour.

PREPARE THE FILLING

  • Fry up the bacon for 5 minutes in in some oil. Add the spinach and continue to cook for 5 more minutes.
  • Sauté the mushrooms in a separate dish. Add to the spinach mixture.   
  • Put in this mixture in a medium sized bowl. Add the crumbled feta, whisked eggs, milk , cream, black pepper, nutmeg, tarragon. Mix.

PREPARE THE CAKE

  • Put the mixture in the pastry shell. 
  • Grade some cheese on the top.
  • Now it is ready to be put into the oven and bake for 40 minutes or until done. When the blade of a knife comes out clean, it is ready.
  • Let cool. Serve warm.

enjoy!

Source

Martha Stewart

Text and photo by Twincitiesherbs.

Hot and sour burdock soup

Spring is here! In the Midwest, one of the first edible foods in nature is Burdock root. A great way to include burdock in your diet is to make a soup with the roots. Asian cooks rave about their burdock soups that they make in the spring. I’m presenting a delicious burdock root soup here that is inspired by Rosaleedela Foret’s blog. There is really nothing exotic about this soup, all the ingredients can be found here in the US.

We tend to eat heavier foods during the winter months but our body is ready to embark on something lighter and easier to digest. As we transition from the winter into spring, it is important to pay attention to our Liver. Heavy foods consumed during the winter might be burdening our livers that can lead to some health problems in the spring, like fevers and tiredness. Our body tends to cleanse itself naturally in the spring. In addition, it is nice to add some bitter plants that aids the liver to accomplish this process. Our ancestors ate a lot of bitters in the spring. One of these spring bitters is burdock.

The burdock’s earthy, heavier flavor pairs nicely with the carrot’s sweet and light flavor. In addition to the bitter flavor, the liver also needs the sour flavor for support. It gets the sour flavor from the vinegar. This soup is a big favorite in our family, yes even the kids like it. Perhaps, it is because of its interesting, well balanced flavors. In fact, it has all five flavors: sweet, salty, bitter, sour, and pungent!

The main ingredient in this recipe is burdock root. If you are familiar with burdock, you can harvest it yourself. Otherwise, it might be difficult to get at the stores. If you don’t have it in your backyard, it is available at farmers’ markets, health food stores or also from Harmony Valley in Veroqua, WI.

Instructions for boiling the eggs

Make sure the eggs are at room temperature. Eggs straight out of the fridge need to warm up otherwise the cooking time needs to be changed. You might have to experiment with the exact cooking time as there are many variables that can effect it. It should be somewhere between 7 and a half and 8 minutes for 1 egg and more for additional eggs. The eggs should be semi-hard on the outside and be ‘semi-runny’ in the middle.

RECIPE

4 servings

INGREDIENTS
  • 10 cups stock (vegetable or chicken, pork).
  • 2 cups burdock root, cut into match stick pieces
  • 2 carrots, peeled and cut into match stick pieces
  • 2 cloves of garlic, chopped
  • 1 Tbsp of ginger, minced
  • 1 cup mushrooms (like shiitake)
  • 3 Tbsp cornstarch + 4 Tbsp of water
  • 4 Tbsp of rice or white vinegar
  • 2 lightly beaten egg yolks
  • 1 Tbsp sesame oil
  • 1 bunch scallions, chopped
  • salt to taste
  • soy sauce
  • 4 hard boiled eggs
  • hot red pepper or sriracha sauce (optional)
  • 1 pkg ramen noodles (I used HakuBaku Organic Ramen )

METHODS
  1. Bring stock to a boil.
  2. Add carrots, burdock roots, mushrooms, crushed garlic and ginger. After it boils, turn it down to low medium heat and cook for about 5 minutes covered.
  3. In a smaller bowl mix vinegar, the cornstarch and water. Add it to the soup and continue to simmer while stirring until the mixture is thickened, about 2 to 3 minutes.
  4. Turn off the heat and stir egg yolk in gently. Add sesame oil, salt and hot red pepper. Mix.
  5. Make the hard boiled eggs. Make sure the eggs are at room temperature. Bring some water in a pot to a boil. Add the 4 eggs at room temperature. Boil them for about 8 minutes. Take them out and put them into cold water. Peel the shells. (Please see my note above).
  6. Cooking the ramen noodles. In a medium sized pot, bring cold water to a boil and cook the noodles. according to its cooking instructions. Strain and discard water.
  7. Serve in a deep bowl. Add ramen noodles and eggs. Garnish with scallions and add soy sauce to taste.

Enjoy!

Sources:

Text and photo by Twincitiesherbs.

Kitchari recipe

Kitchari! A nourishing vegetarian dish to make in the winter or the summer … whenever you are looking for something easy to digest.

Now that the holidays are over, our bodies want to have a little break from all the rich, heavy foods. However, spring isn’t here yet so we can’t eat all the lovely seasonal vegetables. In fact, spring is nowhere in site, just the past week it was -40F here in the Midwest. Even if the prediction of the groundhog is correct, spring won’t start until April here. Many people start dieting now, removing nourishing foods from their diet but most fail because it is just too early.  So what can we do?  

I like to turn to the ancient Ayurveda cooking, in other words Indian cuisine! Most people associate Indian foods with something exotic. Yes, some of their dishes can be foreign to us, but their nourishing dish, the Kitchari can be made any time, anywhere and surely by anybody.  Really, Indians make it on a regular basis, serve it during holidays with the rich foods to help their digestion and even give it to sick people to recover from an illness. It is an inexpensive dish that millions eat on a daily basis in India. I asked my Ayurveda teacher if we could eat it during the cold season. She said yes even when it is -40F – just add the warming spices like ginger, cumin, and hot pepper. You can serve local vegetables like carrots, spinach, kale, cauliflower, onions etc. Of course, it would go nicely with some Indian rice and roti. 

This is a very healthy dish. Usually, Ayurveda practitioners advice their clients to eat kitchari if they have any acute or chronic issues. It just does amazing things… The three spices turmeric, cumin, coriander are used along with the mung beans. The kitchari diet should last for 1 week when one is only allowed to eat kitchari, rice, grains and vegetables. Of course all the fried foods, fried vegetables, paneer have to be left out. Mung beans are used but if you can get the yellow split moong beans, they are even better as they are easier to digest.

Recipe

Kitchari Ingredients
  • 2 tsp of ghee (I use home-made)
  • 1 tsp turmeric powder
  • 1 tsp of coriander powder
  • 1/2 tsp of cumin powder
  • 1 tsp of whole cumin seeds
  • 1 cup of split mung dal (yellow) – soak for at least 4 hours
  • ½ tsp salt
  • about 4 cups of water or chicken stock
  • 1 inch of fresh minced ginger root, finally chopped
  • black pepper
  • cilantro to taste
  • yogurt
  • lemon
Indian rice Ingredients
  • 1 cup white Basmati rice
  • 2 cups water or meat stock
  • 2 tsp ghee (homemade the best)
  • 1 tsp cumin seeds
  • little piece of cinnamon
  • pinch of  saffron (8-10 strings)
  • 1/2 tsp salt
  • ¼ tsp little turmeric

Preparations
  • Clean and soak mung beans overnight but soak at least for 2 hours.
  • Discard water and use fresh cold water to cook the beans. Cook for 1/2 hour.
  • Making the gravy. Saute the onions on medium high heat. When you smell the nice aroma of the onion, add the ginger, cumin seeds stir and cook for about 5 minutes.
  • Add the garlic and the powders (turmeric, cumin, coriander), stir for 1 minute.
  • Add 1/4 cup of cold stock or water. Stir.
  • Add 1 cup chopped tomato and cook for about 5-10 minutes until it becomes saucy.
  • Add chopped carrots and other vegetables.
  • Bring to a boil, turn down and cook for 30 minutes.
  • Add in the cooked mung beans and cook for 15 more minutes or until done.
  • Add salt and pepper to taste.
  • Serve with rice, roti, cilantro and lemon.

Indians cook the dish with the rice. I personally like to serve the rice on the side and prepare separate.

Enjoy!

Traditional Hungarian stuffed cabbage (töltött káposzta)

I don’t think it is an accident that stuffed cabbage is a Christmas dish.  You can surely serve it any time but it is the perfect dish for the holidays.

I smile every time I remember my daughter’s reaction. She was three years old when she saw stuffed cabbage on the Christmas table and screamed ‘YUCKY’.  However, after she tried it, she realized how delicious it was. Ever since then, she makes sure that stuffed cabbage is on the Christmas menu.

Stuffed cabbage is a popular winter dish in Hungary even though our ancestors didn’t make it. It is a dish that was taken from the Turkish cuisine. They called it szárma from the Turkish word sarmak, then the Hungarians added their own twist to it. Today, many of us can’t imagine Christmas without it. My mom made it every year. 

I don’t think it is an accident that stuffed cabbage is a Christmas dish. You can surely serve it any time of the year but it is the perfect dish for the holidays.  In the old days, families butchered their pigs and the meat was ready to be used by around this time. Also, there weren’t too many vegetables available except for a few like cabbages and onions. Not to mention that the dish can be kept in the cold for a couple of days. In fact, it tastes the best after a few days. This was an important consideration, too. Christmas went on for days back in the old times. Also, according to traditional customs, people were not allowed to work during the celebrations.

The recipe is not too difficult, though it is time-consuming. Just remember you won’t have to cook for 3 days afterwards! There are many variations of this recipe but this is how I make it. Please feel free to experiment with it.

RECIPE

Makes about 18 rolls

INGREDIENTS

Meat stock:
  • 1 -2 lb of beef bones (ox tail and beef bone)
  • 2-3 Tbsp of black pepper corn. I like to add a lot of peppercorns because they give a really nice flavor to the dish.
  • water
  • 4 bay leaves
  • 3 carrots
  • 2 parsnips
  • 1 large onions
  • few cloves garlic
  • 2 celery stalk or 1 medium sized celery root
For the cabbage rolls:
  • high quality oil (lard, sunflower seed oil)
  • 1 1/4 lb of ground pork (can be half beef)
  • oil
  • 1/4 cold water
  • 1 larger onion, chopped
  • 2 slices of bacon, sliced
  • 2 cloves garlic, crushed
  • 2 lb of sauerkraut, drained, divided
  • few strings fresh thyme or 1 tsp dried thyme
  • 1 cup of uncooked rice, cleaned
  • 1 cup of cold water to cook the rice in
  • 1-2 heads of large Savoy cabbage or green cabbage or sour cabbage leaves (about 18 – 20 leaves)
  • marjoram
  • 2 tsp sweet Hungarian paprika (make sure it is authentic)
  • 1 egg
  • sour cream
  • freshly ground black pepper and salt to taste
  • Hot pepper flakes or Erös Pista to taste
  • smoked meat like kielbasa, sausages (optional)

METHODS

Meat stock

Place the onion, beef bones, pepper corns, garlic, carrots, parsnips, bay leaves and celery in a large pot. Add enough water to cover everything well. Bring to a boil, turn the heat down and slowly cook for 2- 4 hours covered. Set aside. (Omit if you already have it).


Making the dish
  1. Preparing the base of the dish. Sauté onion in oil on medium high heat for 5 minutes or until translucent. Add bacon and render for 5 more minutes. Add paprika and garlic, stir for 1 minute. Add 1/4 cup cold water (have it ready) and stir. Add 1 lb of the sour kraut. Mix. Set aside.
  2. Preparing the cabbage leaves. Fill a larger pot with cold water and start boiling it. This will be used to blench the leaves. Take the leaves off the cabbage gently one by one. When the water boils, add the leaves in the boiling water one at a time for a few minutes. Here we are parboiling the cabbage leaves quickly so make sure they get semi soft but not mushy. After taking the leaves out quickly immerse the leaves in cold water. Take them out and put them on a colander so the water can drain. (Omit if you have sour cabbage leaves). 
  3. Parboiling the rice. Bring 1 cup of rice in 1 cup of cold water to a boil. Turn the heat down and cook uncovered for 10 minutes. Set aside.
  4. Preparing the stuffing. In a larger dish, mix the cooked rice from earlier, crushed garlic cloves, marjoram, 1 egg and the meat together. Set aside.
  5. Assembling the stuffed cabbages. Fill the cabbage leaves in the middle with about 1 heaping tablespoon of stuffing or more if leaf is bigger and fold them on all four sides so the stuffing is tucked inside the leaves nicely. You can close the leaves with a toothpick if you want but it is really not necessary. This may sound like a difficult task but really what you do here is you tuck the filling inside the leaves and fold each side onto the stuffing so it is nested inside the leaves. Please, see the pictures for clarification below.
  6. Place the assembled cabbages on top of the prepared sour kraut mixture from earlier one by one, fitting each leaf snug next to each other. Place the remaining 1 lb sour-kraut on top of the stuffed cabbages. 
  7. Pour the meat stock over the stuffed cabbage leaves. Make sure the liquid covers everything in the pot. Bring to a boil and turn the heat down. Cook on very low heat slowly covered for 2  hours or until the cabbage and the stuffing are cooked.
  8. Add salt and pepper to taste.
  9. Serve the stuffed cabbages on top of the sauerkraut along with sour cream, sliced kielbasa and hot red pepper flakes or Erös paprika.
  10. Add the meat if you wish.

Merry Christmas! Enjoy!  Jó étvágyat!

Text, photos and recipe by twincitiesherbs.