Italian Minestrone Soup

I love making this soup, honestly the process of the preparation is just as rewarding as eating it … I start sautéing the onion and continue with the chopped celery and the carrots. When I can smell the heavenly aroma of this trio, I add the garlic and the fresh rosemary leaves. Then I add the tomatoes. Feeling the rhythm, I prepare the rest of the vegetables and add them to the pot along with the spices. Now that the ingredients know each other, I cover the soup with some stock and continue cooking it slowly. At the end comes the cooked beans, spinach, and the pasta. I keep on cooking with love and passion until the pasta is al dente. Now it is ready! … and the power of this soup truly comes alive when I can share it with others…

Minestrone soup is basically an Italian vegetable soup. Yes, we always order it when we go to Olive Garden, but if possible it really should have locally grown vegetables. You start with the trio of carrots, celery stalk and onions and add other seasonal vegetables and some delicate beans like Borlotti or Cannelloni beans. Of course, kitchen spices are also a crucial part of the recipe. I used crushed fennel, fresh basil, fresh rosemary and thyme. Usually some pasta is added at the end but potatoes are also used instead of pasta in some parts of Italy or you can use both.

Try this soup and let me know how you liked it. I would love to hear from you!

RECIPE


INGRDIENTS

  • 1 medium onion, diced
  • 1 cup diced carrots
  • 2 celery stalks, diced
  • few slices pancetta or bacon (optional)
  • generous amount extra virgin olive oil
  • 10 cups water, vegetable or chicken broth (or enough to cover the soup)
  • seasonal diced vegetables (I used 1 cup of each: green beans, zucchini)
  • 1 potato, diced
  • 1 large fresh tomato, chopped or 1 can 14 oz
  • 3 cloves garlic, minced
  • 1 cup dried delicate flavored beans of you choice like cannelloni, borlotti or 15 oz canned beans
  • 1 tsp of each: ground dried fennel seeds, dried thyme,
  • fresh basil in season (optional) or 1 tsp dried
  • few fresh rosemary springs (optional)
  • salt and pepper to taste
  • harder cheese (Parmesan)
  • small piece of Parmesan cheese rind (optional), chopped
  • parsley to garnish
  • handful dry pasta (ditalini, elbow or orecchiette)

METHODS

  1. Soak the beans overnight but at least for 3 hours. Discard the soaking liquid. Add fresh water and bring it to a boil. Cook for 1 hr on low heat or until they are soft but don’t fall apart. (Omit if using cans). Set aside.
  2. Sauté the onions in generous amount of olive oil until translucent for about 5 minutes. Add the diced celery, pancetta (if using) and keep sautéing. Meanwhile, prepare carrots and continue sautéing the mixture with the carrots.
  3. Add the crushed garlic and fresh rosemary leaves, saute for 1 minute.
  4. Add the chopped tomatoes and rosemary leaves.
  5. Prepare the vegetables (green beans, potatoes and zucchini) and add them to the pot. Pour in some liquid. Keep cooking for about an hour.
  6. Add the spinach, cooked beans and the pasta. Cook for 10 minutes or according to the pasta’s instructions. Make sure there is plenty of liquid as the pasta will absorb some of it.
  7. Add salt and pepper to taste.
  8. Serve warm with parsley and cheese if you wish!

Enjoy!

Text and photos by twincitiesherbs.
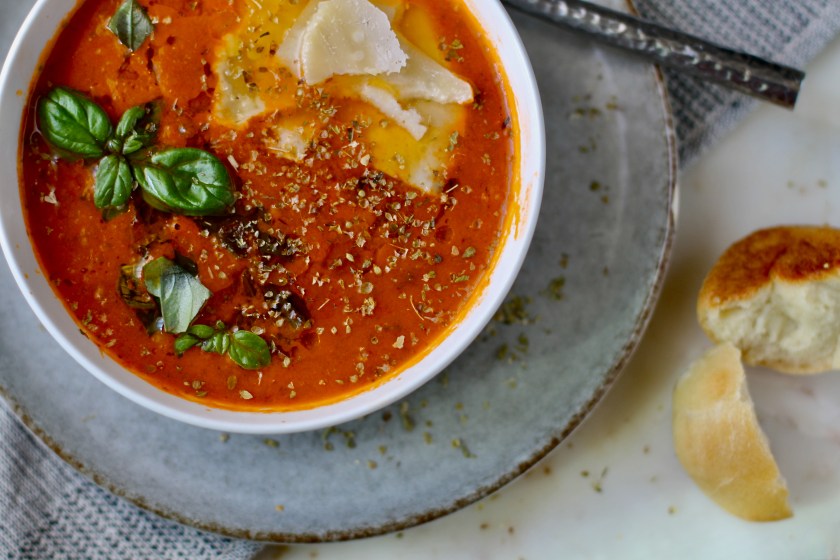
Tomato Florentine Soup

This soup brings back some fond memories. It is the most delicious tomato soup I have had. The recipe is from our beloved restaurant called Dardanelles in Madison, WI. Unfortunately, the restaurant closed in 2010 but the the owner graciously shared her signature recipe back when the restaurant was open. This tomato soup was a staple in the restaurant and was on the menu every day. After so many years, I still make her recipe.

This soup reminds me that home-made food doesn’t have to be difficult to make. It is a simple, well seasoned creamy tomato soup loaded with Parmesan cheese. It is a perfect end of the summer or fall soup, I still have lots of tomatoes and fresh basil. You won’t be able to taste the strong acidic flavor of the tomatoes. What I like about this soup is that it quietly starts a meal, it doesn’t take away or add too much. I think some lovely freshly baked Italian bread would pair nicely with this soup.

TIP

This is a tomato soup so the main ingredient is the tomato. I like to use Heirloom tomatoes that I grow in my garden but any ripe tasty tomatoes would work well. Canned tomatoes are fine too but the tomatoes should be whole and not chopped. I don’t peel the tomatoes. Also, the recipe uses basil. If you have excess to fresh basil, I recommend to use it. If you don’t have fresh basil, no worries, you can use dried basil too. Basil does lose some of its aroma during drying but in its dried form it combines well with other flavors during cooking.

Thank you for checking out my post. If you try my soup, please let me know how you liked it! I’d love to hear from you! Also feel free to sign up for future posts!

RECIPE

4 servings

INGREDIENTS
  • 4 Tablespoons extra virgin olive oil or butter
  • 2 medium onions, diced
  • 1 tsp sugar
  • 3 garlic cloves, chopped
  • 2 Tablespoons balsamic vinegar
  • 8 large, ripe tomatoes or 48 oz canned whole tomatoes, chopped
  • 2 tsp dried oregano or 4 tsp fresh
  • 2 handful fresh basil, chopped or 2 teaspoons dried basil
  • 4 oz fresh or frozen spinach, chopped
  • 1/2 cup whipping cream
  • 1/2 cup white vine
  • 2 cups chicken stock or water
  • 2 Tablespoons balsamic vinegar
  • 1 cup Parmesan cheese + more for serving
  • red pepper flakes to taste (optional)
  • salt and pepper to taste

INSTRUCTIONS
  1. Saute onions in olive oil or butter for 5 minutes or until translucent. Add the garlic and sugar to activate for 1 minute. Deglaze with vine and then cook until nearly evaporated for about 5 minutes.
  2. Add the tomatoes, balsamic vinegar, and herbs (basil and oregano).
  3. Cook for 20 minutes.
  4. Using an immersion blender, puree the soup.
  5. Add the spinach and cook for 10 more minutes.
  6. Adjust seasoning and add red pepper, salt and pepper to taste. Mix in water, cream, and cheese. Whisk.
  7. To serve, warm up the soup but don’t boil. Sprinkle additional cheese on top and add some bread.

Enjoy!

Text and photo by Twincitiesherbs.

Chestnut Mushroom Stroganoff, a crowd pleaser!

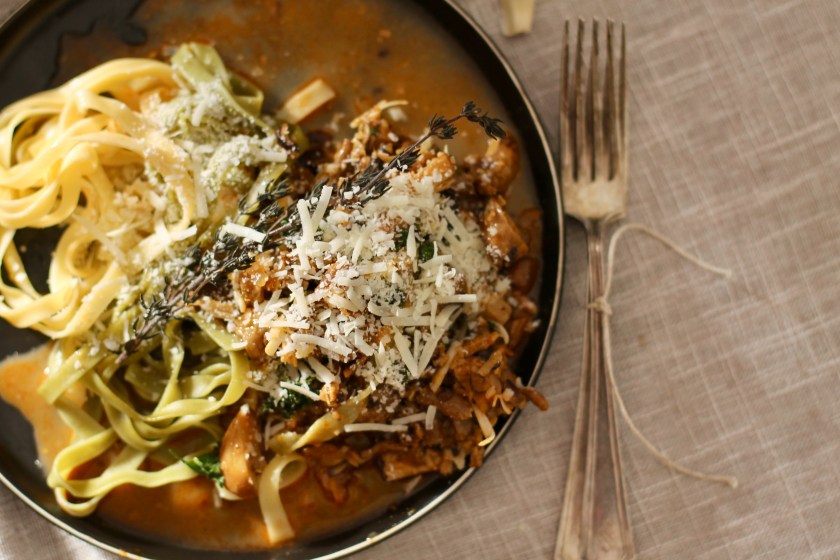
This is a festive, delicious entree. The main ingredient is the chestnut mushroom but you can use any hardy mushrooms that you’d like, even crimini mushrooms would work well. The mushrooms are sauteed with the delicate shallots. It is seasoned with paprika, thyme and Dijon mustard. Also, I used beef broth that boosts the savory depth and creates the unami flavor, bringing this dish to another level. Honestly, everything in this dish comes together to a taste sensation that you can’t stop eating. It is truly a crowd-pleaser!

RECIPE

Serves 4 people

INGREDIENTS
  • 1 lbs Chestnut mushrooms, cleaned and sliced
  • 1/4 cup shallots, finally chopped
  • 2 Tbsp butter
  • 1 tsp Hungarian paprika
  • 3 cloves garlic, chopped
  • 1-2 cups cold stock (I used beef but chicken or vegetable would be fine too)
  • 1 tsp Dijon mustard
  • 1 tsp dried thyme or 3 springs fresh thyme
  • 1/8 -1/4 cup cream
  • 1/2 cup white wine (optional) or extra stock
  • pepper and salt to taste
  • parsley for garnishing

METHODS
  1. In a wide skillet, melt the butter over medium heat. Add and the shallots for 5 minutes. Add the mushrooms and keep sautéing for 10 minutes or until they release their juice.
  2. Clear the middle portion in the pot by pulling all the ingredients to the side. Add the paprika and garlic for 1 minute. Stir.
  3. Add the wine. Stir. Cook for a couple of minutes. (Omit if not using wine, use additional 1/2 cup stock instead).
  4. Add the cold stock, Dijon mustard and thyme. Stir. Bring to a boil and turn the heat down. Cook for 5 more minutes covered. Turn off heat.
  5. Add the cream. Stir.
  6. Serve hot with egg noodles. Garnish with parsley.

Enjoy!

Recipe, text and photo by Twincitiesherbs.

Borscht

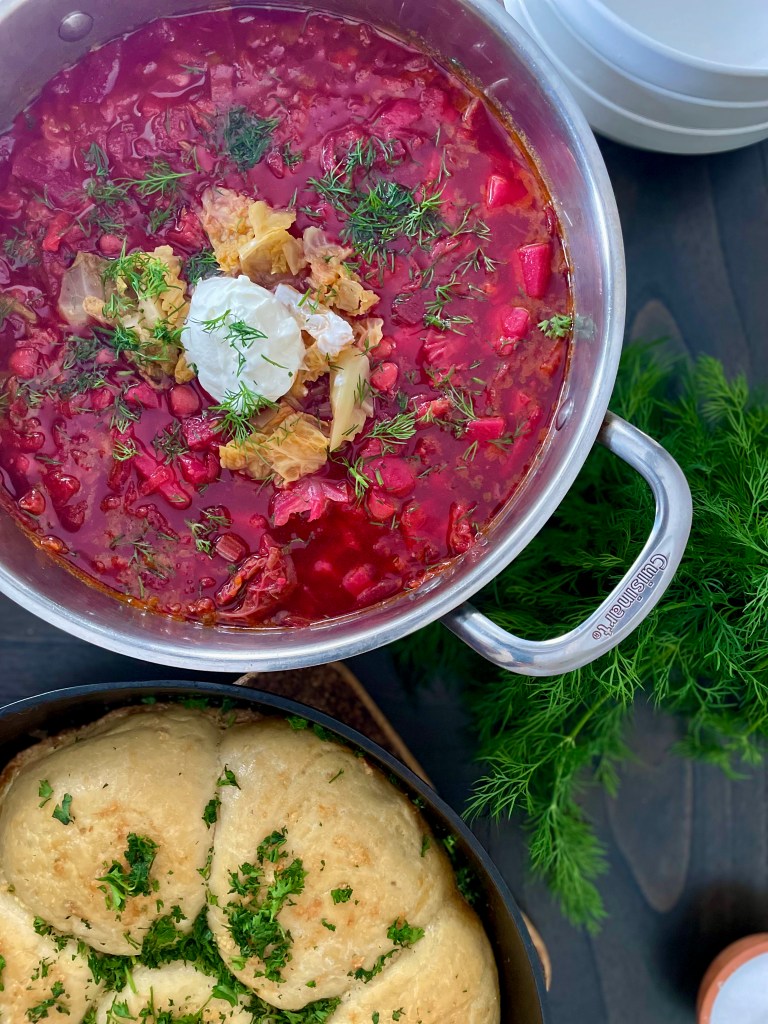
Borscht is a traditional Ukrainian dish and is popular all over Eastern Europe. This iconic soup is ideal for the winter. In my opinion, it is one of the best soups in the winter. It is made with hardy root vegetables: potatoes, beets and carrots. These vegetables can be stored in a root cellar over the winter. The soup gets its gorgeous red color from the beets and zesty flavor from the Zacharka. Zacharka is made with sautéing onions, carrots and beets and is briefly simmered in a tomato sauce mixed with vinegar. At the end, cabbage, garlic and beans are added. Put a dollop of sour cream and chopped dill in the soup. Traditionally, it is also served with Pampusky or rye bread.

RECIPE

Serves 8 people

INGREDIENTS
Broth
  • 1 lb beef bones or chicken bones or 2 large celery roots for vegetarian option
  • 3 bay leaves
  • 3 parsnips
  • 1 onion
  • 3 cloves garlic
  • 1 heaping Tbsp black pepper corns
  • 3 carrots
  • water
Soup
  • 10 cups broth (vegetarian, beef or chicken)
  • lard
  • 2 strips bacon, chopped (optional)
  • 3 potatoes (Yukon, Russet), peeled and cubed.
  • 4 medium beets, match stick
  • 2 larger carrots, peeled and shredded
  • 1 onion, finally chopped
  • 2 celery stalks, chopped
  • 1 larger tomato, chopped
  • 1 Tbsp tomato puree (traditionally used but I don’t use it)
  • 2 cloves garlic, crushed
  • 4 Tbsp ketchup
  • 1 Tbsp vinegar
  • 1 Tbsp mustard
  • 1/4 small savoy cabbage, deveined, shredded
  • 1 cup dry cannelloni beans or 1 can (14 oz) with the liquid
  • salt and pepper to taste
  • fresh or dried dill

METHODS

1. Making the stock. In a large pot, combine all the stock ingredients and add water well covering all the ingredients. Bring to a boil, turn down and cook for 2 hours. (Omit if using canned broth)

2. Cooking the beans. Soak the beans overnight but at least for 4 hours. Place the raw beans in a smaller dish and cover well with water. Next day remove the soaking water, discard. In a medium sized pot cook the beans in fresh water. Bring to a boil and turn down. Cook for 1 hours or until soft but not mushy. (Omit if using canned beans).

3. Preparing the vegetables. Potatoes (peel and small cubes). Chop the onions. Carrots (peel and grate through large greater holes). Beets (sliced and cut lengthwise). Chop the tomatoes. Slice the cabbage leaves thin. Chop the garlic. Chop the dill.

4. Heat a large soup pot, pour in the stock, add the potatoes. Bring to a boil, turn down and cook for 30 minutes.

5. Meanwhile, in a smaller frying pan, saute onion in a small amount of lard or oil for 5 minutes. Add and render the chopped bacon for 5 minutes. Add carrots, chopped celery, beets, vinegar, ketchup, tomato and tomato paste. Continue sauteing for another 5- 10 minutes or until vegetables are soft. Set aside. (This mixture is called Zacharka).

6. Add the Zacharka from earlier, garlic, cabbage, mustard and the beans to the potatoes stock mixture. Mix. Cook for 10 minutes.

7. Add the salt and black pepper. Let the soup rest covered for about 20 minutes before serving. The flavor deepens as the soup sits.

8. Serve hot with a dollop of sour cream and dill. Traditionally it is also served with rye bread or Pampusky.

Enjoy!

Photo and text by Twincitiesherbs.

Parsnip sweet potato latkes

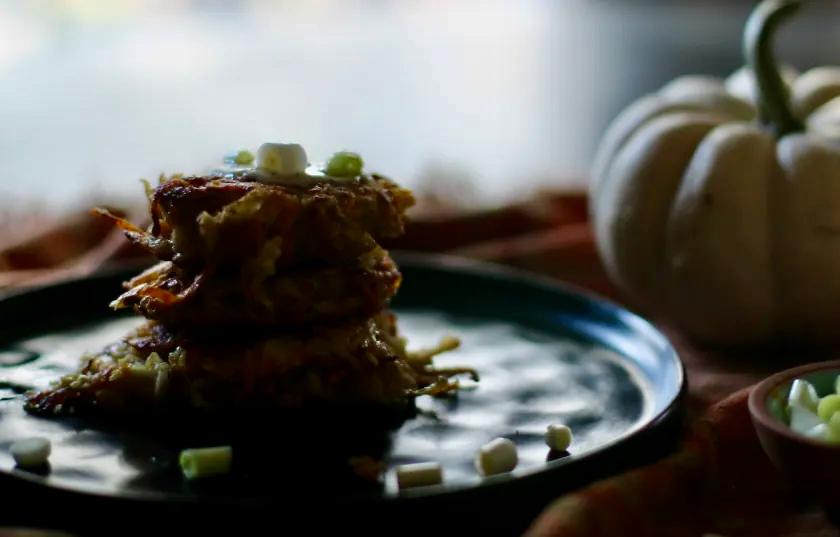
Parsnip sweet potato latkes can be a great addition to your autumn meals! Grated parsnips, sweet potatoes and onions are mixed with eggs and made into patties. They are super easy to make and are delicious too. Serve them with some sour cream and scallions!

RECIPE

6-7 servings

INGREDIENTS

  • 2 cups sweet potatoes or potatoes, grated
  • 1 cup parsnip, grated
  • 1/2 onions, grated or 2 Tbsp dehydrated onions
  • 2 eggs
  • salt and freshly ground pepper to taste
  • 1/3 cup flour
  • 3 scallions plus more for serving, sliced
  • oil for frying

INSTRUCTIONS

  • If you decide to leave the skin on, soak the sweet potatoes (or potatoes, if used) and parsnips. Scrub off any dirt. Otherwise if you prefer not to have the skin on, peel them with a vegetable peeler.
  • Coarsely grate them with a box grater. Try to squeeze out as much liquid as possible. Add the rest of the ingredients except the oil. Mix.
  • Let the mixture rest for 1 hour if possible.
  • Heat a skillet with some oil. Take out 1/3 cup of the mixture and form patties. Put them in the skillet and flatten them down with a spatula to about 1/2 – 1 inch thickness.
  • On medium high heat, cook the patties for about 5 – 10 minutes on each side until crisp and brown
  • Best served fresh.
  • Serve with sour cream or cream fresh.

enjoy!

Photo and text by Twincitiesherbs.

Fluffy Buckwheat Pancakes with Rhubarb Sauce

Surprise your mom for breakfast with these delicious, fluffy pancakes for Mother’s Day or just treat yourself any time!

These pancakes are a happy marriage of the traditional American buttermilk pancakes and the Russian blini. The mixture of the buckwheat and the tapioca gives these pancakes a fluffy and tender texture with a sweet and nutty flavor. This pancake recipe is naturally gluten-free.

I wanted to replace the white flour in the traditional American pancake recipe with something healthy as white flour is tasty but is not very nutritious or filling. I remembered the Russian pancakes called blini; however, blini on its own is too dry for me. Furthermore, many of the flour alternatives can be lesser quality. So after using buckwheat and tapioca over the years, I decided to experiment. I have to say the result quickly became a family favorite. 

Buckwheat is an ancient plant but has been forgotten. It has recently become popular again in the West because it lacks gluten. Gluten can cause gastrointestinal problems in so many people. Buckwheat is a staple food in Russia, in fact, the Russians have survived on it for centuries and got them through difficult times. Eating buckwheat might have been one of their secrets.

So why should we eat buckwheat on a regular basis? Even if there is no crisis, buckwheat can be included in our diet as it is incredibly nourishing and tasty. 

Buckwheat is very healthy. It is not a grain but it is the seed of the buckwheat plant. It does not cause digestive problems like wheat does. Instead, it actually nourishes the digestive tract. Its neutral thermal nature and sweet flavor are an indication that it is a tonic food. It is rich in protein. It also has intestine cleansing, strengthening and appetite improving abilities. 

To improve the texture of the pancakes, I added tapioca. Tapioca is a type of starch that’s derived from the starchy vegetable called cassava root. It is a popular flour to use for its starchiness when replacing wheat flour but it doesn’t provide many important essential nutrients. Combining tapioca with the nutritious buckwheat solves this issue though.

You can serve these pancakes with anything your heart desires. I think nuts and maple syrup are essential. In the summer, I like to serve them with fresh fruits and rhubarb sauce and in the winter apple compote or apple sauce. Please check out my rhubarb sauce recipe that I had posted earlier.

TIPS

This is my well tested pancake recipe, I have been making them for many years regularly on the weekends. I tested the recipe with butter and with coconut oil, both worked great! Also, I used milk and almond milk, both worked well as well.

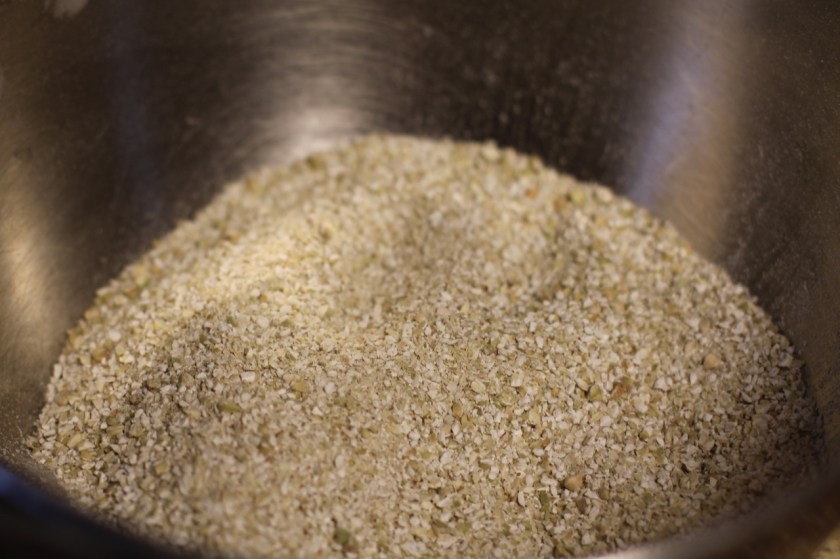
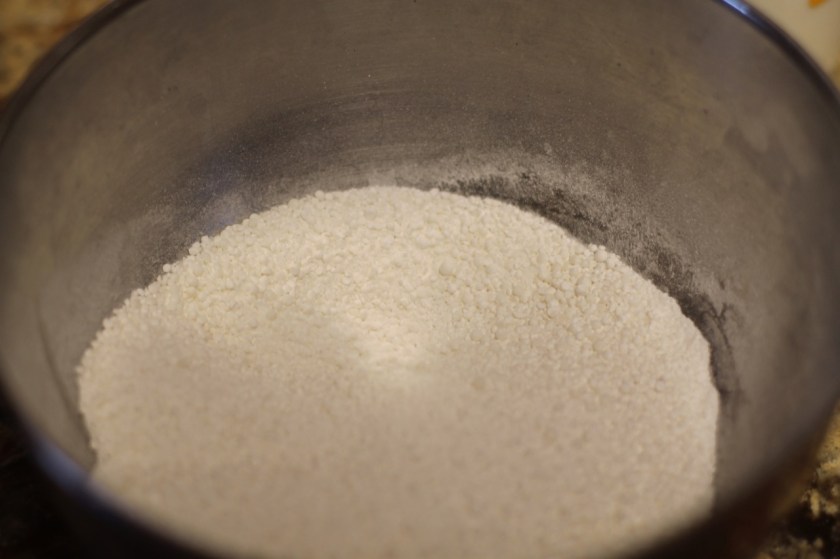
The trick to making these pancakes is to grind both the buckwheat groats and the tapioca pearls in a blender fresh before you make the pancakes. It is worth it! I have a Vitamix but any blender will work. The store-bought flour yields a lesser quality in texture and flavor in my opinion. Of course, you can make the recipe with flour that you get at a store.  

Another trick is when you grind the grains, leave the flour a little coarse. This gives the pancakes a bit of texture. Keep checking the flour to figure how much time you need for grinding. I grind the buckwheat for about 3 seconds and the tapioca for about 15 seconds. Hint: stop grinding them before they become a fine flour consistency, they should be grainy.

Also, I like to use buttermilk. Traditionally, buttermilk is used in pancakes. I like using it because it makes the pancakes taste better. You get this really nice buttery flavor and soft texture. Also, it makes the pancakes healthier as it helps digestion.

I used to buy buttermilk but since I found this simple hack, adding apple cider vinegar to milk, I don’t buy buttermilk anymore. Try it, it works well. This method can be used with almond milk as well. Check out my recipe on how to make buttermilk.

If you make the recipe please feel free to share your experience in the comment section. I’d love to hear from you!

RECIPE

Makes about 21 pancakes

I created this recipe so please don’t share it without giving proper citation.

INGREDIENTS

  • 1 cup freshly grounded buckwheat groats or buckwheat flour (please read note above)
  • 1 cup freshly ground tapioca pearls or tapioca flour (please read note above)
  • 3 cups buttermilk or milk or almond milk
  • 1 tsp baking soda
  • 2 tsp baking powder
  • 2 tsp cornstarch or arrowroot
  • 2 whole eggs, lightly beaten or 1/2 cup unsweetened apple sauce
  • 2 Tbsp of melted butter or coconut oil
  • oil for the pan
  • ½ tsp salt
  • 1 Tbsp sugar (optional)
  • Chopped nuts, for serving
  • maple syrup, for serving
  • fruits, for serving
  • yogurt, for serving

Ground buckwheat flour

ground tapioca flour

METHOD

  • Grind buckwheat and tapioca. Grind buckwheat on the highest setting for about 3 seconds. Grind tapioca on the highest setting for 15 seconds. Of course the time will depend on how strong your blender is. Please check for more info in the introduction and pictures above. (Omit if using store bought flour).
  • Put buckwheat and tapioca flours in a large bowl. Add the buttermilk, mix. Let the mixture sit overnight but at least for 4 hours. (I leave it on the counter overnight. If you put it in the fridge, make sure the batter is at room temperature before making the pancakes).
  • Add baking soda, baking powder, salt, eggs, corn starch or arrowroot, melted butter or oil and sugar (optional). Mix well.
  • Heat a skillet or griddle over low to medium-high heat and grease with oil if need be. When skillet is hot (if you flick water onto the skillet, it should sizzle), take a ¼ cup of batter and pour onto skillet. Let cook for a couple of minutes (until the pancakes begins to bubble slightly). Flip and let cook for another 1-2 minutes until pancake are a slightly brown .
  • Serve hot with your choice of yogurt, rhubarb sauce, maple syrup, nuts, fruits, jam etc. 

Enjoy!

RECIPE, PHOTOS AND TEXT BY TWINCITIESHERBS.

Home made Quinoa Black Bean Salad

Try this delicious, healthy meal, it is very easy to make! It is a popular dish sold in US health food stores. Quinoa and black beans are drizzled with some olive oil, lime juice, and spices. It is vegan and gluten free. I especially like to take it to parties.

Makes 6 cups

INGREDIENTS

  • 1 cup dried black beans (15 oz canned black beans), rinsed
  • 1 cup quinoa, washed and rinsed
  • 2 cup stock (vegetable or chicken) or water
  • 1/2 cup olive oil or avocado oil
  • juice of 2 limes or 4 tbsp lime juice
  • 2 tsp cumin powder
  • 2 tsp coriander powder
  • 1 tsp smoked paprika
  • 2 bunches scallions, chopped
  • 1 smaller cucumber, cubed
  • 1 bunch cilantro, chopped
  • crushed red pepper flakes, to taste
  • chopped tomatoes, optional
  • salt and pepper to taste

DIRECTIONS

Clean and soak the beans for 8 hours. Remove the soaking liquid, discard. Cook the beans in fresh water for 1.5 hours. Strain. (Omit if using canned beans).

Wash the quinoa well with cold water. Let it soak in cold water for at least 1 hour. Remove the soaking liquid and discard. Add the stock or fresh water. Bring to a boil and cook covered for 10 – 15 minutes or until all the water has cooked away. Turn off heat and keep lid on for 15 more minutes. (You can omit the soaking time if you don’t have time).

Meanwhile, prepare the dressing. In a medium sized bowl, mix oil, lime juice, spices, salt. Add the quinoa, scallions, tomatoes, black pepper and cilantro to this mixture and stir.

You can serve with pita bread and feta cheese .

Enjoy!

Photo and text by twincitiesherbs.

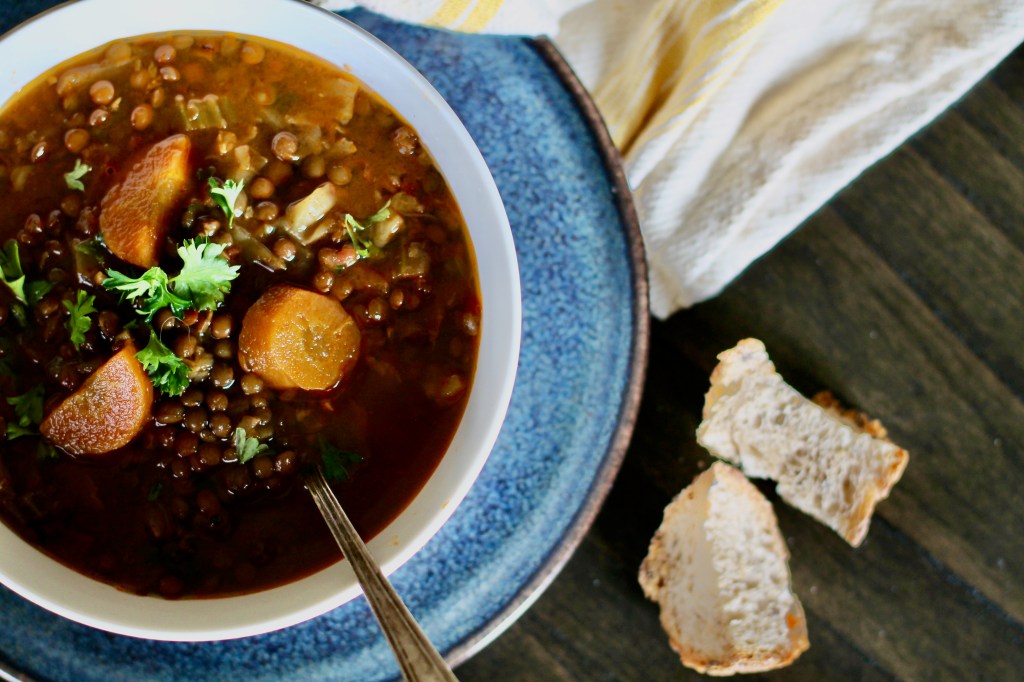
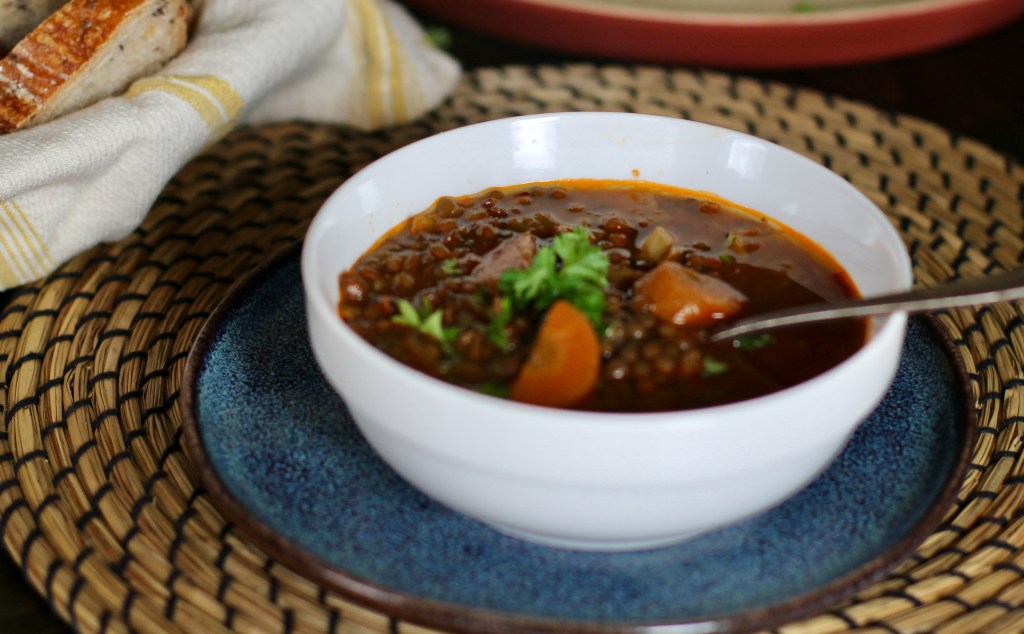
Hungarian Lentil Soup with an Indian Flair

If you are like me and enjoy eating with the seasons, it might be difficult to find dishes to make now. There is no local produce growing here, in fact we just got 5 inches of snow today. I would like to post my favorite recipe that I often turn to when I am out of ideas. This dish is my lentil soup.

This delicious lentil soup is super easy to make and is very filling. You most likely have all the ingredients in your kitchen. I just make a Hungarian soup base with root vegetables (carrots, celery and onions). I also add cabbage or green leafy vegetables like spinach, kale, chard and of course the lentils.

I use curry and paprika powders to spice the soup. When I was shopping at an Indian grocery store, the Indian shopkeeper told me that he often added Hungarian paprika to his curry. Hmm interesting, so when I went home I gave it a try. I added curry powder along with paprika to this soup and the results were phenomenal. The Indian man gave me a great tip! I really like how the curry and the paprika work together in this soup.

That is it! It takes about an hour to cook and it will never disappoint you. Try it and please let me know in the comment section what you think!

RECIPE

INGREDIENT
  • 8 cups Stock (chicken or vegetarian)
  • 1/2 cup dried French or brown lentils or 1/2 can lentil (7 oz)
  • 1 medium sized onion, finally chopped
  • shortening (sunflower oil, lard)
  • 2 celery stalks, chopped
  • 1 large tomato or 1 can (14 oz)
  • 3 medium sized carrots, chopped and peeled
  • 1 cup green vegetables (cabbage, spinach, kale), chopped
  • 1 tsp curry powder
  • 1 tsp of sweet Hungarian paprika (make sure it is authentic)
  • 3 cloves of garlic
  • 2 bay leaves
  • salt and pepper to taste
METHOD
  • Preparing the lentils. Clean and soak the lentils for a few hours hours. (You can skip the soaking if you don’t have time). Discard the liquid. Add 3 cups of fresh water and bay leaves and bring to a boil. Cook covered on low heat for 1 hour. Turn burner off. Let the lentils soak up the cooking water for 15 minutes with the lid on. Set aside. (Omit this step if you are using canned lentils).
  • Meanwhile prepare the soup base. Sauté the onions for 5 minutes until translucent. Stir. Add chopped celery, continue sauteing for 5 more minutes. Keep stirring.
  • Add the curry, paprika and crushed garlic for 1 minute. Stir. (Make sure there is enough oil). Add the tomatoes. Cook for 10 minutes until the tomatoes break up. Stir.
  • Add the carrots, cabbage or spinach and the stock.
  • Bring to a boil. Turn down to low heat and continue cooking for 30 minutes
  • Add the cooked lentils along with its cooking liquid and salt to taste. Stir.
  • Serve hot with bread or biscuits.

Enjoy!

Recipe, photo and text by twincitiesherbs.com

Fusion style curry pumpkin soup

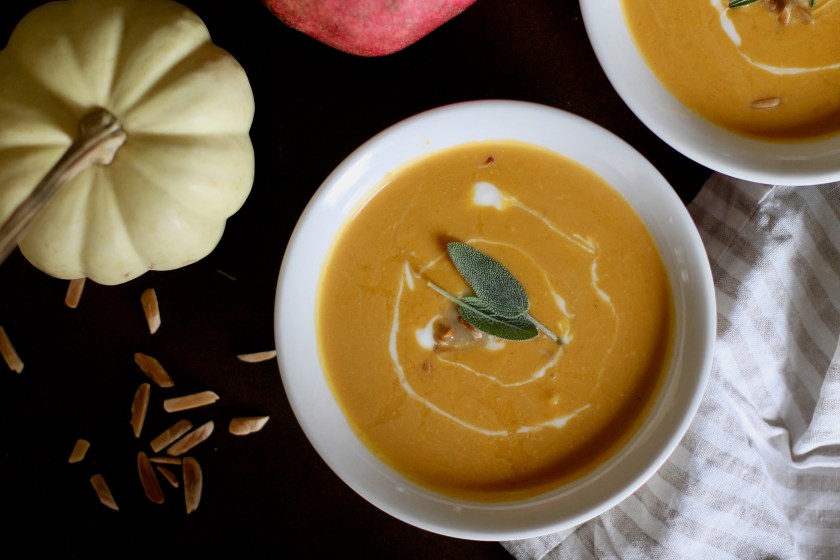
After the rich foods of the holidays, we often just want to eat something simple yet nourishing. It can get a bit tricky in January to do this as it is still cold here. To stay in tune with nature, I really enjoy eating some warming soups. This tasty soup is more of a fusion style pumpkin soup. Its main ingredient, the butternut squash is cooked in a coconut milk base with some warming spices from the East. This soup should feel refreshing after all the rich, heavy foods of the holidays. Oh and those warm aromas in your kitchen while the soup is cooking … enjoy!

RECIPE

Ingredients

  • 1 medium sized butternut squash, peeled and cubed
  • 1 small onion, chopped
  • 1 Tbsp coconut oil
  • 1 tsp curry powder
  • 1 Tbsp graded fresh ginger
  • 1-3 garlic cloves
  • 2 cans coconut milk
  • 1 cup vegetable stock or water
  • 3 Tbsp-whole bottle (to taste) Thai Kitchen Roasted red chili paste, 4 oz
  • Nuts (pumpkin, almonds), slivered
  • Salt to taste

Preparation

  • In a medium sized pot, heat coconut oil on medium high heat. Add onion and sauté for 5 minutes or until it is translucent.
  • Add ginger and cook for a few minutes until you smell its aroma. Add the powdered curry and garlic cloves and stir for 1 minute.
  • Pour in the coconut milk, vegetarian stock/water and the Thai Kitchen red chili paste. Stir and bring back to a boil. Reduce heat to a low medium heat and cover.
  • Cook for 30 minutes. Turn off heat and let the soup cool.
  • Add salt.
  • Use an immersion blender and puree until smooth.
  • Reheat before serving.
  • Serve with nuts, yogurt, bread

enjoy!

Photo and text by twincitiesherbs.com.

Vegetarian stuffed peppers with eggplant and mushrooms with a Middle Eastern flair

Stuffed peppers are popular all over the world as they are mild in flavor and hold their shape. They can accommodate a generous amount of filling. This recipe is a little play on the meat filled stuffed pepper recipes as I used lentils, cheese and mushrooms instead of the meat. Also, it is made with other delicious foods like eggplants and couscous. The dish is simmered in a tomato sauce to perfection. Serve with a nice yogurt sauce and enjoy!

RECIPE

INGREDIENTS

  • 1 large eggplant
  • 4 large peppers
  • 1/2 cup cooked lentils
  • 4 oz feta cheese
  • 1/2 cup Parmesan cheese
  • 1/2 cup Gruyere cheese
  • 8 oz of crimini mushrooms, chopped
  • 1 cup of cooked couscous
  • olive oil
  • garlic, chopped
  • 1 bunch scallion
  • 2 cup of tomato sauce + 1 cup of stock or water
  • 2 tsp ground cumin, divided
  • 2 tsp ground coriander powder, divided
  • 2 tsp smoked paprika, divided
  • 1/8 tsp nutmeg
  • 1 large egg
  • grated Parmesan cheese for the top
  • salt and ground black pepper to taste
  • cilantro

METHODS

  • Preheat oven 400 F.
  • Pierce the skin of the eggplant in several places and bake in the oven for 30 minutes or adjust cooking time depending on the size of the eggplant. Remove, set aside and let it cool.
  • Make couscous. Boil 1 cup of water and add 1 cup of couscous. Let it sit for 5- 10 minutes to soak up the water. Add olive, 1 tsp ground cumin powder, scallions, handful chopped cilantro and salt. Set aside.
  • Sauce for baking the the stuffed pepper: warm up some oil on medium high heat. When ready add garlic and seasoning (cumin, coriander, paprika, nutmeg), stir for 1 minute. Add 2 cups of tomato sauce and 1 cup of stock, stir. Cook for about 5 minutes. Pour into the baking dish that is big enough to hold the stuffed peppers. Set aside.
  • Stuffing: Mash the eggplant with a potato masher. Add 1 tsp cumin powder, 1 tsp coriander powder, 1/8 tsp nutmeg, paprika and garlic cloves, 1 egg, the cheeses, salt, black pepper and the sauteed mushrooms. Add the cooked lentils and the couscous. Mix well.
  • Prepare stuffed peppers. Cut the bottom of the peppers off, discard or use for something else. Place the stuffing inside the peppers and put the stuffed peppers on the prepared baking sheet with the tomato sauce made earlier. Put the graded Parmesan cheese on the top.
  • Bake in a preheated oven at 375 Fahrenheit for about 50 – 60 minutes or until the peppers are soft and the top is golden brown.
  • Remove from oven and serve hot with yogurt.
  • Add salt and pepper to taste.

enjoy!

Recipe, photos and text by twincitiesherbs