I associate the Christmas season with good food, heartwarming music and the company of friends and family. I can help you out with the food part but I leave the rest for you. Please check out holiday dishes from my earlier blogs, hope you can find one for your holiday dinner: festive salad, mouth-watering meat, fabulous vegetarian and tasty vegan dishes. Enjoy!
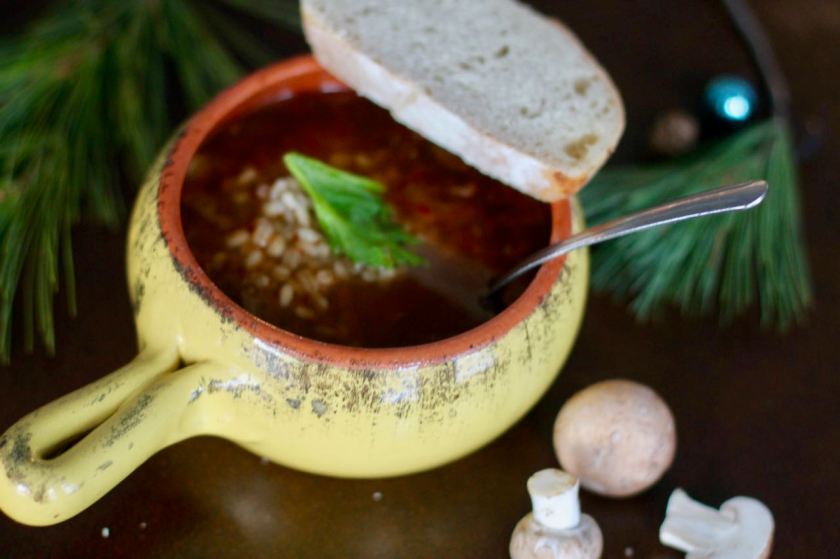
This delicious dish uses this forgotten vegetable, celeriac. The sweet and bitter celeriac is the perfect vegetable to eat as we enter the colder months. It can nicely offset the heaviness of other dishes that we eat during the holidays. The celeriac along with the potatoes are cooked in a stock and are infused with thyme and bay leaves. Serve with cream and some croutons or hazelnuts on the top. Enjoy!
RECIPE
INGREDIENTS
oil
1 medium onion
2 large garlic cloves
1 tsp dried or 2 tsp fresh thyme
1 bay leaf
1 1/2 lb celeriac root, peeled and cut into 1/2 ” chunks
1/2 lb potatoes, peeled and cut into 1/2″ chunks
1 slice of bacon, cut into small pieces (optional)
4 cup of vegetable or chicken stock
1/2 cup heavy cream
1/2 cup hazelnuts or croutons
chopped parsley
crushed red hot pepper to taste
PREPARATION
Cook bacon on medium high heat, in a little oil for 10 minutes. Remove and set aside.
Sauté the onion in a little oil for about 5 – 10 minutes, stir often. Gently fry the garlic for a short time, do not burn. Add the thyme, bay leaf, celery, the potato chunks, bacon pieces and the stock. Bring to a boil and reduce the heat to medium low heat. Cook for about 40 minutes or until all the vegetables are nice and tender.
Remove the bay leaf and let the soup cool off to room temperature. Pour in the cream. Puree the soup. You can use an immersion blender or a regular blender.
Add salt, pepper and red hot pepper to taste.
Serve with hot with croutons or hazelnuts and parsley.
If using hazelnuts, heat up a pan and lightly roast the hazelnuts for 6-8 minutes. Make sure they are toasted on all sides. Chop the cool hazelnuts. Serve on to of the soup.
This is a tasty vegetarian dish that can be served for breakfast, lunch or dinner. It is made with simple ingredients that you most likely have in your kitchen. The eggs are poached in a delicious sauce made of tomatoes, green peppers, onions, garlic and the warming spices of North Africa. I served this dish with home-made pita bread, Hummus and Eggplant Parmesan.
Shakshuka is made throughout Middle Eastern countries today and there are numerous recipes around; however, it originated in Northern Africa. This recipe uses the lovely spices of Northern Africa, the special trio of cumin, coriander and paprika. Enjoy!
RECIPE
Ingredients
1 large onion, diced
3 Tbsp Extra virgin olive oil
1 green pepper
2 clove garlic
1 tsp ground cumin powder
1 tsp ground coriander powder
1 tsp ground paprika
2 large tomatoes
1/4 cup tomato sauce
hot pepper flakes to taste
4 eggs
salt and pepper to taste
1/4 cup parsley
1/4 cup mint leaves
Pita bread
Methods
On medium high heat, sauté the onion in olive oil for 5 minutes.
Add the green peppers and continue sauteing while stirring frequently for another 5 minutes. Add the spices (cumin, coriander, paprika), stir for 1 minute and add the garlic.
Quickly add the diced tomatoes and the tomato sauce, stir. Cook for 5 minutes.
Turn down the heat and let the mixture simmer for 15 minutes covered.
Uncover and let the dish cook for another 5 minutes or so until the sauce thickens.
Using a wooden spoon, clear some space in the sauce or make a ‘well’ and drop 1 egg in. Do this three more times with the other eggs. Cover and let the eggs poach in this lovely, well seasoned sauce until the whites are set and are not runny.
Uncover. Add salt, pepper, parsley, mint leaves and hot pepper flakes.
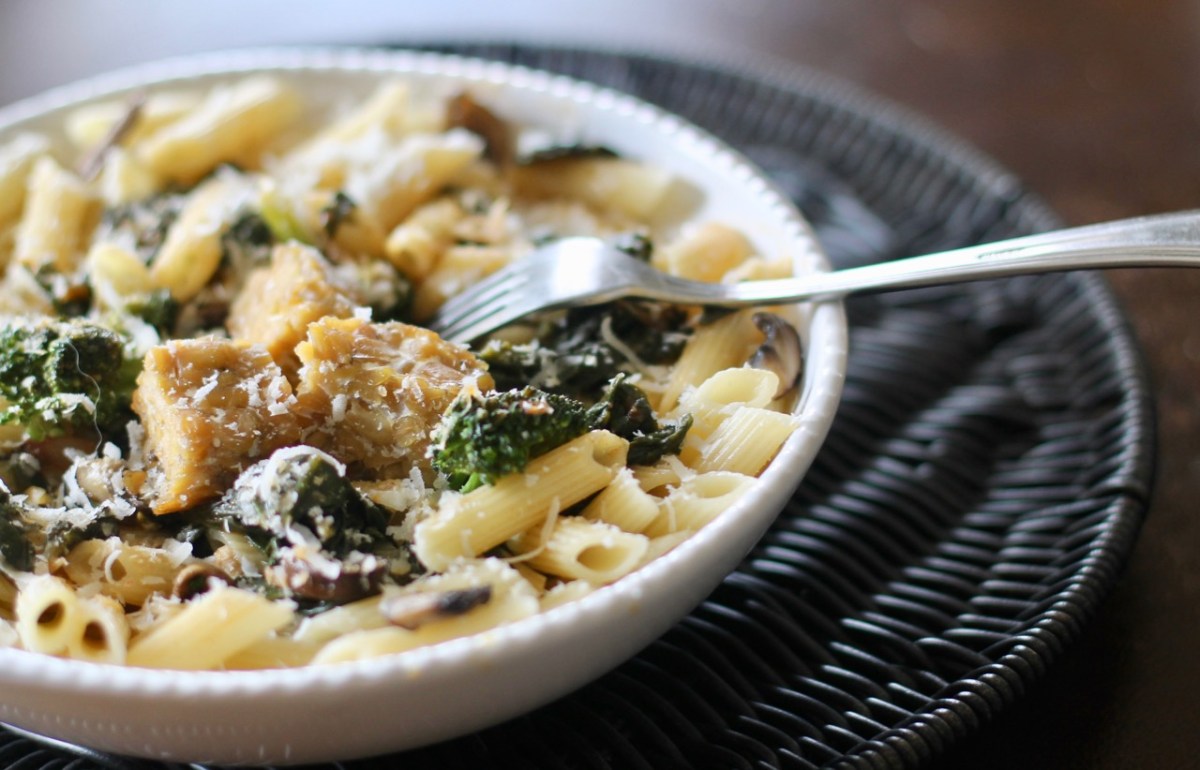
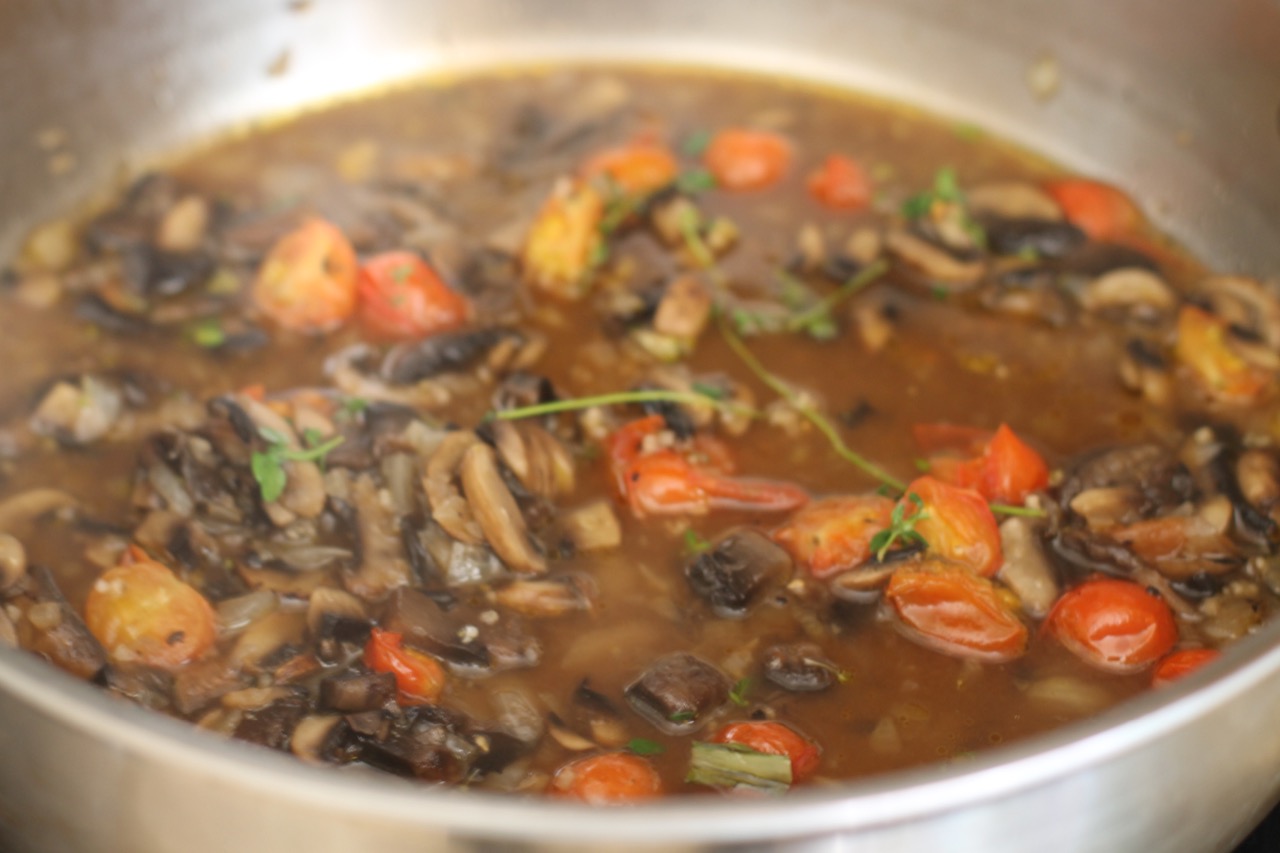
This new spring energy is as vibrant as it can be. Simple vegetarian dishes would be very nice to eat right now. I would like to share my recipe that I have been cherishing for years and making in the spring. This is a vegetarian take on the classic beef stroganoff dish. I used the nutty tempeh to replace the meat and added mushrooms to create this delicious dish. Enjoy!
RECIPE
Serves 4-6 people
Ingredients
1 pkg tempeh (500 gr)
olive oil
1/4 cup of shallots, finally chopped
1 Tbsp flour
16 oz mushrooms (oyster, crimini, portobello, white button)
8 oz green vegetable (spinach, broccoli)
1 tsp Hungarian paprika
1 clove garlic, crushed
1/2 cup wine
1 cup stock (vegetarian or meat)
salt
red hot pepper flakes, optional
few springs of thyme
10 cherry tomatoes
1/4 cup cream
black pepper
parsley
pasta
graded cheese (Parmesan)
Method
Sauté the tempeh in a little oil for 10 minutes or until the sides are nice and brown. Set aside.
Make the pasta according to its directions. Set aside.
In a large pan, heat some oil. Sauté the shallots for 5 minutes on medium high heat.
Add the mushrooms and continue sauteing for another 5 minutes. Sprinkle in 1 Tbsp flour, stir for a few minutes. Add the paprika and garlic. Stir for 1 minute.
Add the wine and the cold stock. Stir making sure there are no knots left from the flour. Add the thyme,vegetables, red hot pepper flakes (if desired), tomatoes and cook for 15 minutes covered.
Take out larger thyme pieces.
Take off heat. Add salt, pepper, parsley and cream.
Add the tempeh cubes so it can soak up some of the liquid.
This is an amazing Thai inspired dish that uses coconut milk and Thai red curry paste as a base. I usually don’t add ready-made seasonings but this is a tasty and easy short cut, you won’t even notice. I chose bok choy and mushrooms for the vegetables, this combination is often used in traditional thai cooking and I really like how they work together. I also threw in some bamboo shoots to balance out the dish. If you want you can add some broccoli in place of the bok choy but this is really a personal preference. Oh and it is done in 30 minutes! Enjoy!
RECIPE
Serves 6 people
Ingredients
1 block of tofu (1 lb) (500 gr)
sesame oil
1 Tbsp ginger, finally chopped
5 cloves garlic, crushed
(26 fl oz) 2 cans coconut milk (1 liter)
4 Tbsp Thai red curry paste
handful (4-8oz) shiitake mushrooms, cut up
1 lb baby bock choy (I like half bok choy and half broccoli)
1 bunch scallions, sliced
little fish sauce to taste (1 tsp)
1 can of bamboo shoots (140 g), drained
soy sauce
1 tsp salt or to taste
1 lime
cilantro
1/2 tsp red flakes or to taste
1 pkg noodles (Thai, ramen)
INSTRUCTIONS
1. Boil water and prepare the noodles according to its directions.
2. Drain water off the tofu and pat dry. Cut the the tofu in 1 inch cubes and fry in a little oil. When done, sprinkle a little soy sauce on the cubes.
3. Heat a pan with oil.
4. Add the broccoli if used and stir fry for about 10 minutes on medium heat until tender.
5. Add the ginger and garlic, stir for 1 minute. Stir.
6. Add the 2 cans of coconut milk and the Thai red curry paste, stir. Continue adding bamboo shoots, red chili flakes (optional) and fish sauce, boc choy and mushrooms. Cook for 10 minutes. I would like also mention that if you add the bok choy and the mushrooms more at the last 5 minutes of the cooking, they will keep their shape better and will not get soggy.
7. Serve with the noodles and the tofu prepared earlier. Add cilantro, scallions and lime juice.
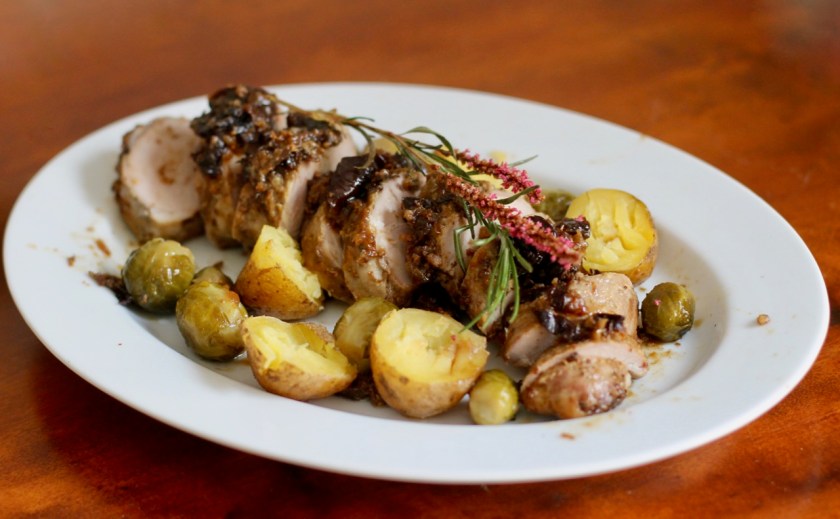
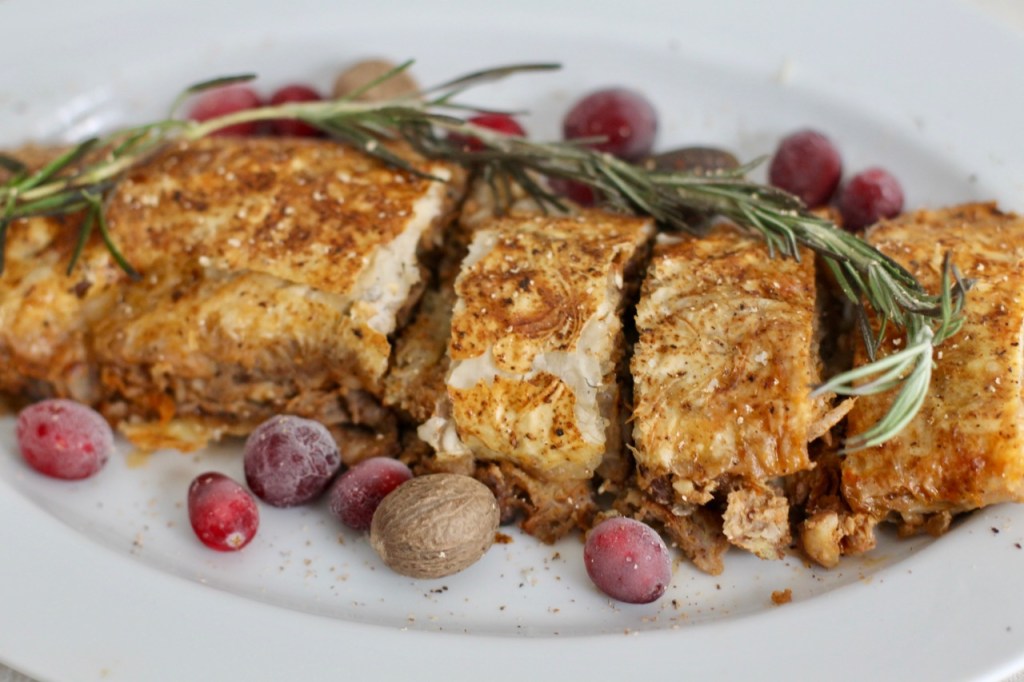
I like challenges … well ok sometimes it is a bit uncomfortable … but then I end up with something delicious like the dish I’m presenting here today.
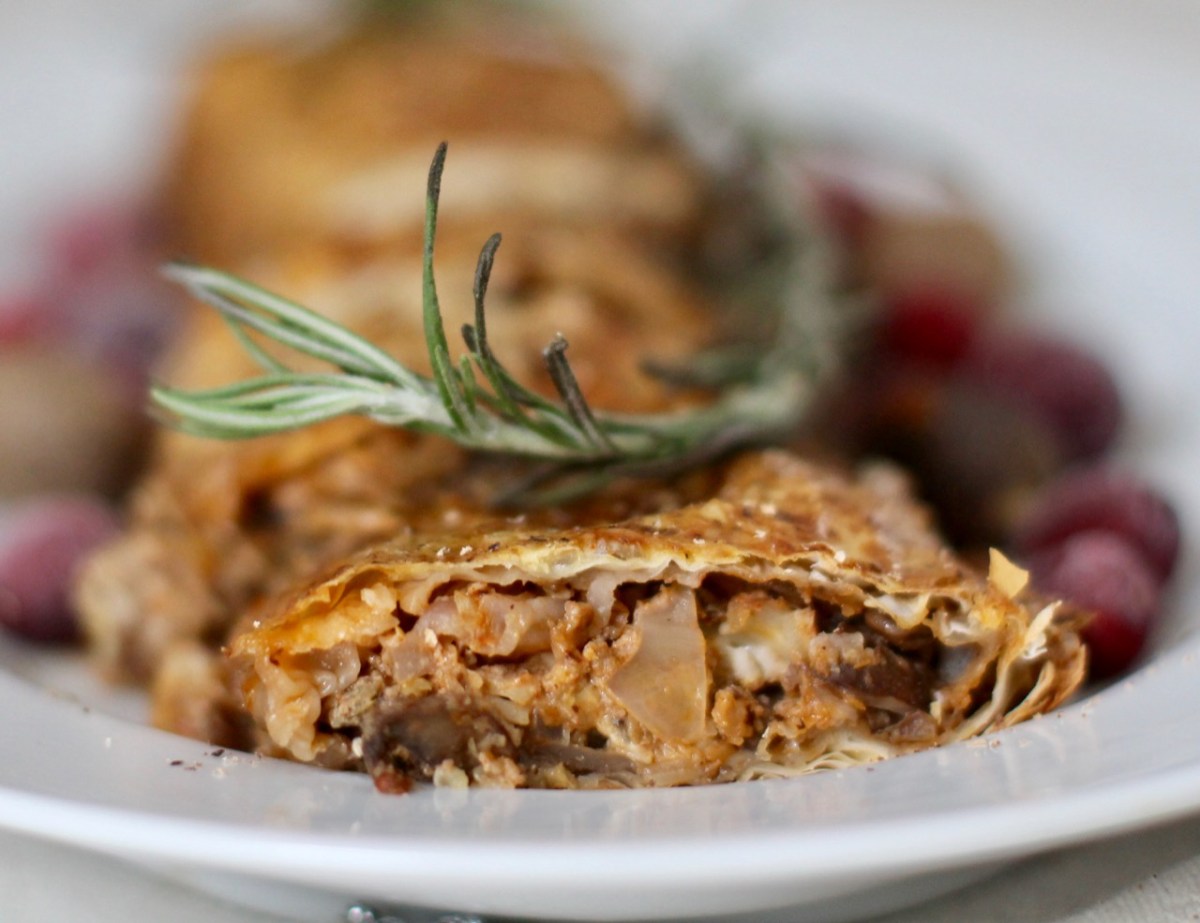
The savory stuffing made with cabbage, mushrooms and lentils is wrapped in a flaky strudel dough and is seasoned with the warming spices of the season. To make it even more festive, serve it with port sauce and brussel sprouts with chestnuts.
I was looking for a vegetarian Christmas dish… seriously, traditionally would there be such a thing? I have seen mushroom strudel served in the winter before but did not find it filling enough as a main dish. Then came the idea … maybe because I was craving cabbage strudel the whole fall … to make the strudel with half mushrooms and half cabbage … then added the lentils and the cheese in place of the meat, a few spices and … this festive dish was born. Cabbage is a staple vegetable for the winter and has been traditionally paired with mushrooms. My non-vegetarian guests really enjoyed a slice with their meat dish. Of course, the vegetarians were asking for seconds.
RECIPE
Ingredients
oil
5-7 sheets of filo dough
1/4 cup chopped shallots
4-8 oz mushrooms (crimini) (chopped into small pieces)
Quarter sliver of a medium sized savoy cabbage. ( Discard the lager veins of the cabbage so you are left with the tender leaves only).
1 celery stalk
2 garlic cloves
1 tsp paprika
1/4 cold stock (vegetarian or chicken) or water
1/4 cup uncooked lentils (1/2 cup of cooked lentils)
Take filo dough out of the freezer. Let it thaw slowly.
Clean and soak the lentils for a few hours. Cook lentils.
Chop up the shallots and the celery and sauté them in some oil for 5- 10 minutes. Add the mushrooms and continue sauteing for 5 more minutes or until the mushrooms are tender. Add paprika and the garlic to activate for 1 minute, stir and add the cold stock (1/4 cup). Add the cabbage. Add chopped thyme leaves, nutmeg and chopped rosemary leaves. Cook the mixture for about 10 minutes on low heat. Set aside.
Chop up the nuts. I leave the hazelnuts chunkier. The walnuts are coarsely chopped. A small food processor can be used. Add to previous onion mixture.
In a medium sized bowl, add 1 lightly beaten egg, mustard, the nuts, the cooked lentils, mushroom/ cabbage mixture from above, feta cheese, salt and pepper. Mix well.
Let the stuffing cool, refrigerate for about 1 hour.
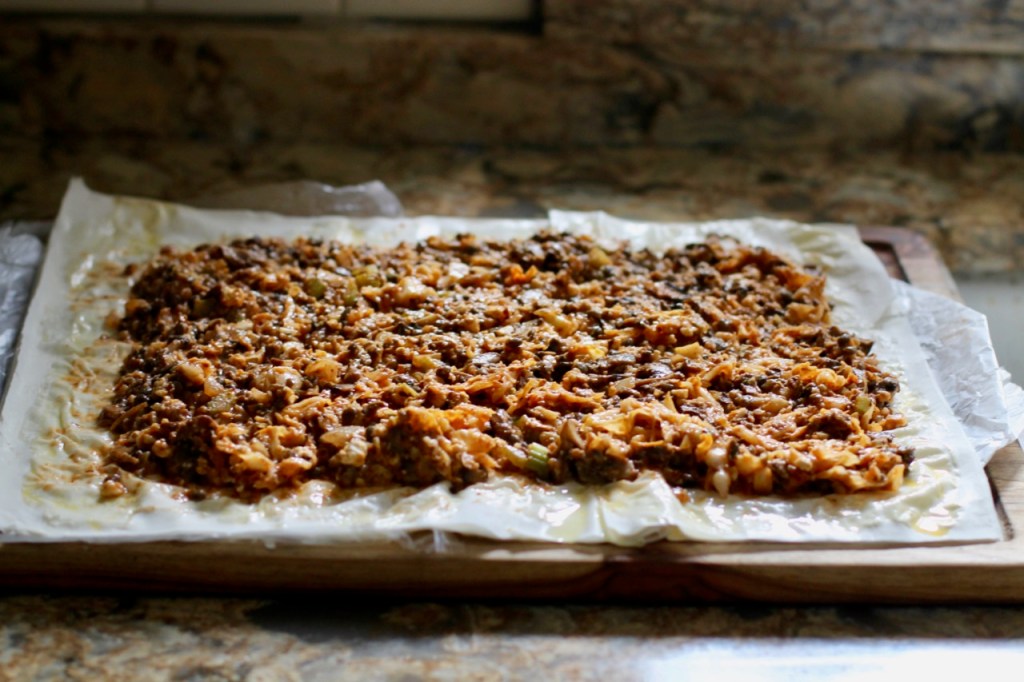
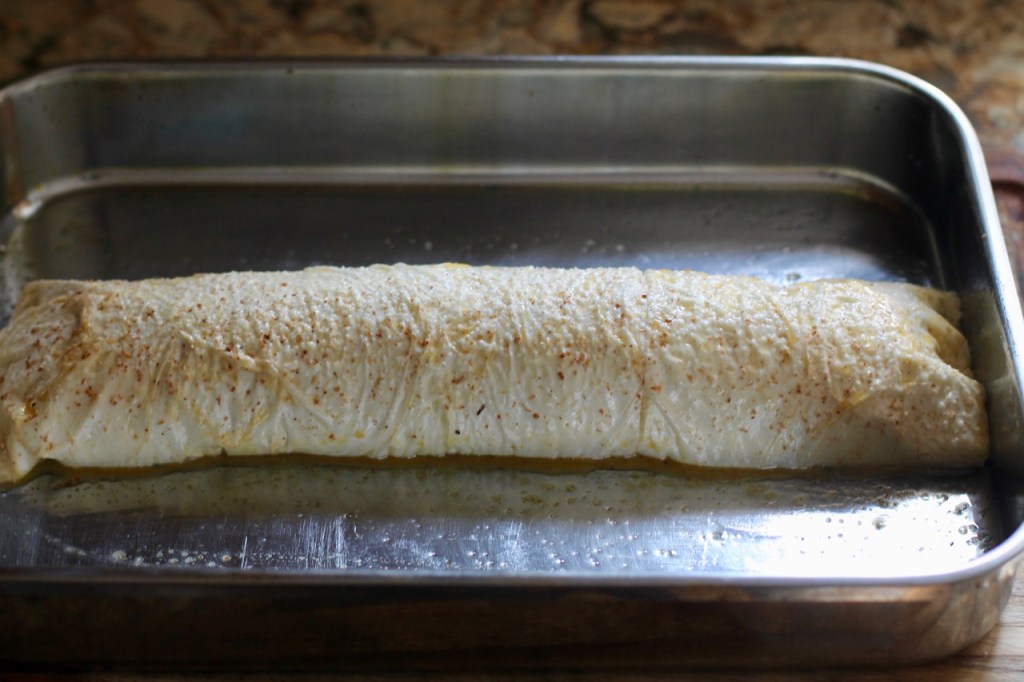
Take 7 sheets of filo dough and lay it on a wooden board. I like to put a piece of parchment paper below the filo dough, it is helpful for rolling. Drizzle some oil and grade some nutmeg. Spread the filling evenly on the sheet leaving 1 inch on each side empty. Roll it up. Placed it in an oiled baking dish.
Lightly beat 1 egg, add some freshly graded nutmeg and salt. Spread it on top of the rolled strudel. Wait for 5-10 minutes until egg wash is absorbed. Apply the egg-wash again. The 1 egg should cover the strudel both times. You can sprinkle additional salt and nutmeg on the top. This will make the crust really tasty.
Bake in the pre-heated oven for 25-30 minutes or until top is nice and brown.
Put left-over filo dough if there is any left in the fridge gently wrapped up in plastic bags so the leaves don’t dry out.
Serve hot with the port sauce (see below) and brussel sprouts with chestnuts. I also like to add cranberry sauce (recipe).
Directions for the port sauce
In a small pot, saute the shallots in some oil or butter. Add the flour for 1 min, stir. Add the garlic, stir for 30 seconds.
Add the wine and stock. Stir.
Add the thyme and rosemary springs. Cover the pot.
Cook for about 20 minutes.
Take out the bay leaves, thyme and rosemary springs.
Take off the heat, add the cream, salt and pepper.
Serve right away. Can be stored in the fridge for many days.
This morning, I was craving something delicious made with apples … most likely because yesterday we went out to an orchard to pick some apples. Of course, we have a lot of apples now. Then I remembered I could easily make Dutch baby and put apples in it.
Dutch baby is made with three basic ingredients: milk, eggs and flour and seasoned with vanilla and apple pie spice. I also added apples to satisfy my autumn cravings. Watch it poof up in the oven and wow your friends and family with this tasty filling breakfast. I served it with caramel sauce that further satisfied those ‘autumnish’ cravings … Oh and I still have raspberries growing in my back yard so I had to use some raspberries too.
RECIPE
Serves 4 people
Ingredients
1 cup all purpose flour
1 cup whole milk milk
5 eggs, lightly beaten
4 Tbsp butter, divided.
pinch of salt
1/4 tsp cinnamon or apple pie spice
1 tsp vanilla
3 Tbsp sugar
2 larger apples peeled, cored and sliced (sour, baking apples like Granny smith, Fuju, Harlson are the best)
caramel sauce, whipped cream, maple syrup, all optional
nuts for serving
Directions
You will need a 2 inch deep oven proof skillet that is 10″ in diameter or something similar in size to bake this dish.
Preheat the oven to 425 F. Have an oven rack in the middle position.
Mix flour, milk, eggs, salt, vanilla, 3 Tbsp melted butter, cinnamon and sugar until no lumps remain. You can use an electric beater for 1 minute but it can easily done by hand too. Let it rest for 1 hour if possible. (The batter can be made the day before and stored in the fridge, just let it warm up to room temperature and mix the batter to get some air in).
Caramelize the apple slices on both sides for 10 minutes with a little butter. Set aside.
Heat the baking dish for 5 minutes in the pre-heated oven. Put 1 tablespoon butter in the hot baking dish and bake for 5 minutes or until the butter is melted. Be careful not to burn the butter.
Take the baking dish out of the oven. Pour the batter in and place the dish in the oven. (IMPORTANT !!! Do not open the oven door before the dutch baby is done). BAKE for 20 – 30 minutes or until the top is nice and golden brown. The pancake will puff up but will settle after 5 – 10 minutes.
Serve with the prepared apples. You can add powdered sugar, ground walnuts and caramel sauce – of course all optional.
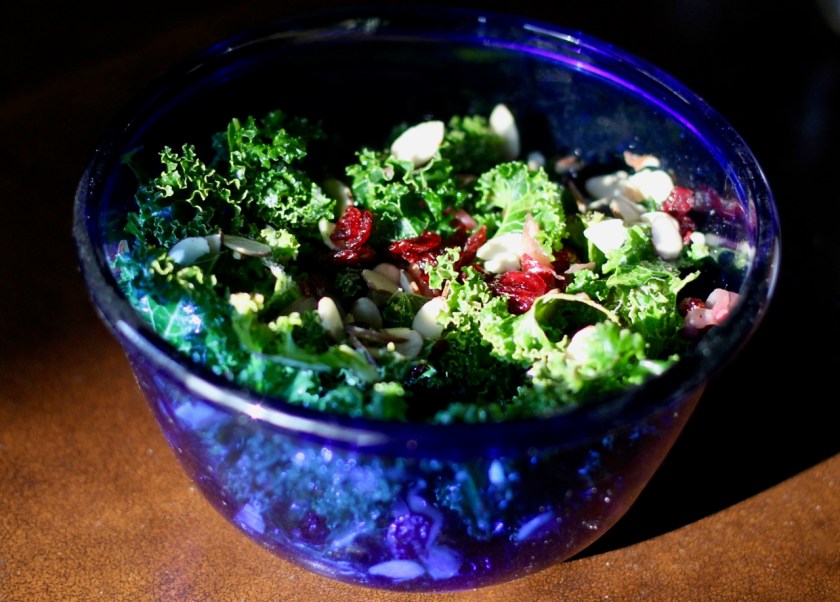
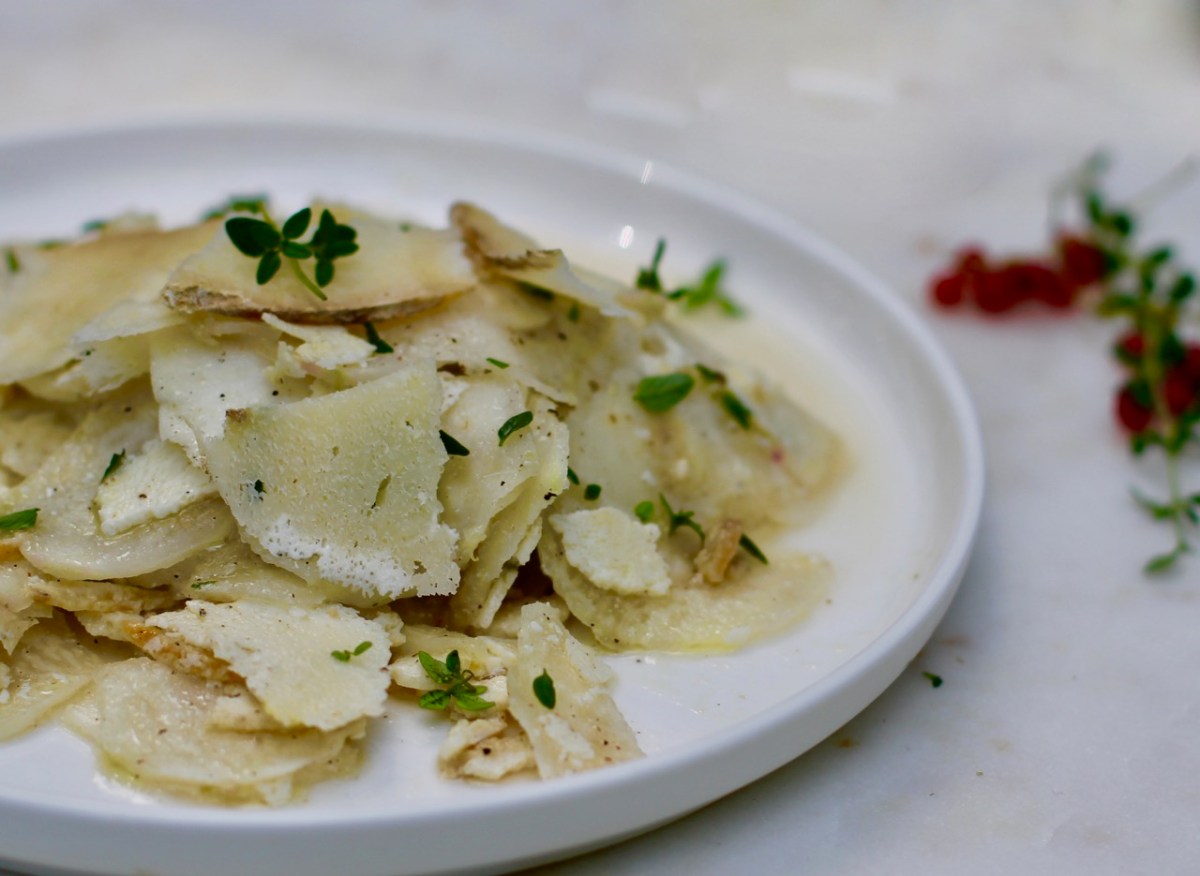
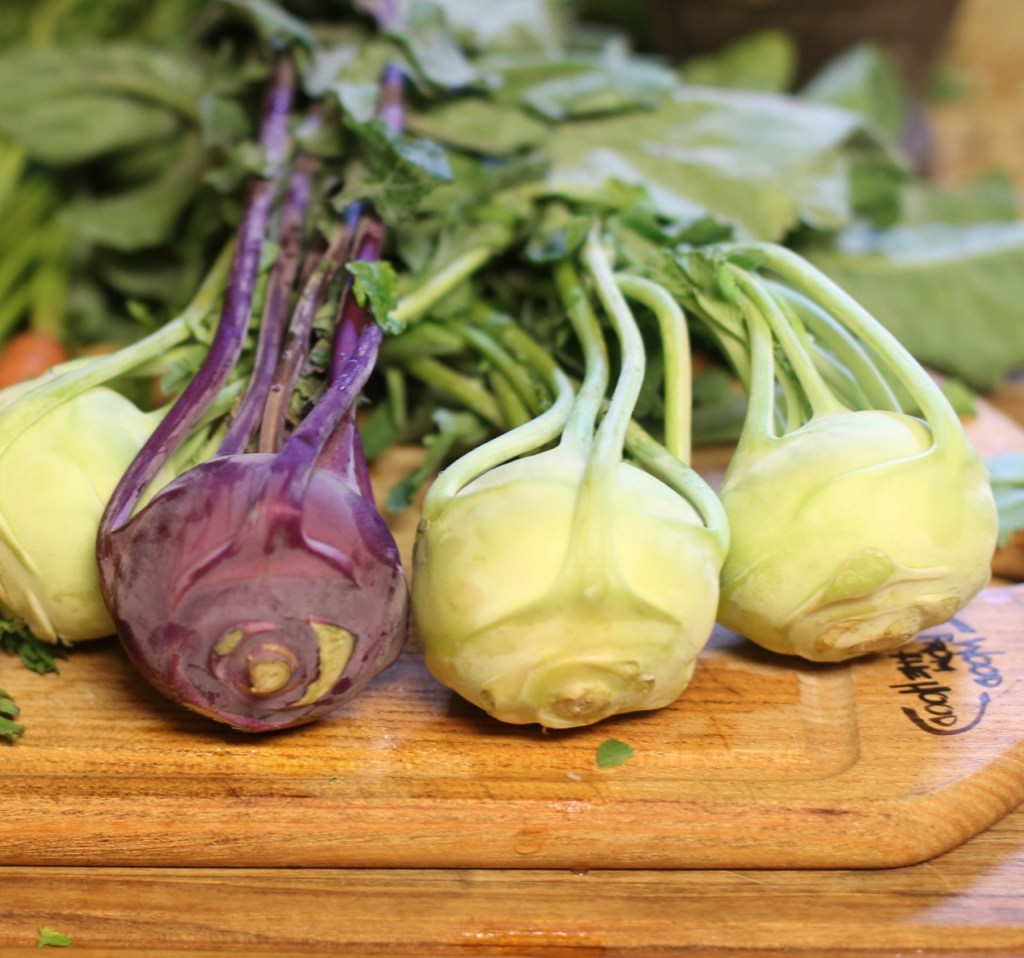
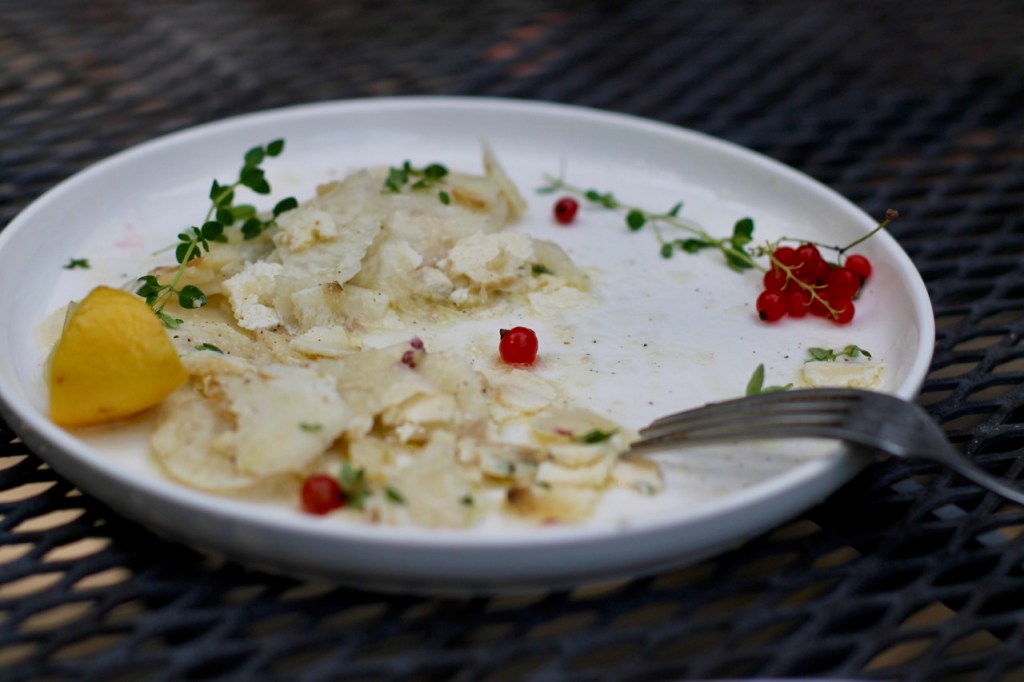
Kohlrabi has such an interesting flavor but I have never thought of making a salad with it … until I found this recipe. The kohlrabi is drizzled with some olive oil and lemon juice and is paired with the savory cheese and thyme and voila! … a delicious salad is made!
If you like kohlrabi, you might be interested in my kohlrabi soup recipe. Please click here.
RECIPE
Serves 2 people
Ingredients
1 kohlrabi (green, purple or white)
handful of hard goats’ cheese or sheep’s’ cheese or any stronger flavored hard cheese
juice of 1 lemon
extra virgin olive oil
sea salt and freshly ground black pepper to taste
a few springs of fresh thyme, chopped
Directions
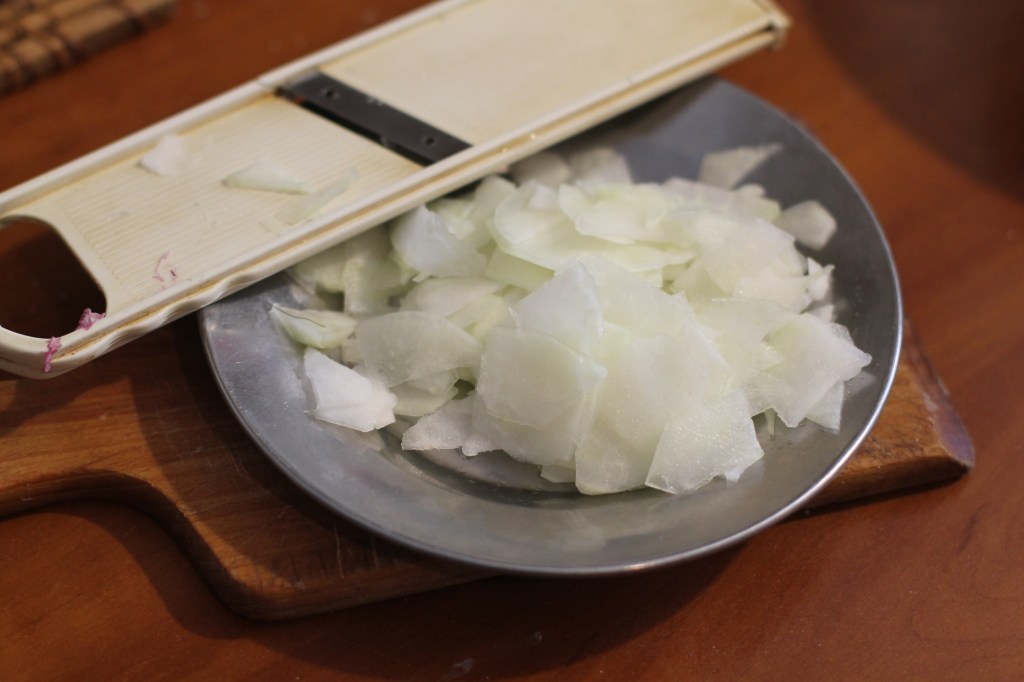
Peel the kohlrabi. Shave it on a grader.
Shave the cheese on the grader as well. I like to crumple some of the cheese to cover the kohlrabi and put some shaved pieces on the top. The amount is something like a handful.
Pour on the lemon juice and drizzle on some olive oil.
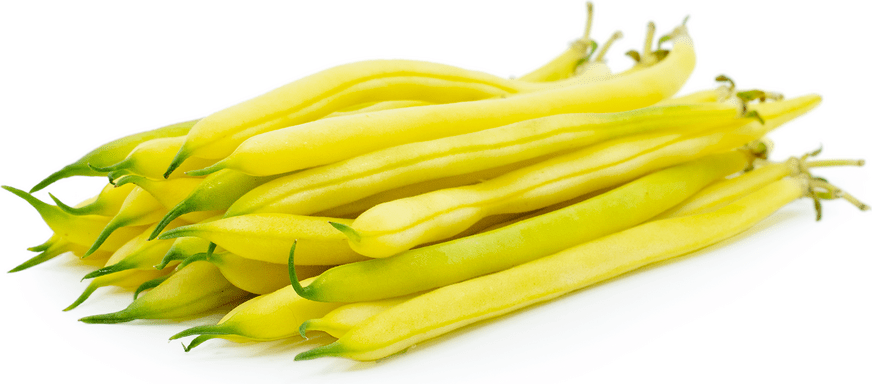
I love summer. It looks like there are so many vegetables finally ready to eat. I enjoy rhubarb too but there was not much else here in the Midwest for quite a while and now all of the sudden we have so many more to choose from. So ended up picking yellow beans for this week.
I’m presenting a simple Hungarian yellow bean soup recipe that many Hungarians know how to make but I added my little twist to it. I like reading about foods and experimenting with them. So I was reading that Hungarian cuisine was a little bit different when Hungarians lived in Asia. Over the years they lost some of the ingredients and picked up new ones. So I had the idea why not add chickpeas and curry to this bean soup. Who knows maybe our ancestors made the soup like this back wherever they came from ?!?
The sweet yellow bean is nutritious and is high in fiber but really is not the most exciting vegetable. The real flavor IMO comes from the seasoning especially from the dill. Dill is a unique sweet plant that gives the zesty, tangy flavor with slightly bitter undertones. It helps digestion and calms the mind. Also, adding the sour cream or yogurt is a must at the end … and then you get a pleasant sweet and sour soup.
As I have mentioned I added chickpeas to the dish. If you look at a chickpea, you can see it resembles the heart and is considered to be beneficial for the heart. It is a good source of iron and unsaturated fats.
I often make this soup more of an entree by adding an egg or other protein. It is very filling this way, for sure. I just put the soup in a jar and take it with me in the summer. It is an instant lunch on the go for me. Oh yes and I get the stares from Hungarians … what is that dish?!? … lol.
RECIPE
Serves 4 people
This is my recipe so please don’t publish without proper citation.
Ingredients
1 lb of yellow beans
oil (vegetable, lard)
1 medium size onion, chopped
1 tsp of sweet Hungarian paprika (make sure it is authentic)
1 tsp curry powder
1 chopped large tomato
vegetable or meat stock (I used pea shells)
3 carrots, thinly sliced
1 zucchini, optional
1-3 bay leaves
1 yellow pepper, optional
handful of dill, chopped
2 Tbsp white vinegar
1 cup dried or 1 can of chickpeas (14 oz)
salt and black pepper
red pepper to taste
sour cream or yogurt to garnish
Directions
Clean and soak the chickpeas overnight or for at least 8 hours. Remove the soaking liquid and discard. Add fresh cold water and cook for 3 hours. A pressure cooker would greatly reduce the cooking time. (Omit if using canned chickpeas).
Making the soup base: Saute the onion in some oil for 5 minutes or until translucent. Add garlic, paprika and curry powder, mix and after 1 minute add the chopped tomato. Mix and cook for about 5- 10 minutes or until tomato has cooked into a sauce.
Wash the yellow beans. Cut the ends off on both sides and discard. Cut them up into 1 inch pieces. Clean and cut the carrots. Oh and I almost forgot I like to put in zucchini too. So wash and cut zucchini into about 1 inch pieces.
Add the cut up yellow beans, carrot slices, bay leaves, zucchini and the stock. I like to add a yellow pepper for flavoring or at least its seed house. Cook for about 30 -45 minutes or until the beans are soft. Remove the pepper and bay leaves.
Add the cooked or canned chickpeas with its liquid and the white vinegar.
Salt and pepper to taste. Add the red chili pepper if desired.
Serve hot with chopped dill and sour cream/yogurt.
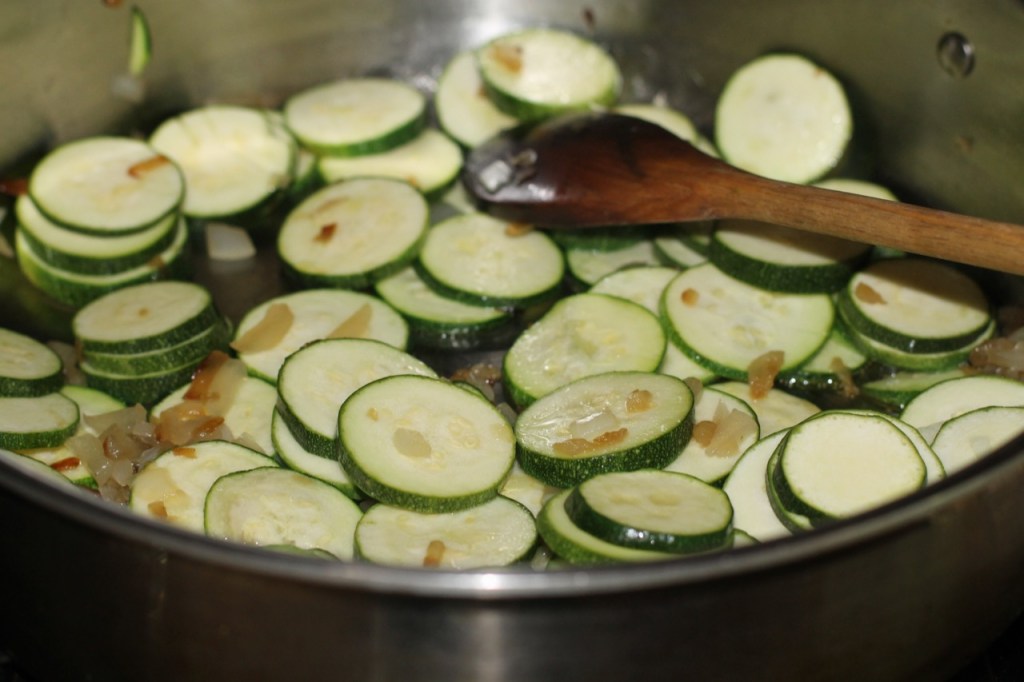
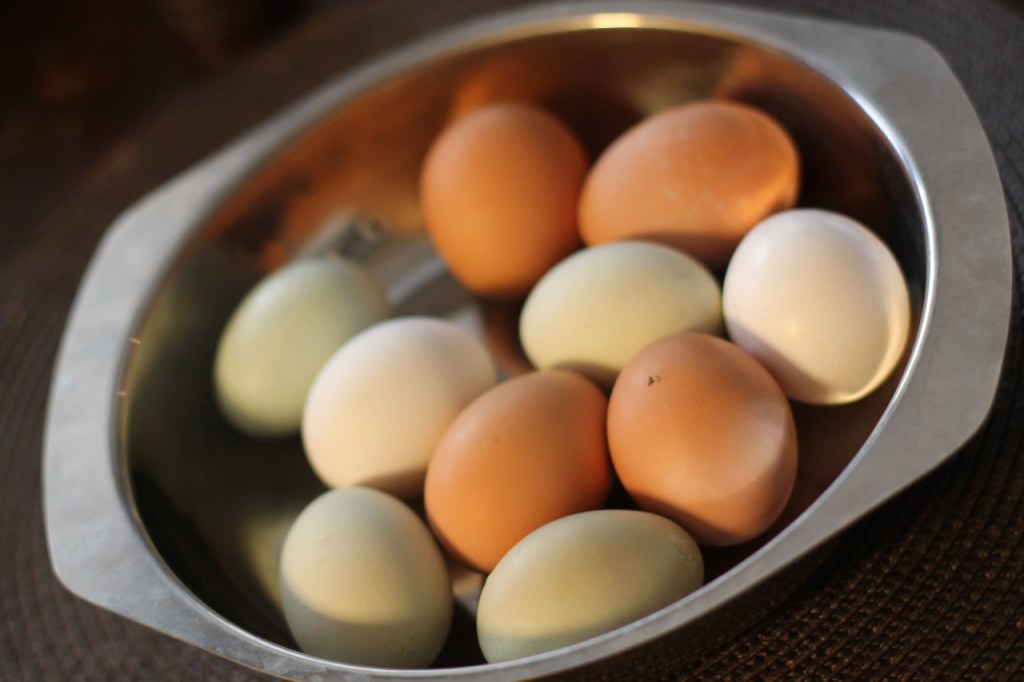
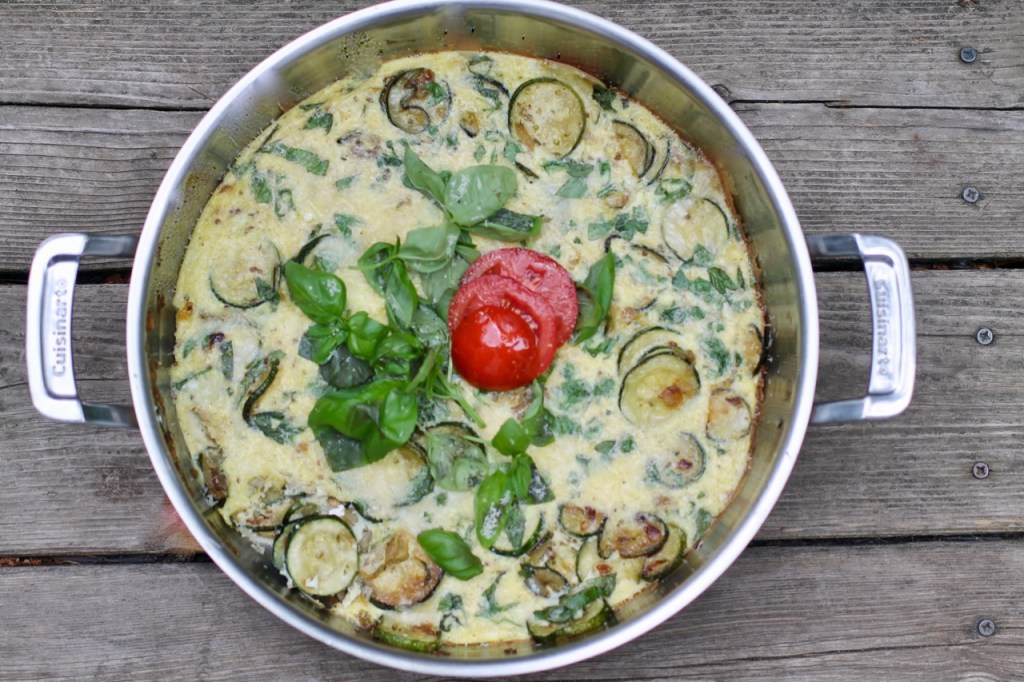
We just celebrated the Summer Solstice so summer is definitely here. Zucchini is one of the first summer vegetables that appears at the farmers’ market. Fritatta is a popular Italian dish and also is my favorite way to prepare zucchini. Italians often make this dish for ‘lunch on the go’ because it tastes good as it is … it does not have to be reheated and is an interesting and unique dish. If you have eggs, cheese, onions, zucchini and olive oil you can make zucchini fritatta. The secret is in the preparation.
So let’s look at those secrets … no worries it is not a difficult dish to make. The main secret is to cook it slowly. It is kind of a ‘slow food’ meaning that it is cooked slowly on low heat starting in cold olive oil. This was rather a hard concept for me at first because I always heat the oil before I put onions in a pot … but once you taste the dish, you will understand. Also, it prevents the olive oil from burning- I’m guessing. Another secret is to not dry it out so basically don’t over-cook the eggs. And that is about it other than the usual, use good ingredients.
The recipe is from Marcella Hazan’s cookbook Essentials of Classic Italian Cooking.
So let’s look at why we should incorporate zucchini in our summer diet. The watery zucchini is cooling and refreshing and is great to overcome the summer heat. It has a tender texture with a slightly sweet flavor and pairs nice with something a little more robust like eggs and cheese. It is also packed with nutrients and is rich in calcium, magnesium, iron, vitamin B and C.
Oh and I can’t forget about the basil, the other main ingredient. It is in the mint family along with the other remarkable Mediterranean herbs like oregano, mint, rosemary. It is not an accident that Mediterranean chefs use basil on a regular basis. The aromatic basil is used in cooking for making food taste better and has numerous health benefits. For more information on basil, please check out this article.
RECIPE
Ingredients
1/4 cup cold pressed olive oil, divided
1 large onion (1 cup), finally chopped
2 slices bacon, chopped (optional)
2-3 medium sized zucchini, sliced
5 large eggs, whisked
1 Tbsp dried oregano
a handful of fresh basil leaves
2/3 cup freshly graded Parmesan cheese
salt and black pepper to taste
2 Tbsp butter
Directions
Put half of the cold oil, and the onion in a large pan. Turn heat onto low heat, (not simmer) and cover. Cook until the onion wilts and becomes greatly diminished in bulk for about 40 minutes. Then uncover and continue cooking until the onion gets a nice golden brown color. I turn the heat a notch up here. This is going to be a lengthy process but it is an important part of the dish.
Meanwhile, prepare the zucchini. Scrub and wash off any dirt. Cut off both ends. Slice them thin.
When the onion is nice and golden brown, add salt and the sliced zucchini. You can put the chopped bacon in here if you plan on using it. Turn heat up to medium high and cook them until they are softened and have a light nut brown color. Stir frequently.
Making the frittata. Add the butter and cook for 5 minutes on medium high heat. Add the whisked eggs, torn-up basil, freshly ground black pepper and the cheese. Cook carefully until the eggs have set and thickened and the bottom has a light brown color (not burnt) and only the top is runny. Turn the broiler on. I use the low broiler for 3 minutes.