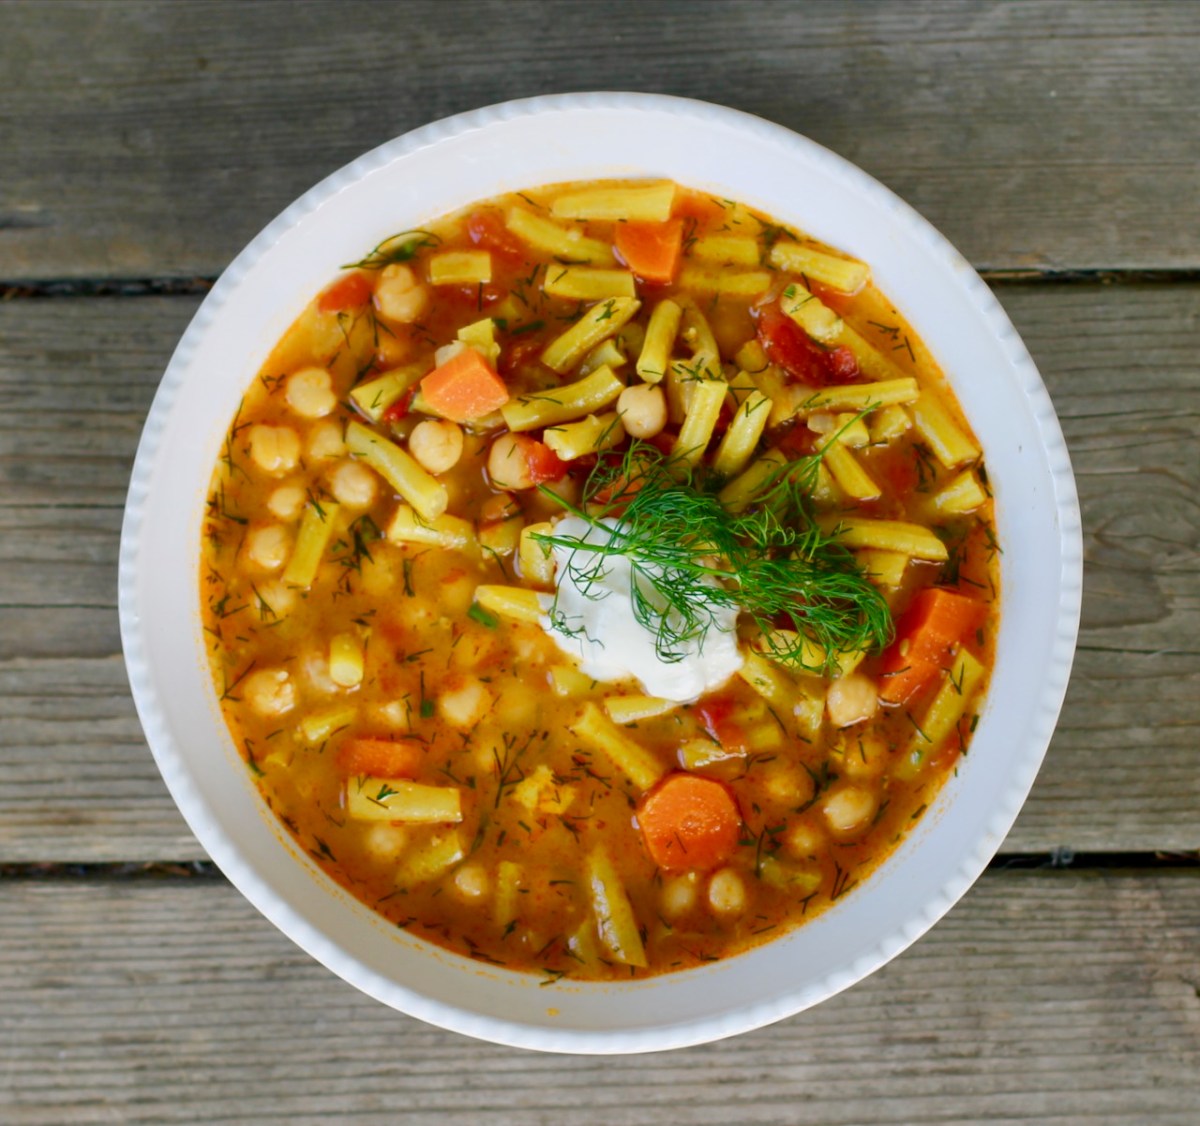
Hungarian summer bean soup with dill

I love summer especially the abundance of all the fruits and vegetables. I enjoy rhubarb too but there was not much else here in the Midwest and now all of the sudden we have so many more to choose from. So ended up picking yellow beans for this week.

I’m presenting a simple Hungarian yellow bean soup recipe that many Hungarians know how to make but I added my little twist to it. I like reading about foods and experimenting with them. So I was reading that Hungarian cuisine was a little bit different when Hungarians lived in Asia. Over the years they lost some of the ingredients and picked up new ones. So I had the idea why not add chickpeas and curry to this bean soup. Who knows maybe our ancestors made the soup like this back wherever they came from ?!?

The sweet yellow bean is nutritious and is high in fiber but honestly is not the most exciting vegetable. The real flavor IMO comes from the seasoning especially from the dill. Dill is a unique sweet plant that gives the zesty, tangy flavor with slightly bitter undertones. It helps digestion and calms the mind. Also, adding the sour cream or yogurt is a must at the end … and then you get this pleasant sweet and sour soup.

As I have mentioned, I added chickpeas to the dish. If you look at a chickpea, you can see it resembles the heart and is considered to be beneficial for the heart. It is a good source of iron and unsaturated fats.

I often make this soup more of an entree by adding an egg or other protein. It is very filling this way, for sure. I just put the soup in a jar and take it with me in the summer. It is an instant lunch on the go for me. Oh yes and I get the stares from Hungarians … what is that dish?!? … lol.

RECIPE

Serves 4 people

This is my recipe so please don’t publish without proper citation.

Ingredients
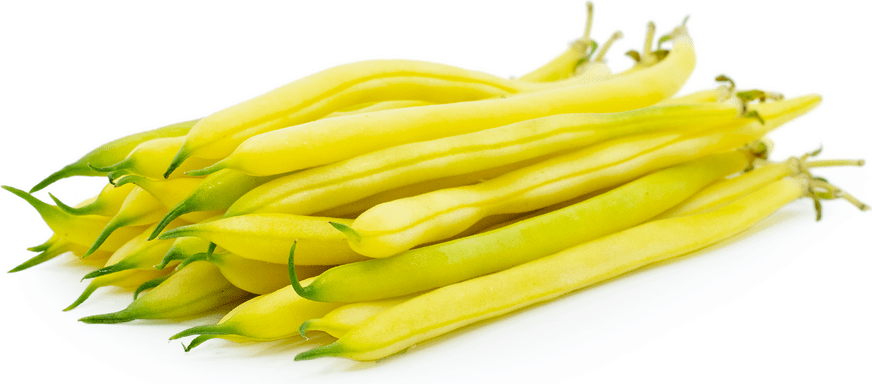
  • 1 lb of yellow beans
  • oil (vegetable, lard)
  • 1 medium size onion, chopped
  • 1 tsp of sweet Hungarian paprika (make sure it is authentic)
  • 1 tsp curry powder
  • 1 chopped large tomato
  • vegetable or meat stock (I used pea shells)
  • 3 carrots, thinly sliced
  • 1 zucchini, optional
  • 1-3 bay leaves
  • 1 yellow pepper, optional
  • handful of dill, chopped
  • 2 Tbsp white vinegar
  • 1 cup dried or 1 can of chickpeas (14 oz)
  • salt and black pepper
  • red pepper to taste
  • sour cream or yogurt to garnish
Directions
  • Clean and soak the chickpeas overnight or for at least 8 hours. Remove the soaking liquid and discard. Add fresh cold water and cook for 3 hours. A pressure cooker would greatly reduce the cooking time. (Omit if using canned chickpeas).
  • Making the soup base: Saute the onion in some oil for 5 minutes or until translucent. Add garlic, paprika and curry powder, mix and after 1 minute add the chopped tomato. Mix and cook for about 5- 10 minutes or until tomato has cooked into a sauce.
  • Wash the yellow beans. Cut the ends off on both sides and discard. Cut them up into 1 inch pieces. Clean and cut the carrots. Oh and I almost forgot I like to add some zucchini too. So wash and cut zucchini into about 1 inch pieces.
  • Add the cut up yellow beans, carrot slices, bay leaves, zucchini and the stock. I like to add a yellow pepper for flavoring or at least its seed house. Cook for about 30 -45 minutes or until the beans are soft. Remove the pepper and bay leaves.
  • Add the cooked or canned chickpeas with its liquid and the white vinegar.
  • Salt and pepper to taste. Add the red chili pepper if desired.
  • Serve hot with chopped dill and sour cream/yogurt.

enjoy!

Recipe, text and photos by twincitiesherbs.com

Zucchini frittata with basil (frittata di zucchine)

We just celebrated the Summer Solstice so summer is definitely here. Zucchini is one of the first summer vegetables that appears at the farmers’ market.

Fritatta is a popular Italian dish and also is my favorite way to prepare zucchini. Italians often make this dish for ‘lunch on the go’ because it tastes good as it is … it does not have to be reheated and is an interesting and unique dish. If you have eggs, cheese, onions, zucchini and olive oil you can make zucchini fritatta. The secret is in the preparation.

So let’s look at those secrets … no worries it is not a difficult dish to make. The main secret is to cook the onions slowly. It is kind of a ‘slow food’ meaning that it is cooked slowly on low heat starting in cold olive oil. This was rather a hard concept for me at first because I always heat the oil before I put onions in a pot … but once you taste the dish, you will understand. Also, it prevents the olive oil from burning- I’m guessing. Another secret is to not dry it out so basically don’t over-cook the eggs. And that is about it other than the usual, use good ingredients.

The recipe is from Marcella Hazan’s cookbook Essentials of Classic Italian Cooking.

So let’s look at why we should incorporate zucchini in our summer diet. The watery zucchini is cooling and refreshing and is great to overcome the summer heat. It has a tender texture with a slightly sweet flavor and pairs nice with something a little more robust like eggs and cheese. It is also packed with nutrients and is rich in calcium, magnesium, iron, vitamin B and C.

Oh and I can’t forget about the basil, the other main ingredient. It is in the mint family along with the other remarkable Mediterranean herbs like oregano, mint, rosemary. It is not an accident that Mediterranean chefs use basil on a regular basis. The aromatic basil is used in cooking for making food taste better and has numerous health benefits. For more information on basil, please check out this article.

RECIPE

Ingredients

  • 1/4 cup cold pressed olive oil
  • 1 large onion (1 cup), finally chopped
  • 2 slices bacon, chopped (optional)
  • 2-3 medium sized zucchini, sliced
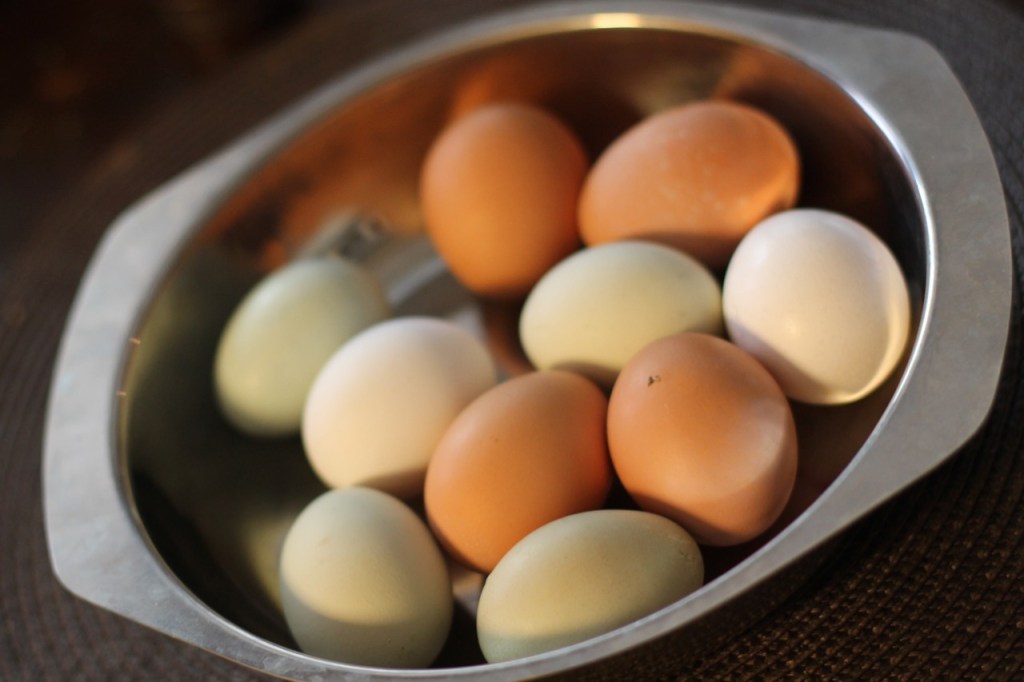
  • 5 large eggs, whisked
  • 1 Tbsp dried oregano
  • a handful of fresh basil leaves
  • 2/3 cup freshly graded Parmesan cheese
  • salt and black pepper to taste
  • 2 Tbsp butter

Directions

Put the olive oil and the onion in a large pan. Cook on low heat covered (a notch up from simmer) until the onion wilts and becomes greatly diminished in bulk for about 40 minutes. Then uncover and continue cooking until the onion gets a nice golden brown color. I turn the heat a notch up here. (This is going to be a lengthy process but it is an important part of the dish).

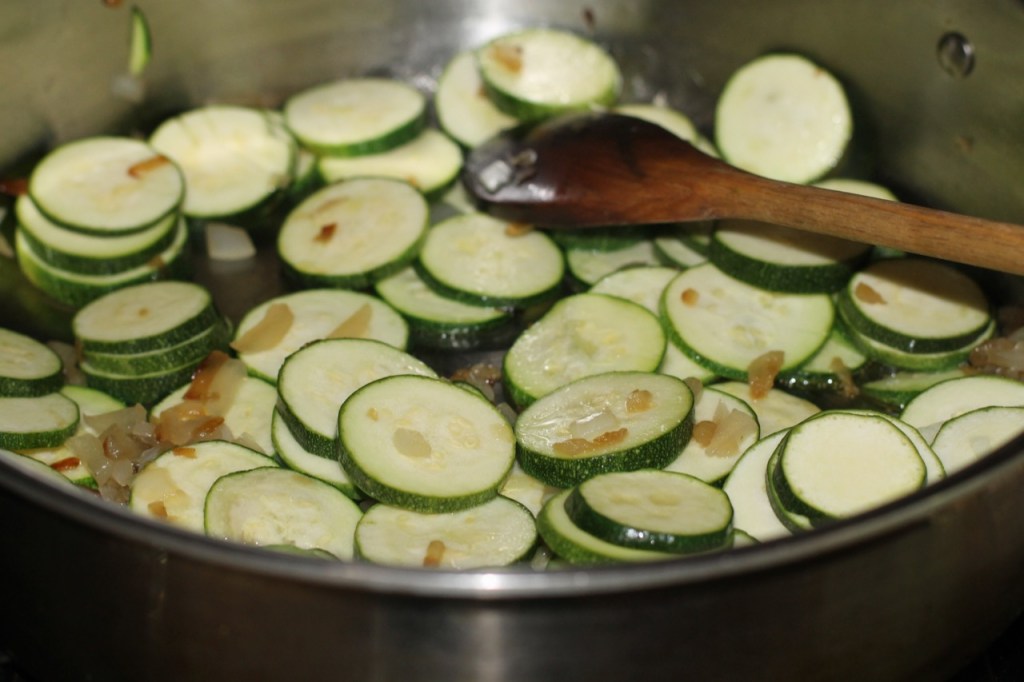
Meanwhile, prepare the zucchini. Scrub and wash off any dirt. Cut off both ends. Slice them thin.

When the onion is nice and golden brown, add salt and the sliced zucchini. You can put the chopped bacon in here if you plan on using it. Turn heat up, and continue cooking on medium high heat until everything is softened and have a light nut brown color. Stir frequently.

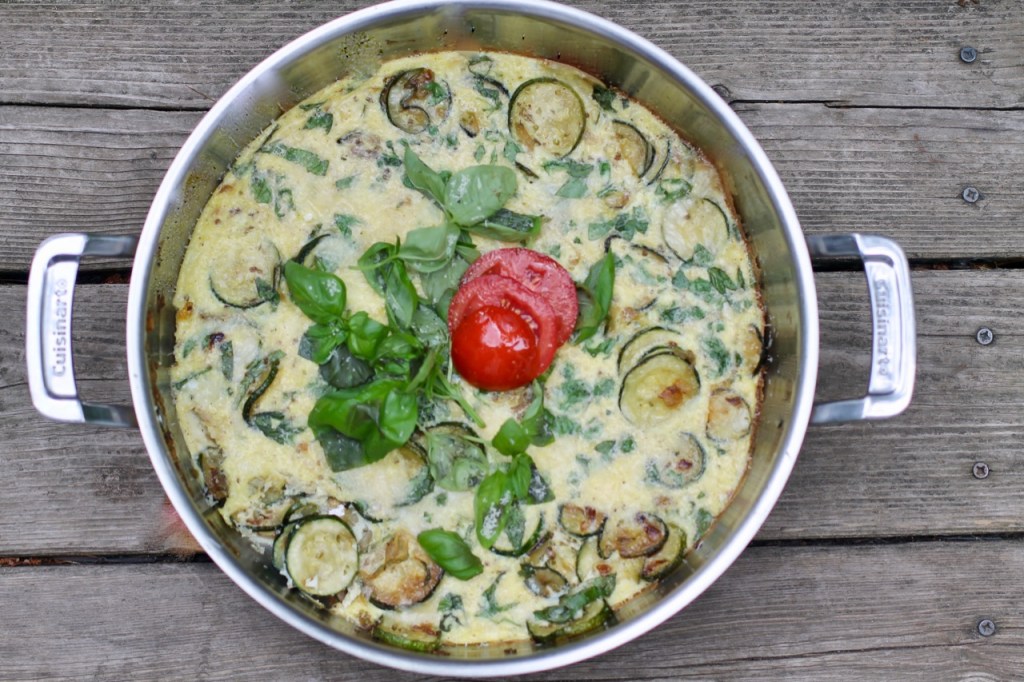
Making the frittata. Add the butter and cook for 5 minutes on medium high heat. Add the whisked eggs, torn-up basil and the cheese. Cook carefully until the eggs have set and thickened and the bottom has a light brown color (not burnt) and only the top is runny. Turn the broiler on. I use the broiler with low heat for 3 minutes.

Add fresh cracked pepper to taste.

I served it with pesto and tomato salad.

Serve warm.

enjoy!

Source

Photo, text by twincitiesherbs.com.

Hot and sour tofu with rhubarb

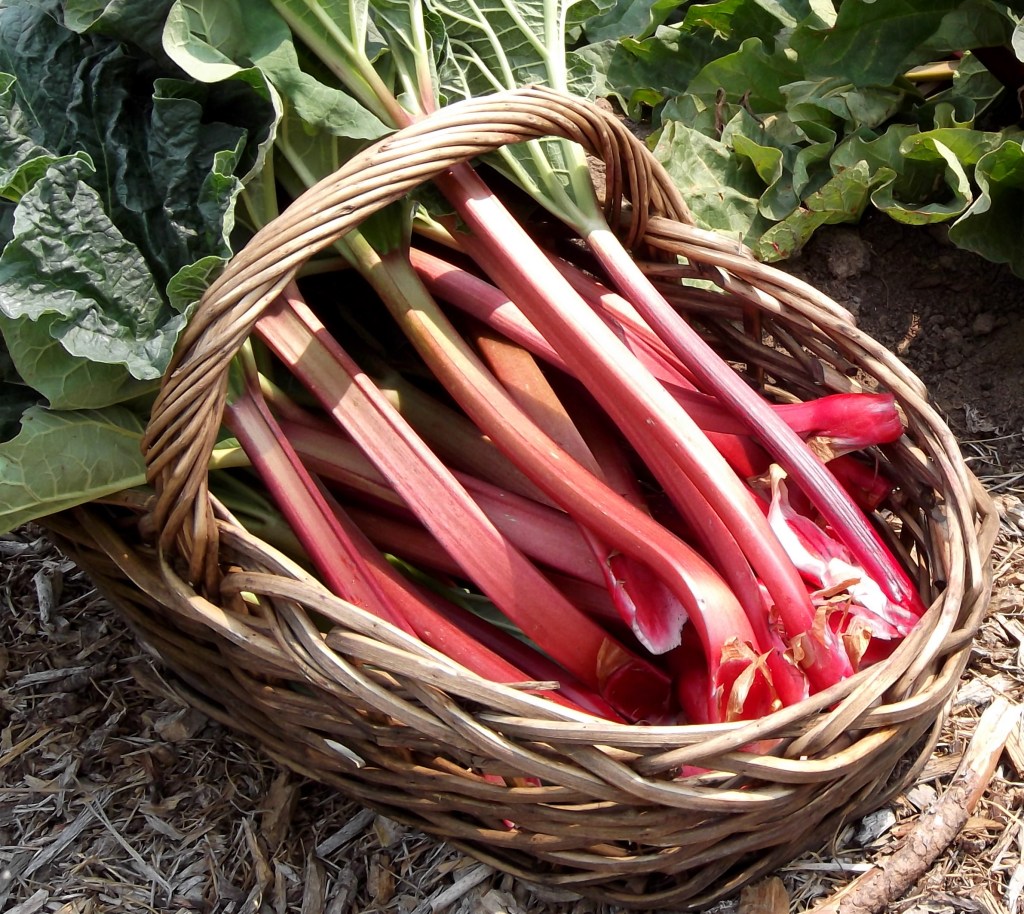
In the United States and Europe, rhubarb is known as the pie plant and in fact we tend to use it in sweet dishes. However, in Asia, it is more used in savory dishes. Today, I’m presenting a savory dish that was inspired by the following blogs: ( blog 1 and blog 2). The rhubarb gives the sour taste that is balanced out nicely with the sweet and hot Chinese sauce and the bitter bamboo shoots. I chose broccoli as the main vegetable for the dish. Traditionally, pork is used but is replaced here with the tofu. In the original recipe, the raw rhubarb is blended in the sauce but I made it more traditionally sautéed like the rest of the vegetables.

For the meat version of this dish, please, see this recipe.

Recipe


Serves: 4 people  

Ingredients

  • 500 g tofu
  • 2 tsp + 3 Tbsp honey (or replace with agaste sauce for a vegan option)
  • 1/4 tsp five spice
  • chili flakes to taste
  • Sesame oil
  • 3 Tbsp sake
  • 3 Tbsp rice wine
  • 3 Tbsp graded ginger
  • 3 Tbsp soy sauce
  • 5 large cloves garlic
  • 200 g of rhubarb stalks (about 3 smaller or 2 bigger stalks)
  • 2 large heads of broccoli
  • 1 large onion, thinly sliced
  • 1 can (8 oz / 225 g) of bamboo shoots, drained
  • handful of peanuts, chopped
  • 4 scallions, chopped
  • lime
  • cilantro
  • rice or rice noodles

Ingredients listed as used in groups

Rice or rice noodles

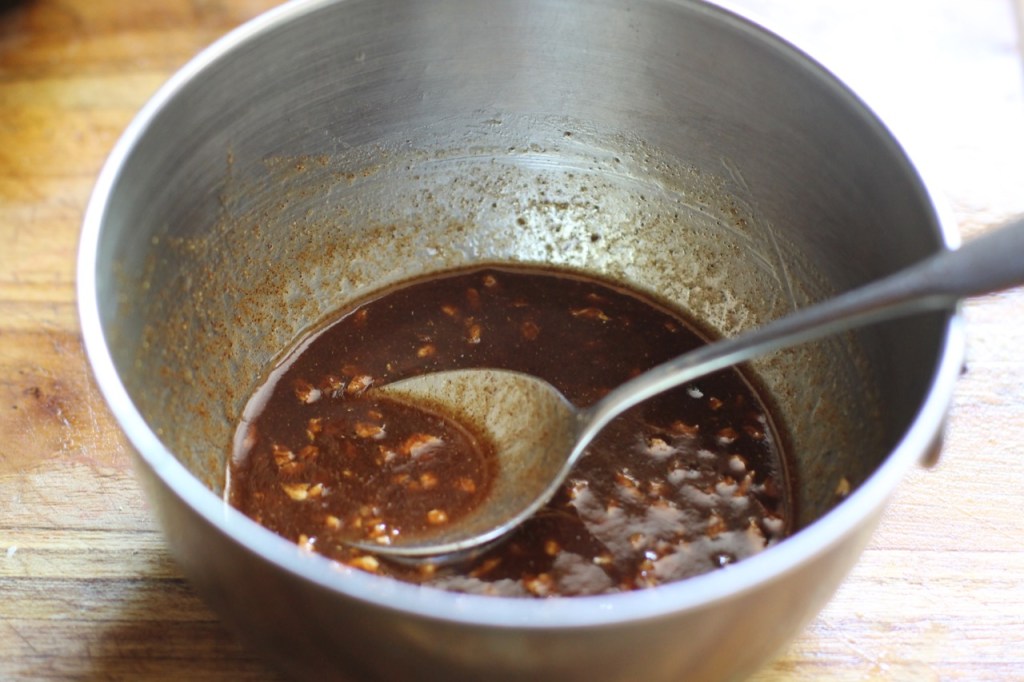
Marinade/tofu: 2 tsp honey, 1/4 tsp five spice powder, 1/4 tsp red chili pepper flakes (optional), 1 Tbsp sesame oil, 3 Tbsp rice vinegar, 3 Tbsp sake, 1 Tbsp soy sauce, 500 g tofu.

The sauce: 5 cloves garlic, 3 Tbsp honey, 3 Tbsp soy sauce, 1 Tbsp ginger, 1/2 tsp red chili flakes (or to taste).

Vegetables: 200 g (3 medium sized) rhubarb stalks, 1 large onion, 2 heads of broccoli, 1 can of bamboo shoots.

Toppings: handful of chopped peanuts, 4 scallions, small handful coriander, soy sauce and limes.


Directions

  • The rice.  Make the rice of your choice. I used sushi rice.
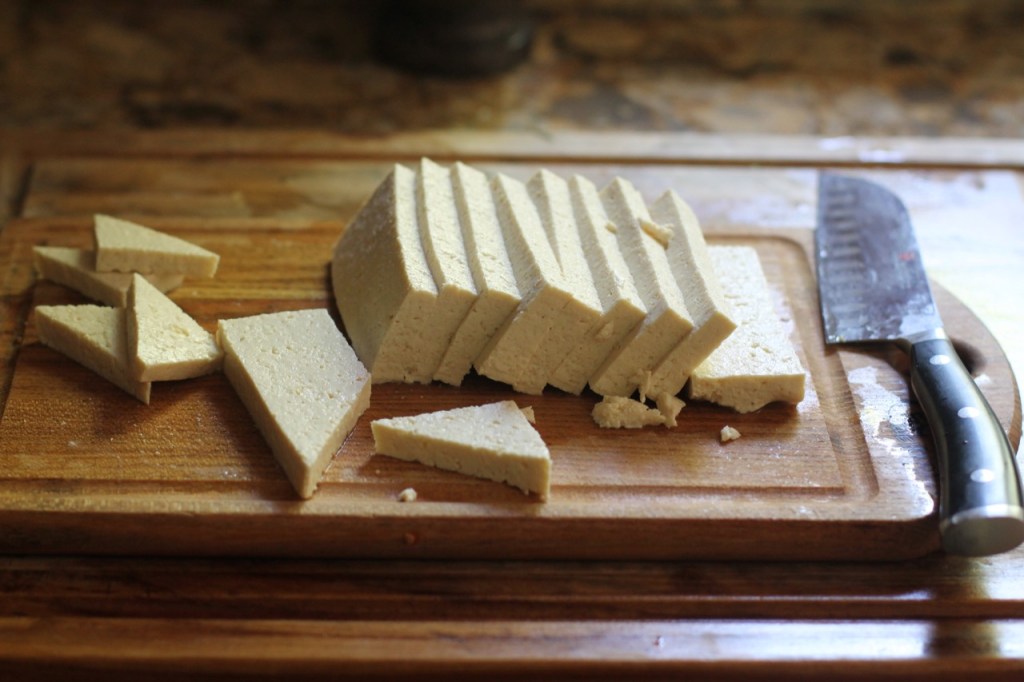
  • Cut up the tofu so it is about 1 cm / 1/2 inch thick. I made triangular shapes but rectangular or square shapes are fine too.
  • Mix the ingredients of the marinade in a small bowl and pour it all over the tofu. Cover and put it in the fridge for at least 1 hour.
  • Make the sauce. Put all the ingredients in a blender and mix to get a nice sauce. Set aside.
  • Take tofu/marinade out of the fridge and strain off marinade. Pat dry tofu with a towel. Sauté tofu slices in small amount of oil for about 5 minutes on each side. Cover and set aside.
  • Cut up the vegetables. Thinly slice the onions, cut up the broccoli flowers. Cut rhubarb diagonally in 2-3 inches length. If stalks are bigger, cut them in half first.
  • In a larger pan or wok, heat sesame oil, add rhubarb batons in a single layer and cook for about 1-2 minutes while stirring to make sure all sides cook well. Make sure you don’t over cook rhubarb, they should be firm and not mushy. Add 1 Tbsp sugar and cook for 1 minute. Take off heat and set aside.
  • On medium high heat, sauté the sliced onion for about 10 minutes until translucent. Add the broccoli and continue sautéing on medium high heat for about 5 minutes or until it is soft but still crunchy. Add the sauce made earlier. (Quickly whisk, then pour it into the pan). Add the rhubarb (that was set aside from earlier step) and the bamboo shoots and bring to a boil, reduce the heat and simmer for three or four minutes. Add the tofu and toss and coat well and cook until the tofu is warm.
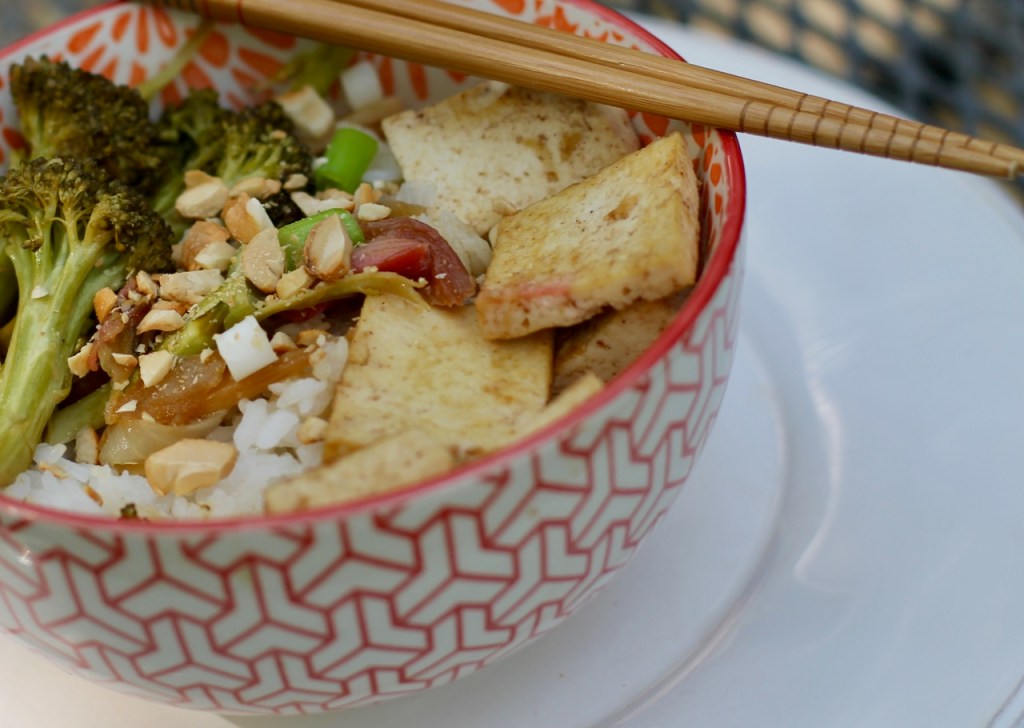
  • Serve on rice with chopped cashew nuts, chopped scallions, cilantro, lime wedges and soy sauce.

enjoy!

Sources

http://www.mostlyeating.com/ tofu with hot and sour sauce

https://wordpress.com/read/blogs/35104325/posts/55143

Photo, recipe and text by twincitiesherbs.com.

Italian spinach/mushroom lasagna (vegetarian)

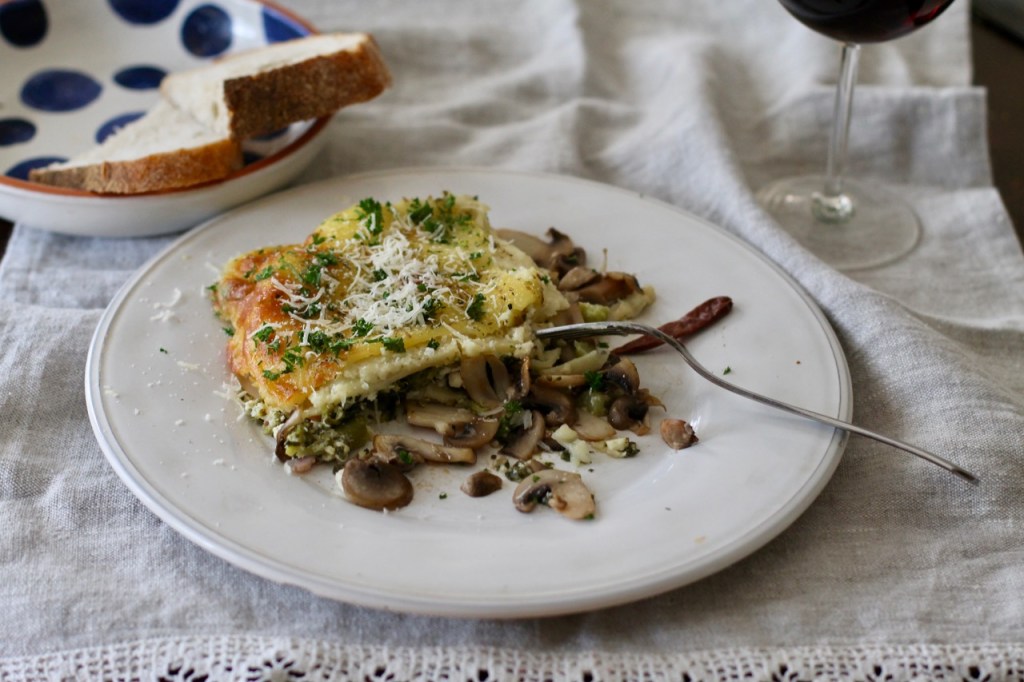
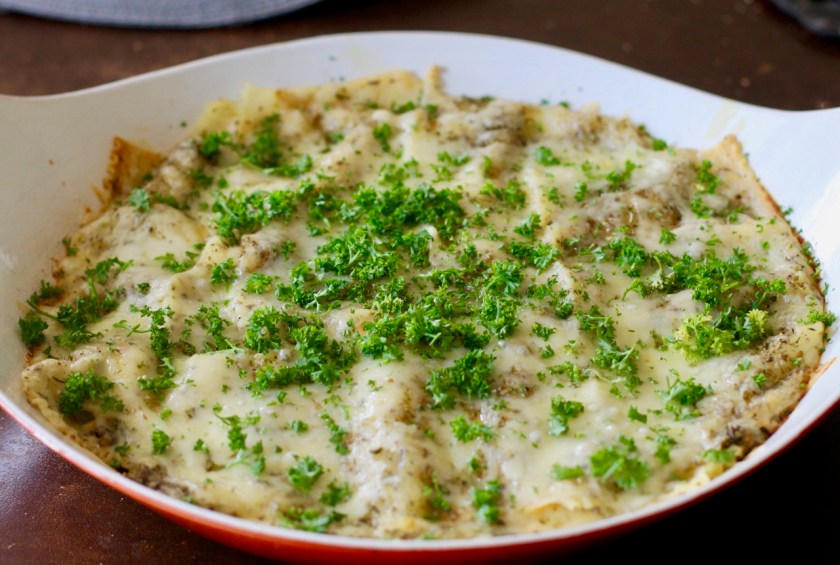
I have been making lasagna recently quite a bit. It is not too hot outside yet so I can turn the oven on but we want something on the lighter side too … so this dish seems to fit the bill. Of course, you can make it any time of the year. Lasagna is an Italian specialty. Traditionally, it is made with layers of tomato sauce based ragu, cheese and béchamel sauce. In this dish, I replaced the meat with spinach, mushrooms and cheese. I served it with red wine that seemed to compliment it very nicely.

Spinach is a great vegetable for the spring, it is hardy and nourishing for the liver.

Of course, an important part of the lasagna is the pasta. The best is if it is home made but good, high quality packaged pasta will do too.

Also, the cheese is also important. Try to get the best quality you can afford. Honestly, when I was in Italy, the first thing that I noticed was how tasty the cheese was in their dishes. I like to use a mixture of cheeses, here I used fresh mozzarella cheese balls, feta cheese and Parmesan cheese.

I make my own Italian seasoning but of course any store bought mix would work too. I think this is a nicely balanced mixture of spices grown in Italy. They are carefully selected herbs so one herb will not overpower the other. Also, they all are carminative therefore will help with digestion. Historically, we can thank the ancient Greek doctors who added these herbs to dishes so people can get their benefits all year along.

The warming, aromatic oregano is the key ingredient in pasta dishes. I like to use it because it gives a nice, distinctive flavor to Italian dishes. The sweet fennel seeds are acrid and compliment the strong aromatic oregano in the dish. The delicate basil is probably the most loved and popular spice used in Italian cooking. If you can, try to use the fresh plant instead of the dried. Its aromatic flavor is a nice addition to any Italian dish. The pungent chili pepper is not a big part of the Italian cuisine but Italians enjoy adding a little to their pasta dishes. The oregano and the fennel seeds both can offset the heat of some stronger spices.

Italian seasoning

2 TBSP (6 tsp) dried oregano

1 tsp dried basil or handful of fresh basil

2 tsp ground fennel seeds

1/8 tsp black pepper

1/4-1/2 tsp hot red pepper or to taste (optional)

RECIPE

Serves 6-8 people

Ingredients

  • lasagna pasta (I used 10 strips)
  • 10 oz spinach (frozen is fine too)
  • 4 oz chopped up mushrooms
  • olive oil
  • 2 slices of bacon, sautéed (optional)
  • 1 cup of tomato sauce – divided
  • 8 oz of Parmesan cheese, divided
  • 16 oz fresh mozzarella balls
  • 8 oz (200 g) of feta cheese
  • 1 Tbsp of Italian seasoning plus more for the top
  • handful of fresh basil leaves (if you have them)
  • 3 cloves of garlic
  • 1 egg, lightly beaten

Bachamel sauce ingredients

  • 5 Tbsp of butter
  • 1/2 cup of flour
  • 2 cups of milk
  • salt and pepper to taste
  • 1/8 tsp freshly grated nutmeg
  • 1 egg

  • Rosso Piceno wine. Bottled by Saladini Pilastri 2018 (optional) It is the best and not expensive!
  • parsley leaves (chopped)

Directions

Start boiling the water for the pasta (omit if your pasta does not need to be boiled).

Preheat the oven to 400 F and have the rack in the middle of the oven.

Start boiling the water for the pasta. Prepare according to instructions.

Making the filling: In a pan, sauté bacon (optional) and mushrooms in a little oil for 5- 10 minutes. Transfer into a larger bowl. Meanwhile wash and take stems off the spinach. (If using frozen spinach of course no need to do it). Sauté in a little oil and water. Remove and try to drain off water. Chop spinach well and transfer into the bowl. Add mashed feta cheese, mushrooms, 1 egg, garlic, 1 Tbsp of the Italian seasoning (see recipe above). Add sautéd bacon if used. Mix. set aside.

Preparing the béchamel sauce. It is not too hard, just follow these steps. I used a whisk. Use a double boiler. In the top pot, warm up 5 Tbsp of butter on low heat, when melted increase the heat to medium high and add the flour slowly, stirring continuously. Then start adding the milk very slowly, stirring after each addition and wait for a minute to let the flour mixture soak up the milk. When you start seeing bubbles, it is done. Remove it from the heat. Grate some nutmeg, add 1/2 cup of Parmesan cheese and 1 egg. Mix well.

Assembling the lasagna: Put half the tomato sauce on the bottom of a 3 Qt size baking dish. Place 1 layer of the pasta strips on the bottom of the pan. Put the filling on top of the pasta, followed by the fresh mozzarella balls (cut up if using the larger balls), pour the béchamel sauce and top it all with another layer of the pasta. Spread some pasta sauce and the shredded Parmesan cheese on the top.

Turn the oven heat down to 375 F and put the dish in the oven. Bake for 30 – 35 minutes or until the top is nice and golden brown.

Serve hot with a little grated Parmesan cheese and fresh parsley on the top. I really enjoyed a glass of red wine with the dish. It felt like I was in Italy! I would recommend a bottle of red wine if you are looking for one to try (please see details above in Ingredients).

enjoy!

Source

  • Matthew Wood: Earthwise
  • Paul Pitchford: Healing with Whole Foods

Photo, recipe, text by twincitiesherbs.com.

Chana masala (Indian chickpea dish)

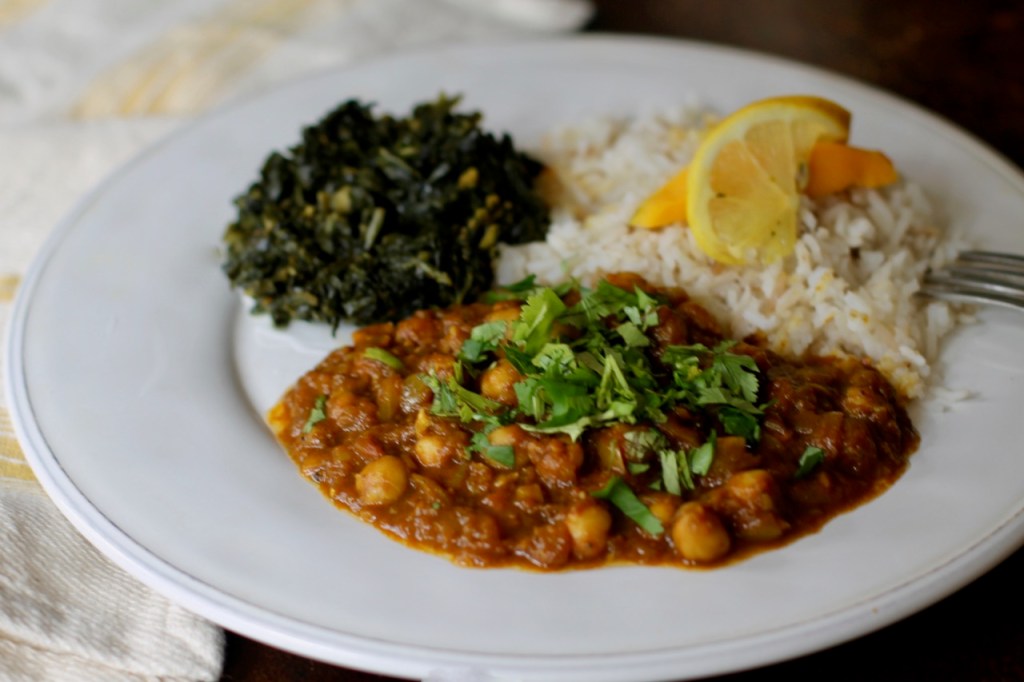
Chana masala is a delicious Indian dish that would be great for the spring. I still vividly remember the first time I had chana masala at a friend’s house. He had us over for dinner when his parents came to visit from India like 25 years ago. I did not even recognize the chickpeas … I actually thought they were chestnuts. I never got the recipe but his mother gave me some tips. (Thanks to the internet I found this recipe on line and I think it is very close to what we had that night).

Chana means garbanzo beans and is the main ingredient in the dish. The secrete to this dish is to prepare these beans properly. I remember our friend’s mother told me to cook the beans for a long time. They should be cooked for 3 hours or you can use a pressure cooker according to its instructions, of course. Cooking for this long will soften the beans and let the flavors come out. So if time is not an issue, I would recommend home cooked chickpeas instead of using the canned ones. The canned beans will not have the same results for sure.

Garam masala is the main spice in the dish. It is not just one spice but is actually a cleverly chosen mixture of a few spices: fennel seeds, star anise, mace, black cardamom. It is nicely balanced so one flavor will not overwhelm the dish. You can blend it yourself or you can just buy it. (I ended up buying it at the store).

This is a common dish that people in India make on a regular basis for lunch or dinner. It has an interesting flavor, taste and texture. It can be made less spicy, if you don’t like spicy dishes, just leave out the green chili. So chana masala is basically a chickpea curry cooked in an onion tomato sauce with the spices. I always wonder how poor people in India get by on very little money and still eat well. This dish might be one of their secrets …

RECIPE

-I doubled the recipe

serves 3-4 people

  • 1 cup of dried chickpeas or 1 (15oz) can
  • 3 cups of water

Ingredients for the tomato sauce

  • 2 Tbsp vegetable oil/ghee
  • 2 large onions, finally chopped
  • 2 garlic cloves, minced
  • 1 inch ginger piece, finally chopped
  • 2 medium tomatoes, chopped
  • 1/2-3/4 TBSP of red chili powder (adjust to taste)
  • 1/4 tsp turmeric powder
  • salt to taste

Ingredients for the chana masala gravy

  • 1 bay leaf
  • 1 inch cinnamon stick (If you double up the recipe, you will not need to add another cinnamon stick)
  • 2-3 clove pieces
  • 3 green cardamom pods without the shells.
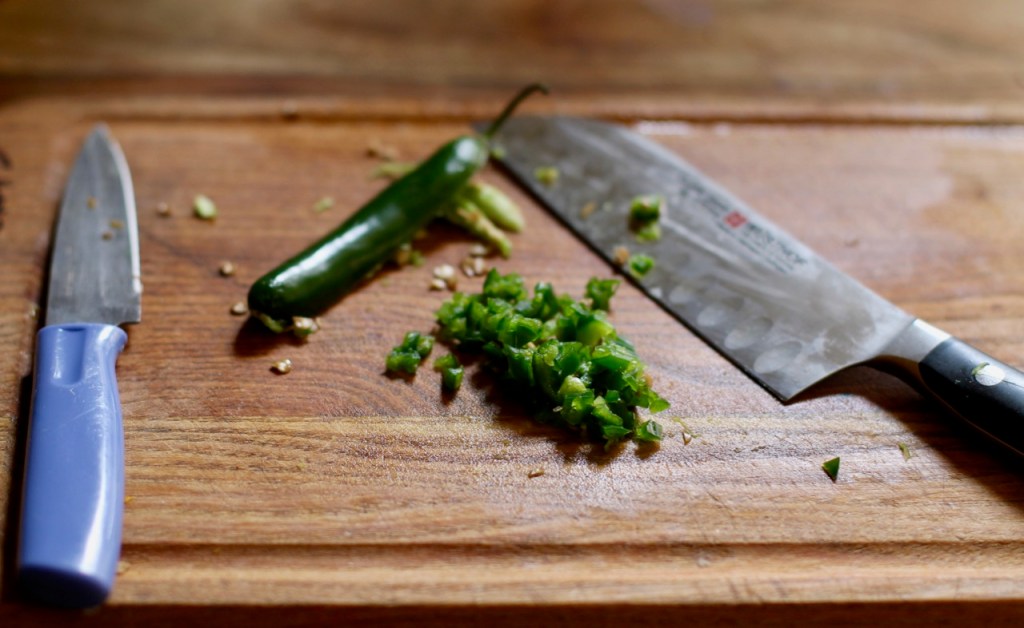
  • 1 green chili pepper, chopped (optional)
  • 1-1 1/2 tsp garam masala
  • 1 1/2 tsp coriander powder
  • 2 pinch mango powder (amchur) (optional)
  • fenugreek leaves (optional)
  • coriander leaves

Directions

Clean and soak the chickpeas for at least 8 hours. Pour off soaking liquid. Add fresh cold water and cook for 3 hours. Less for pressure cooker. Save cooking liquid. Omit if using canned beans.

Directions for the tomato sauce

  • Sauté the onions in oil or ghee until golden. Add the chopped ginger for 1 minute, stir.
  • Add red chili powder and turmeric. Stir for 1 minute. Add garlic quickly, stir.
  • Quickly add chopped tomatoes and little salt, stir. Cook for 15-20 minutes or until there is a nice sauce. The onions should not taste raw.
  • Let this mixture cool. Add 1 tbsp liquid from the beans. Make a thick gravy with a blender. Set aside.

Directions for the Chana masala gravy

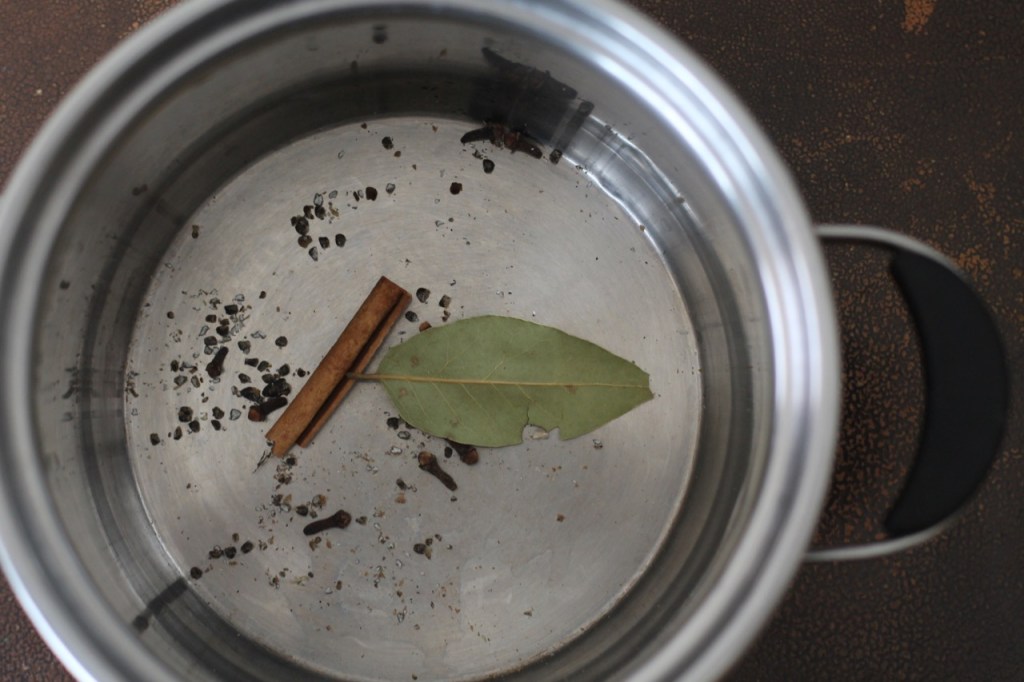
  • Dry heat the spices (cinnamon stick, bay leaf, cardamom, clove) in a pot for 1 minute until you can smell the aroma of the spices. Stir. I grind the cardamom as some people don’t like them in their foods whole.
  • Pour the blended tomato sauce mixture from the previous step back into the pot, the chopped green chili pepper, coriander and garam masala powders and the spices.
  • Mix and cook for a few minutes until ingredients are mixed nicely.
  • Add the cooked chickpeas and the cooking water. You might have to add more water.
  • Bring to a boil and simmer for 5-6 minutes.
  • Taste the mixture and see if you need more garam masala. Boil and simmer for 2 more minutes if spices were added.
  • Take out the larger spices like bay leaves, cinnamon, cloves.
  • I also added salt here.
  • Keep it covered until served.
  • Serve hot with cilantro, yogurt, lemon, rice, vegetables and roti.

enjoy!

Source

https://www.indianhealthyrecipes.com/chana-masala/

White black bean chili soup

-can be vegetarian

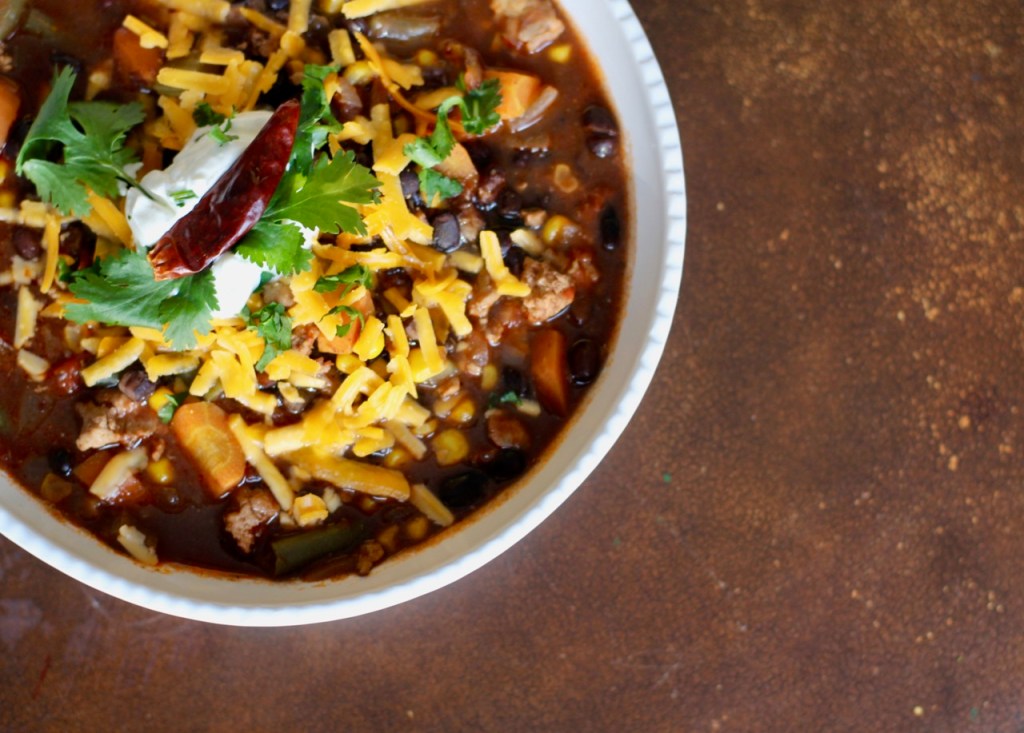
This tasty soup is a fun twist to the regular chili soup. The difference is that the beef is replaced with turkey or chicken and the chili beans are replaced with white or black beans but otherwise it is very similar to the well known beef chili soup. Of course, you can add all your favorite ingredients that you would otherwise add to a chili soup.

The biggest change in the recipe is the meat. Many people prefer the lighter turkey or chicken meat. The chicken or turkey is very nice here, the thigh gives more flavor and is cheaper but the breast would work well too.

Perhaps it would be more accurate to call this soup black and white chili soup. The white makes sense with the white meat but I used black beans instead of white beans because I think it has more flavor. Of course, you can use either.

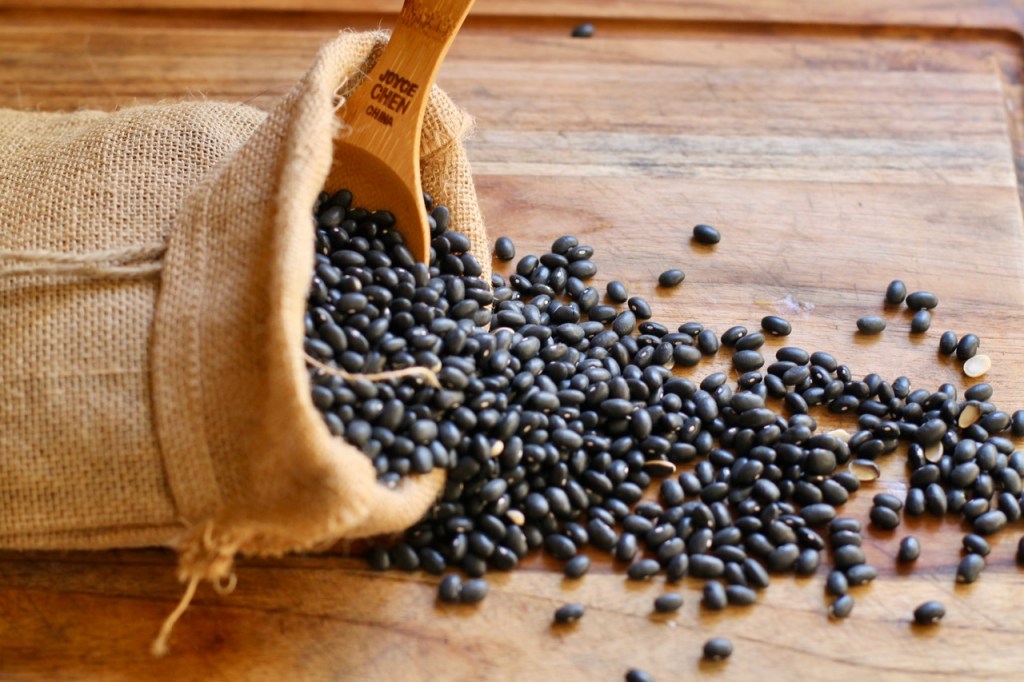
I decided to post this recipe now because beans especially black beans are great in the winter. The warming black beans have a sweet flavor and nourish the kidneys. It also improves digestion and is great for overall health. It is native to the Americas and have been used for thousands of years. No wonder the natives ate it with almost every meal.

I like to make my own chili spice, please follow the recipe below or buy it in a store ready made.

You can experiment with the vegetables of course, I added corn, carrots and green beans. In the summer, I like to add zucchini too. But please feel free to add whatever you would like.

Vegetarian readers might be wondering if this soup could be made vegetarian. The answer is yes! – you can take out the meat and just use vegetarian stock and I also added eggs. I have made it without meat, it is tasty.

Surprise your guests at a party or just treat yourself. Honestly, we believe that this version is even tastier than the original soup.

RECIPE

Ingredients

  • 1 large onion
  • vegetable oil
  • 2 celery stalks, chopped
  • 3 medium sized carrots, sliced
  • 2 strips of bacon (optional)
  • 1 lb ground chicken or turkey thigh or breast
  • 2 large tomatoes or 29 oz canned chopped tomatoes
  • 5 tsp of chili seasoning (please see recipe below)
  • 2 garlic cloves
  • 8 cups chicken stock
  • 4 oz corn (frozen)
  • 8 oz vegetables. I used green beans. Also zucchini would be fine
  • 2 cups of uncooked black beans or 28 oz of canned beans
  • 1 jalapeño pepper, chopped
  • salt and pepper to taste
  • yellow cheddar cheese
  • chips
  • sour cream
  • cilantro

Chili seasoning ingredients

  • 1 Tbsp (3 tsp) chili powder
  • 2 tsp cumin powder
  • 1 tsp oregano
  • 1 tsp smoked paprika
  • 1 tsp coriander powder
  • 1/4 tsp cayenne pepper (optional)

Preparation

  • Wash and soak beans in cold water for 8 hours or overnight. Pour off the liquid and wash well. Add cold filtered water and cook for 2 hours or until soft but not falling apart. Omit if using canned beans. The home-made beans are well worth the extra effort though, they taste so much better.
  • Make the stock. Omit if using ready made stock.
  • Heat oil in a large pot with a large surface area. Sauté the chopped onion for 5 minutes. Mix. Add the celery. Sauté for 10 more minutes.
  • Render the bacon.
  • Add the chili seasoning and the crushed garlic cloves for 1 minute. Stir.
  • Quickly add the tomatoes, stir. Cook for about 10 minutes or until the tomatoes make a nice sauce.
  • Add the carrots, vegetables and jalapeño pepper. Add enough stock so the liquid covers the soup well. Cook for 1 hour or until the carrots are soft.
  • Add the black beans with its liquid and more stock if needed to cover everything.
  • Season with salt and pepper to taste.
  • Serve hot with sour cream, chips, cilantro.

enjoy!

Text and photo by Twinctiesherbs.

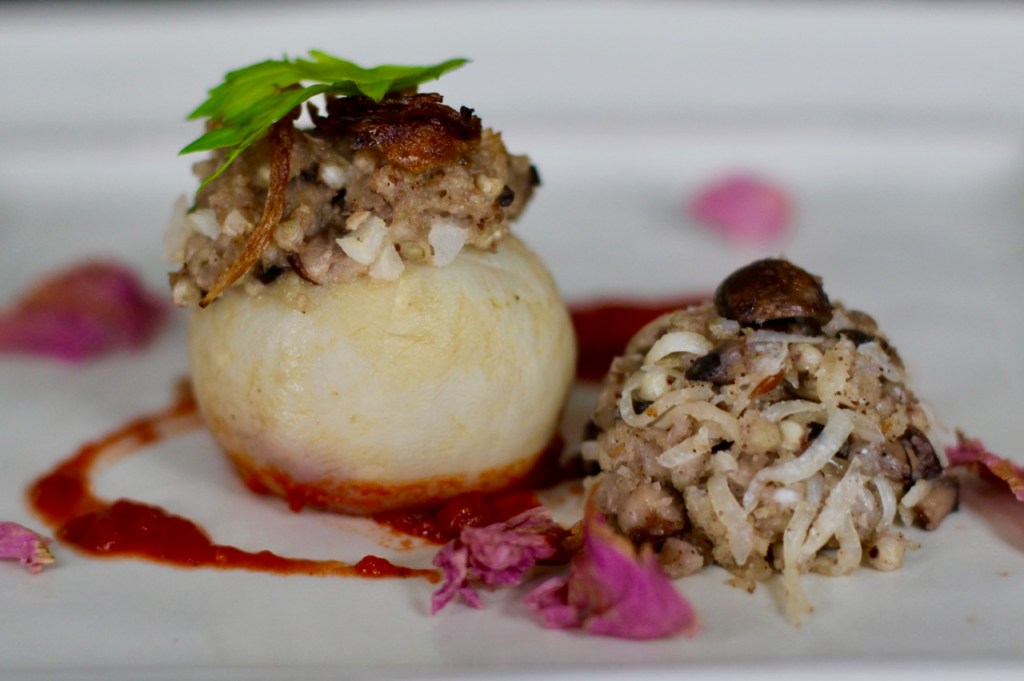
Stuffed turnip (Фаршированная репа)

Happy New Year, Everyone!

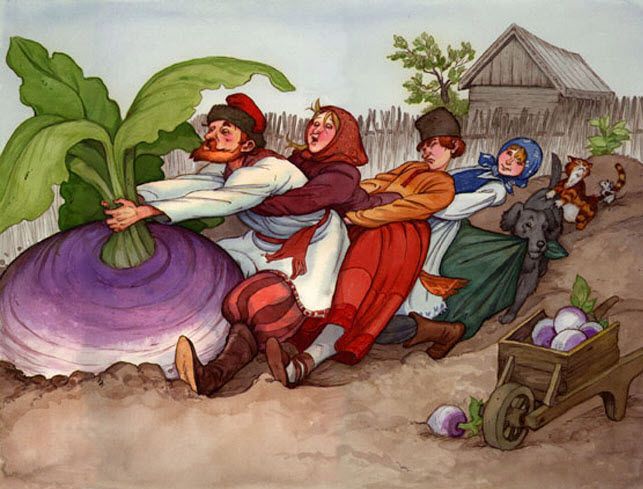
Hope you all had a lovely Holiday and got to eat lots of delicious food. Now I feel that it would be nice to eat something refreshing, more cleansing though … and turnip is a tasty vegetable that could be used. I always think of the Russian folk tale, The Giant Turnip when I hear the name, turnip. In fact, turnip is an important staple in the Northern countries like Russia. So let’s go to Russia and get their famous recipe for stuffed turnip.

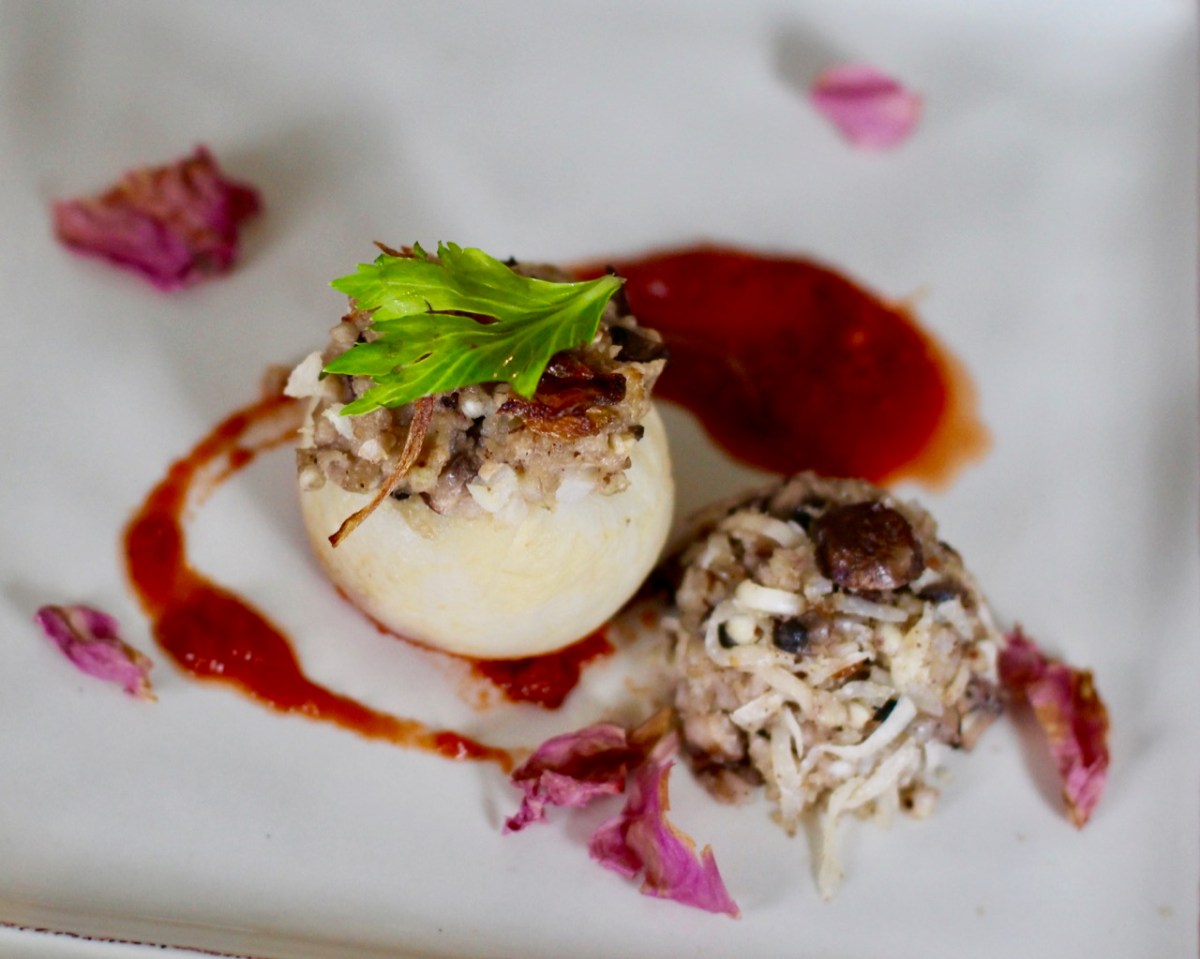
This is a very simple dish at its best. The main ingredients are the nutty buckwheat, the earthy mushrooms and the pungent turnips that mainly create this special dish. There are no exotic ingredients or spices. Honestly, I only used thyme, salt and pepper to flavor.

I got this recipe from a website called http://www.Russianrecipebook.com but I made some minor changes. I cooked the buckwheat in stock instead of just water. In addition, when cooking, you need to be careful with the turnips as they cook fast. They need to be boiled for only about 10-12 minutes to get the right consistency. Otherwise, it is a very easy and quick recipe. This dish is more like the everyday people’s food.

Wonder if we had cooked tasty dishes like this in my Russian classes, I would speak Russian now …

Turnips have been used in folk medicine for thousands of years. A cold climate loving vegetable, it is native to Northern Europe and is still popular today. Turnips have many beneficial properties. They are great source of vitamins, minerals, anti-oxidants and fiber and may be used among others for indigestion, detoxification, diabetes, jaundice. In Chinese Medicine, they have a neutral thermal nature and have pungent, sweet and bitter flavor at the same time. They are considered to be useful for their dispersing abilities in lung ailments; however, this quality is only available in its raw form. They are also used for improving circulation and remove damp conditions in the body. The green top is also valuable.

RECIPE

Serves about 2-4 people. – I cooked 1 cup of raw buckwheat to have some on the side (adjust other ingredients accordingly).

Ingredients

  • 4 smaller-sized turnips or less if bigger
  • 8 oz fresh mushrooms, chopped (I used crimini)
  • 1/4 cup uncooked buckwheat (1/2 cup of cooked buckwheat)
  • 1/2 cup of bone or vegetable broth or water
  • 1/8 cup shallots or half of a small onion, finely chopped
  • 2 tablespoons chopped parsley 
  • 1/4 cup grated cheese (mozzarella, provolone, cheddar, or Parmesan for extra flavor)
  • 3 tablespoons bread crumbs
  • Salt and pepper to taste
  • Vegetable oil and/or butter
  • 1 tsp fresh or 1/2 tsp dried thyme (optional)

Directions

Preparing the buckwheat

  • Clean buckwheat kernels and soak for a couple hours.
  • In a medium sized pot, start boiling the stock or water. Add the buckwheat to the boiling liquid and cook for about 10 – 15 minutes or until they are soft but not mushy. Add salt and pepper to taste. Set aide.

Preparing the turnips

  • Clean well and peel the turnips. Boil them for about 10 – 12 minutes or until they are just soft enough to scoop out the insides. The bigger ones will take more time. This is the most difficult part of the recipe. You really need to keep an eye on those turnips, they should be slightly cooked. Try not to overcook them. When done, take out turnips and let them cool. You can put them in cold water.
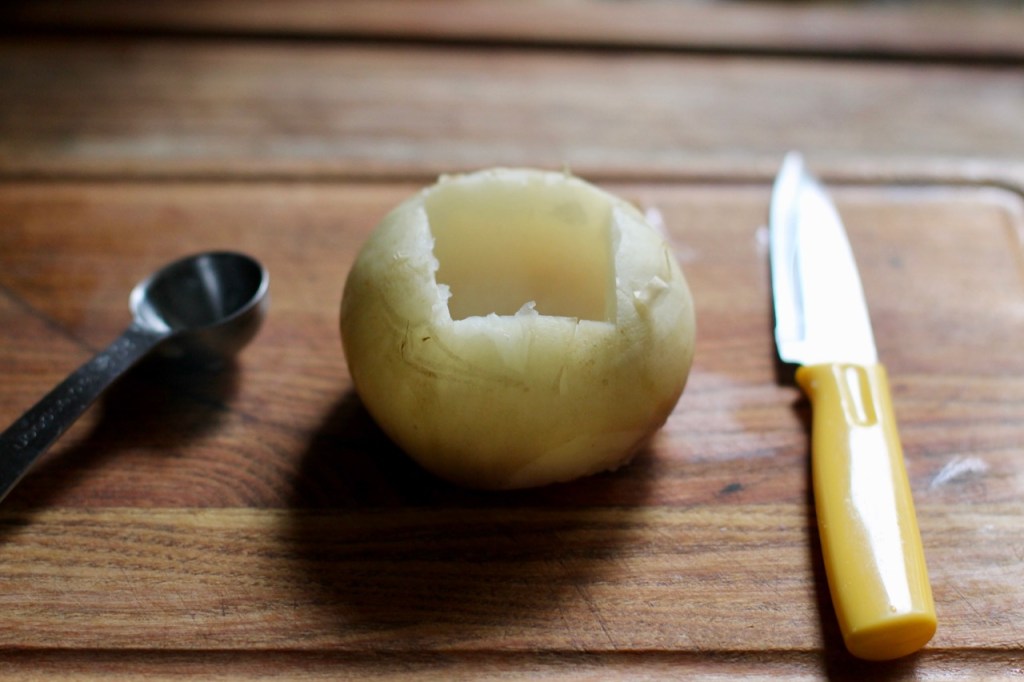
  • Cut off enough of the bottoms to create a flat surface that will allow them to stand upright on a baking sheet. Save the cut portion. With a spoon and/or a small knife, scoop some of the flesh out of the top end to form a cup. Save the scooped flesh as well, they are so tasty. (You can scoop the inside of the turnip out with a watermelon scooper or a measuring spoon).

Preparing the stuffing.

  • Sautee the onions or shallots in some oil for about 5 minutes. Meanwhile thoroughly clean the mushrooms and chop them up. Add them to the onions and continue to sauté them for about 10 more minutes or longer for some wild mushrooms and then let them cool.
  • Add the cooked buckwheat, bread crumbs, grated cheese and the saved chopped turnip pieces. Mix well. I would like to invite you to take a bite of the stuffing, try to see if you like how it turned out.

Stuffing the turnips

  • Preheat oven to 375°F.
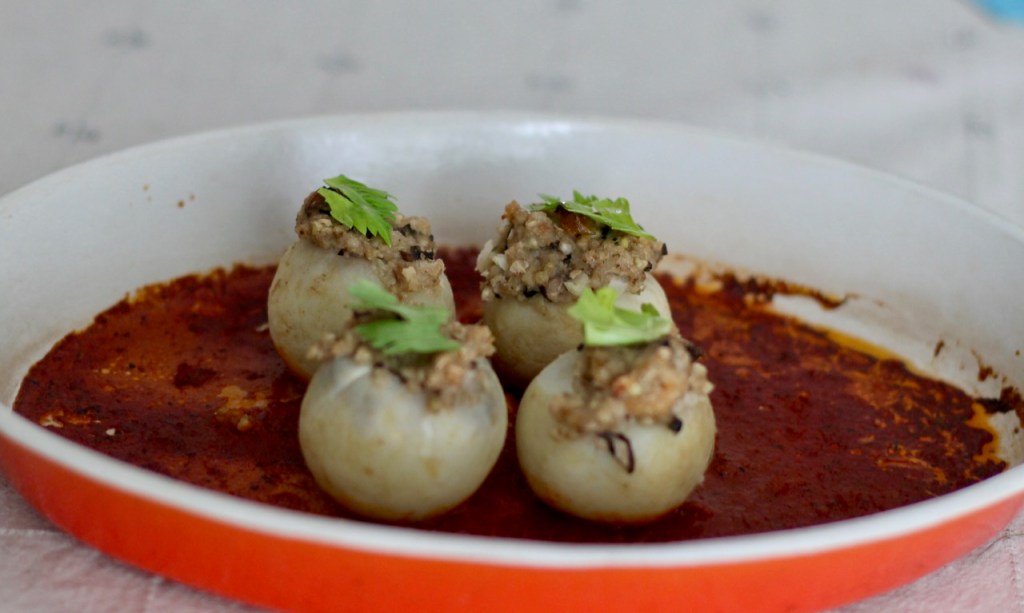
  • On a well-greased baking sheet, arrange the turnips in an upright position with the scooped-out wider portions facing up (like cups). (I used tomato sauce for the bottom of the pan). Fill the turnips with stuffing. Ideally the stuffing should be above the surface of the turnips, although this will depend on the size of the turnips, and the amount of stuffing.
  • Put a small piece of butter on top of each turnip and bake in the pre-heated oven for about 20 minutes, until the turnips are heated through and crusty on top. The turnips should not be raw but nicely baked. If it is still raw, just bake it a little longer.

Mushroom sauce recipe

Ingredients

  • 4 ounces of mushrooms
  • 1 tsp fresh thyme or 1/2 tsp dried thyme
  • 3/4 tsp dried sage or 2 fresh leaves
  • 1/4 tsp of dried rosemary crushed or 1 fresh spring
  • 1 Tbsp oil
  • 1 cup of stock
  • 1/4 cup of creme

Directions

  • While the stuffed turnip is baking, prepare the mushroom sauce. In a saucepan, warm oil over medium heat, add rosemary for 1 minute. Add mushrooms and cook until they release their liquid and mushrooms are well browned. Stir frequently. Add thyme, sage and let cook for one minute. Add stock, stir, and let simmer for 10 minutes and reduce heat to low.
  • Transfer half of gravy to a blender and puree until completely smooth. Add pureed mushrooms back into mushroom mixture and stir. See if you like the consistency. If not thick enough, puree a little more of the mixture.

Serve turnips hot, with sour cream and mushroom sauce. Decorate with parsley. I also made additional stuffing to serve on the side.

Enjoy!

Source

Photos and text by twincitiesherbs.com.

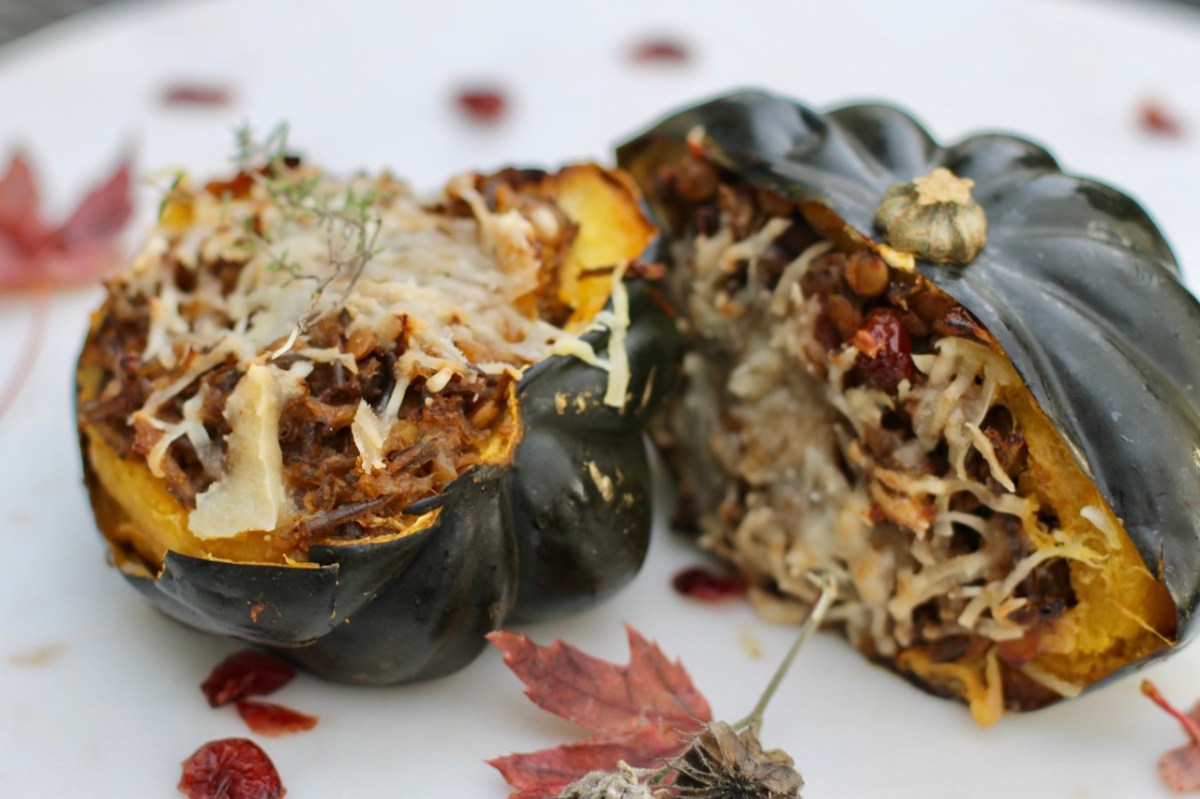
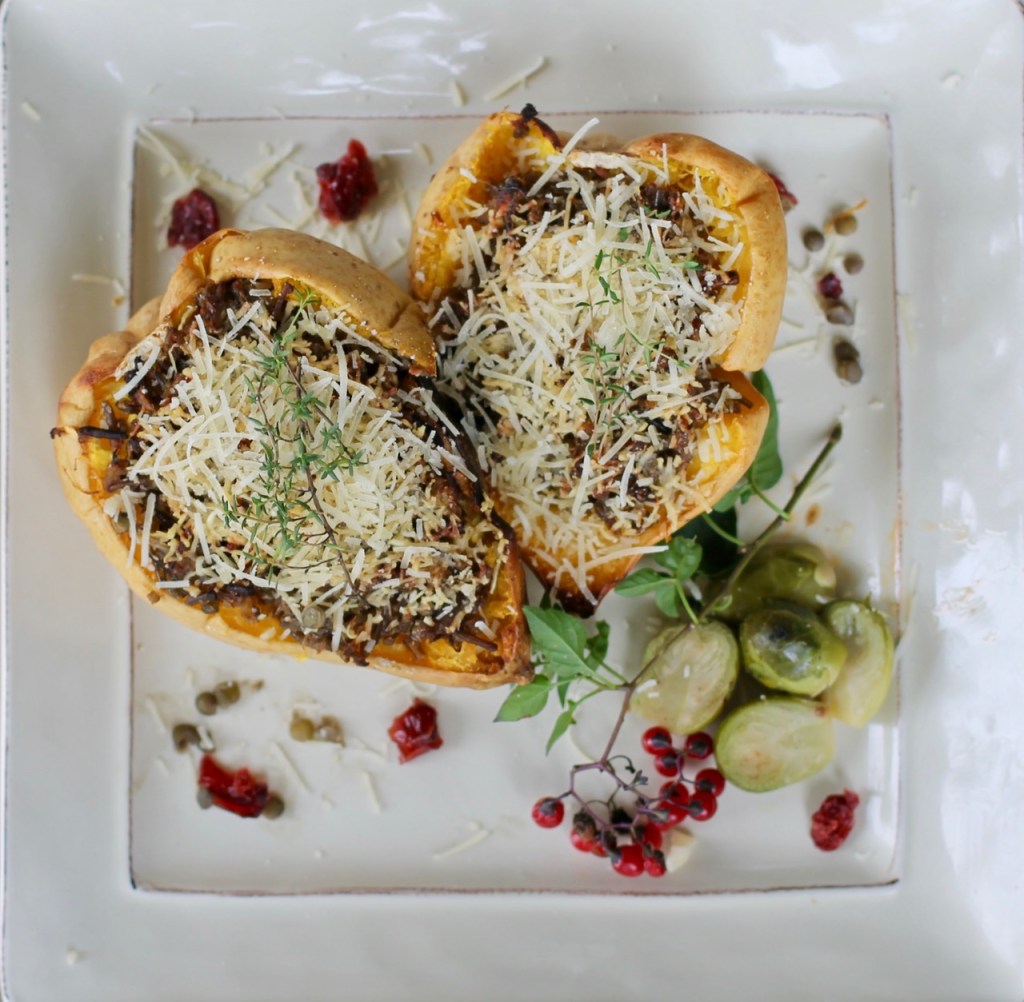
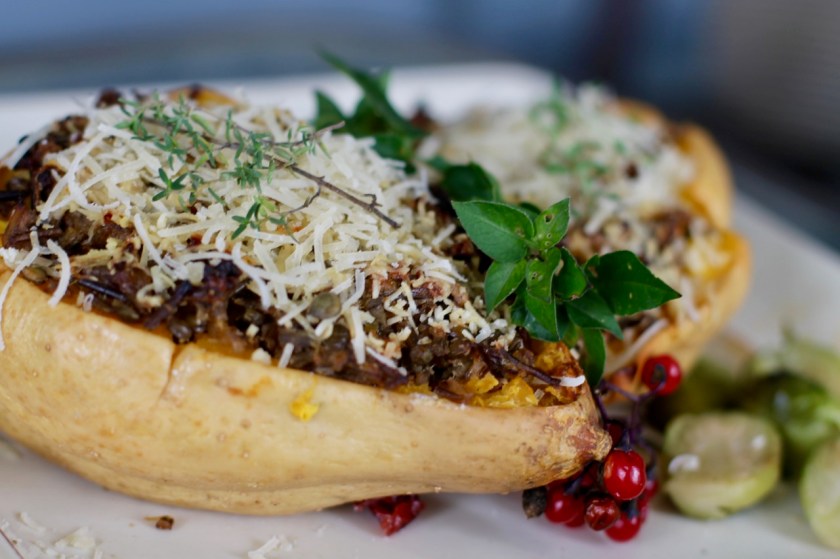
Stuffed squash with lentils, cranberries and wild rice (a Midwestern twist)

I love this savory dish … it has a lot of the foods that I enjoy eating in the fall. The tasty squash is filled with wild rice, lentils and cranberries and mixed with the melted cheese. It is wonderfully aromatic and tasty. Of course, I serve them with fall essentials, brussel sprouts.

Squash is one of the main foods in the fall. We are so lucky to have all these different varieties available in the US. They are sweet, soft, and have a neutral flavor that make them ideal to be stuffed.

Squashes are native to the Mexico region and may have been around for at least 10,000 years. Their flesh is usually used for cooking. They tend to be high in natural sugars, carbohydrates and vitamin A. In general, they all are mildly sweet, have a luscious nutty flavor and have a creamy texture. However, each variety comes with a unique characteristics and with different vitamin and mineral contents.

Ancient Chinese Medicine considers them to be highly nourishing and warming for the digestive system with anti-inflammatory properties.

If we talk about squash, we have to mention its seeds as they are equally valuable for health. They are rich in heart friendly dietary fiber, unsaturated fatty acids, and in addition, protein, minerals, and vitamins. They contain tryptophan that is responsible for increased motor decision speed and blood sugar regulating effect. The seeds are also used for remedying intestinal worm problems. They can be roasted in the oven on low heat at 250 F.

RECIPE

Serves 4 people

Ingredients

  • 2 medium sized squash – (Choose squash that has a firm outer shell with a scoop friendly inside like acorn, delicata, carnival, sweet dumpling).
  • 1 cup of uncooked wild rice (Wild harvested preferred).
  • 3 cups of stock (vegetable or chicken)
  • 1/3 cup of shallots, finally chopped
  • vegetable oil (sunflower)
  • handful of earthy mushrooms (crimini, shiitake, portabello)
  • 1 celery stalk
  • 1 slice bacon (optional)
  • couple of fresh thyme sprigs or 1 tsp dried thyme
  • 1/4 cup of uncooked lentils
  • 1/4 dried cranberries or raisins
  • 2 Tbsp of chopped pecans
  • 100 g or 4 oz of feta cheese
  • 1/2 cup of hard cheese like Gruyere or Parmesan cheese (more for the top)
  • salt and pepper to taste
  • crushed red hot pepper to taste
  • little freshly ground nutmeg

Preparation

  • Turn oven on to 375 F (190 C). Bake cleaned squash on a baking sheet for 40 – 60 minutes or until you can easily put the blade of a knife through the flesh of the squash. When done cut in half and scoop out the seeds. The seeds can be saved and roasted.
  • Clean and soak lentils for an hour. Place lentils in a medium pot, add 3 cups of water, thyme spring and bay leaves. Cook for about 45 – 60 minutes or until they are done, soft but not mushy. When done let it sit in its steam for 15 minutes. Add salt to taste.
  • Heat the oil on medium high heat. Sauté the shallots for 5 minutes. Then add the sliced bacon, sliced celery for -10 more minutes, stir frequently. Add 1 cup of wild rice, 3 cups of stock, sliced mushrooms, thyme and bring to a boil. Stir. Simmer over low heat with lid partially closed for a 35 – 55 minutes until the water is absorbed and the rice is fluffy and tender.
  • If using regular rice, cook rice separate, follow the cooking directions for the rice of your choice. Prepare the vegetables as written above. When ready combine.
  • In a bowl mix the lentils and the rice mixture. Add the feta crumbles and the hard graded cheese. Add the salt, pepper, hot red pepper and freshly graded nutmeg to taste. Mix. Also you can sprinkle salt, nutmeg and pepper inside the squash. Put the stuffing in the inside of the squash. Sprinkle the top with cheese and bake them in the oven for about 20 – 30 minutes or until the tops are golden brown.
  • Serve with other fall vegetables like brussel sprouts, beets, cranberry sauce etc.

enjoy!

Sources

Recipe, text and photo by twincitiesherb.com.

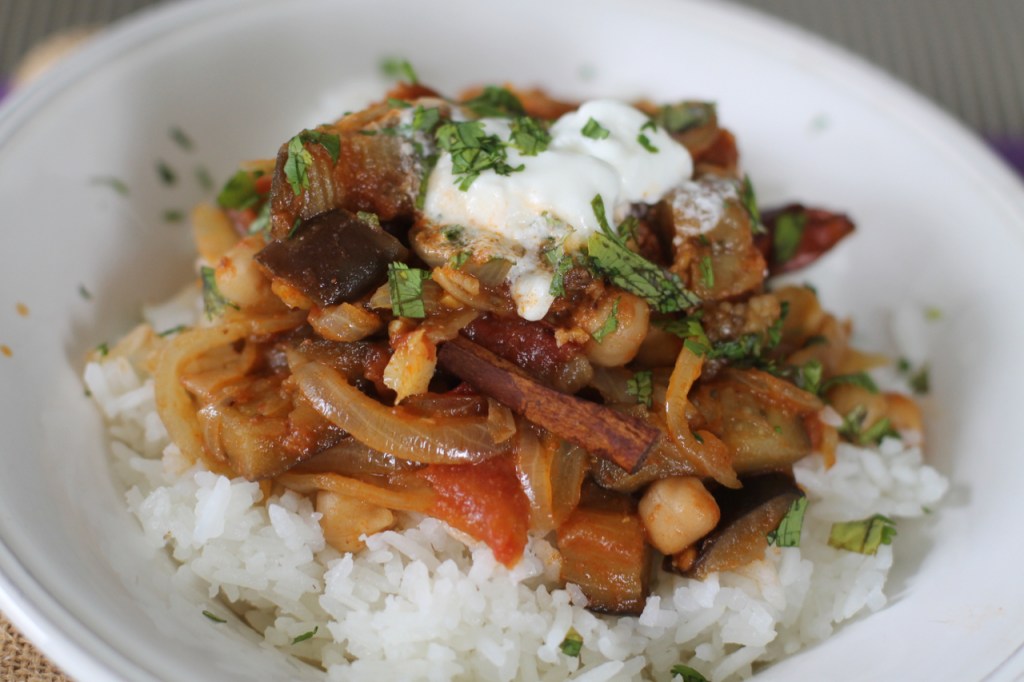
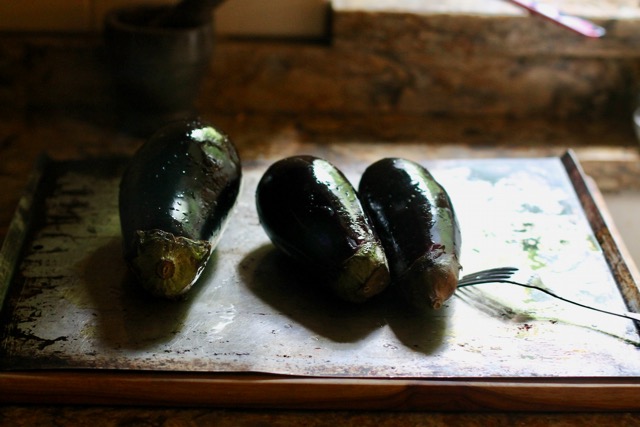
Moroccan eggplant stew with garbanzo beans

Enjoy this delicious and easy vegetarian eggplant dish. The eggplants are browned and cooked with some tomatoes, pungent spices, onions, and garbanzo beans. They can be served with rice or couscous and yogurt sauce. I also added sweet mama squash that complemented the dish nicely and made it more suitable for this ‘going from the summer into the fall’ time period. With the warming spices and the baked squash, it will be a great meal for this time of year. Not only that it suits the weather but it is delicious … honestly my family can’t get enough of it. I might have to go back to the farmers’ market tomorrow to get more eggplants.

RECIPE

Serves 4-5 people

Ingredients

  • 2 medium eggplants
  • couple of handful salt for salting the eggplants
  • olive oil
  • 2 large onions, sliced
  • 1 Tbsp grated fresh ginger
  • seasoning: 2 tsp paprika, 1 tsp cumin powder, 1 tsp coriander powder, 1/4 tsp nutmeg, 1 cinnamon stick,
  • pinch of saffron (optional)
  • 2 garlic cloves
  • 2 large tomatoes or 2 cups canned tomatoes
  • 1 cup dried garbanzo beans or 1 can (14 oz)
  • 1 dried hot pepper or to taste
  • squash (zucchini, sweet mama squash) – optional
  • salt and pepper to taste
  • couscous or rice to serve
  • cilantro

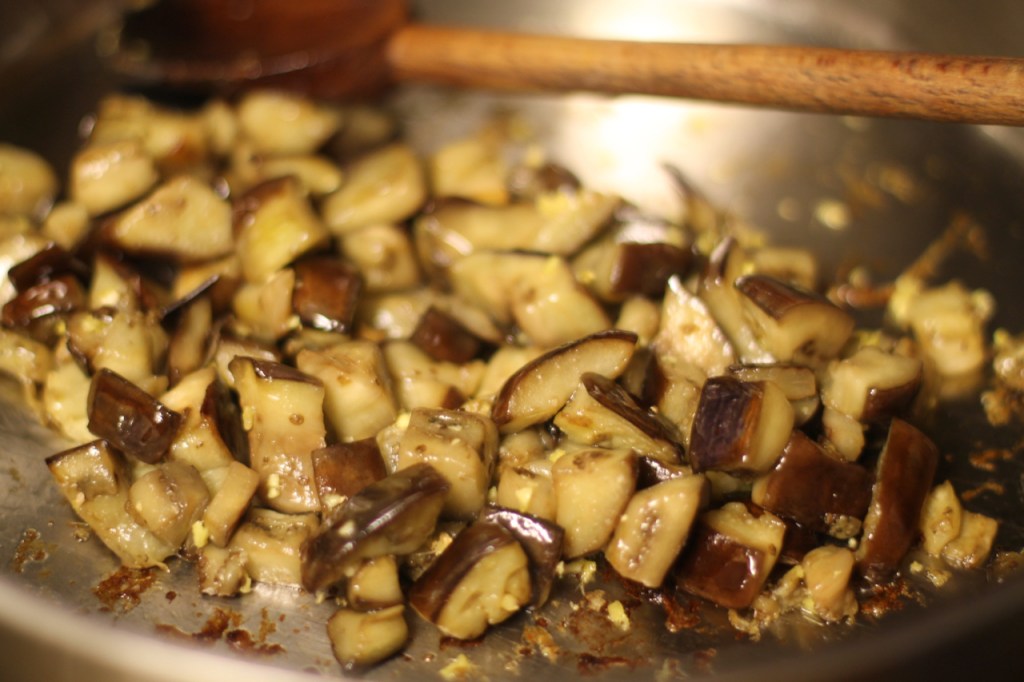
Browning the eggplants
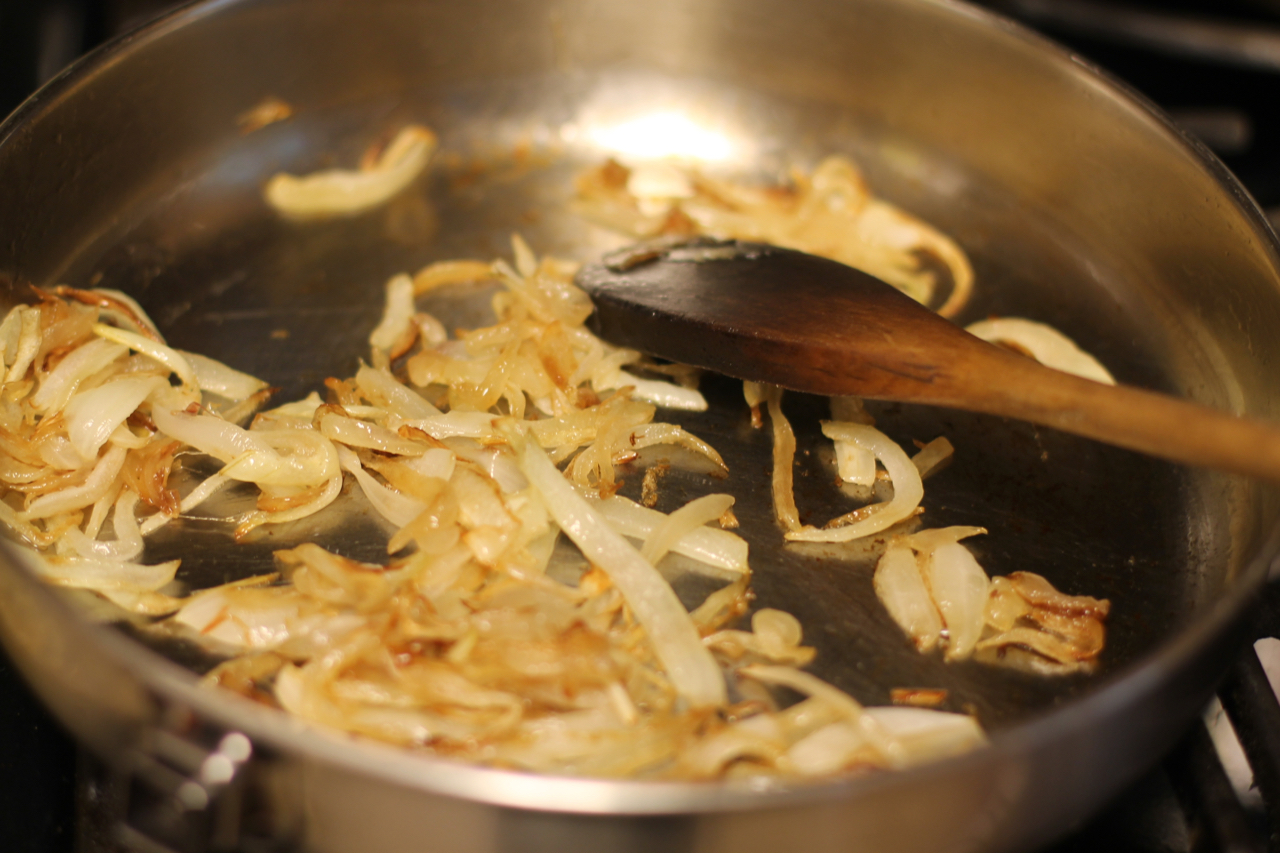
Browning the onions.

Directions

  • Garbanzo beans. Soak overnight or at least for 4 hours. When done, discard the soaking liquid. Add enough cold water to cover the beans. The water should be about 1 inch above the beans. Cook the beans for 2-3 hours. (You can use a pressure cooker, just adjust the time). They need to be cooked slowly for a long time until they are nice and soft. They can take up liquid after they are cooked so add more water if needed. Add 1 tsp salt when done.
  • Preparing the eggplants. Wash and cut eggplants into cubes. Salt them and put them into a colander for 30 minutes to let the liquid drain. Wash off the salt and pat dry.
  • Frying the eggplants. In a wide large skillet, on medium low heat, slowly brown the eggplants in some olive oil for about 20- 30 minutes or until soft. They will not cook any more so make sure they are soft and well cooked before you add it to the sauce. Stir frequently. Make sure they don’t burn. Set aside.
  • Caramelize the onions. In a separate large skillet, brown the sliced onions in some oil with care, it takes about 30 minutes. Stir frequently. Set aside.
  • Crumple the saffron between your thumb and index finger and add hot liquid, stir well (optional). Otherwise you can just put whole saffron strains in the dish. Set aside.
    • Making the sauce. On medium high heat, warm up oil and add the ginger for 5 minutes. Then add the paprika, cumin, garlic and stir for 1 minute to activate the spices. Add the chopped tomatoes and the saffron from earlier and stir well. You can add a little water here too. Cook the tomatoes for about 5 minutes until they become ‘saucy’. Add the saffron, cinnamon stick, and hot pepper. Bring to a boil and turn down the heat. Cook for 10 minutes on low medium heat. Add a little water if needed. Add the browned onions, eggplants and garbanzo beans from earlier. Cook for 5 more minutes covered. Let the dish sit for 15 minutes so the flavors can come together. Take out the cinnamon stick and the hot pepper pieces. Add freshly graded nutmeg, salt and pepper or anything else that needs to be adjusted.
  • Serve with cilantro, rice or couscous and yogurt sauce. I also added some baked sweet mama squash slivers and they nicely complemented each other.

enjoy!

Recipe, photo and text by twincitiesherbs.com.

Butternut squash soup with a Midwestern flare

As the fall season is arriving, I feel like a little squirrel trying to get ready for the colder months: eating the great variety of fruits and vegetables, storing up foods, making last minute repairs and just mentally getting ready. By now we are aware that summer is gone and a new season is coming with all its beauty and challenges. It was the Autumnal Equinox a couple of days ago, when the days and nights are equal and from now on the days are going to get shorter and colder as well.

Warm up to the fall with this delicious squash soup. My recipe is made with a little Midwestern twist. I added wild rice, a Midwestern staple but it can be served with some hearty bread like rye bread instead. I enjoy squashes in all shapes and forms. Many of us think of squashes when we hear the word fall cooking so I will start off my fall recipe collection with a squash dish.

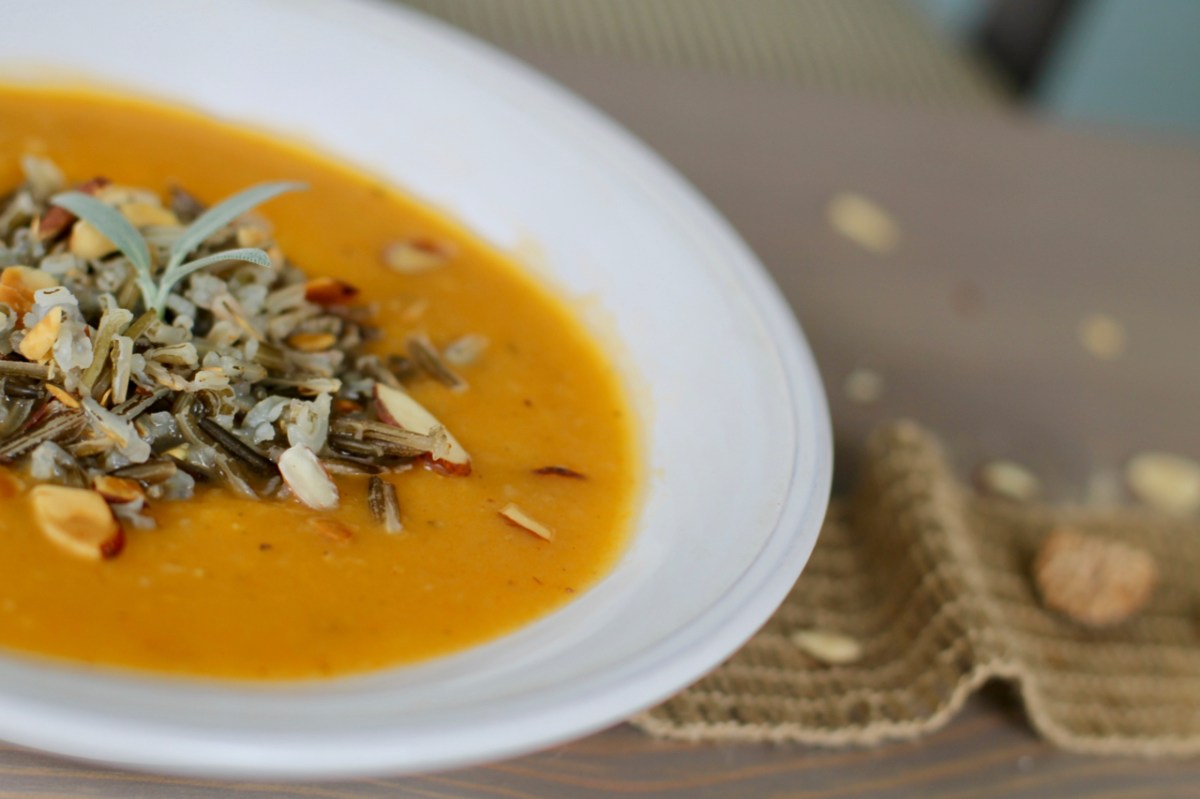
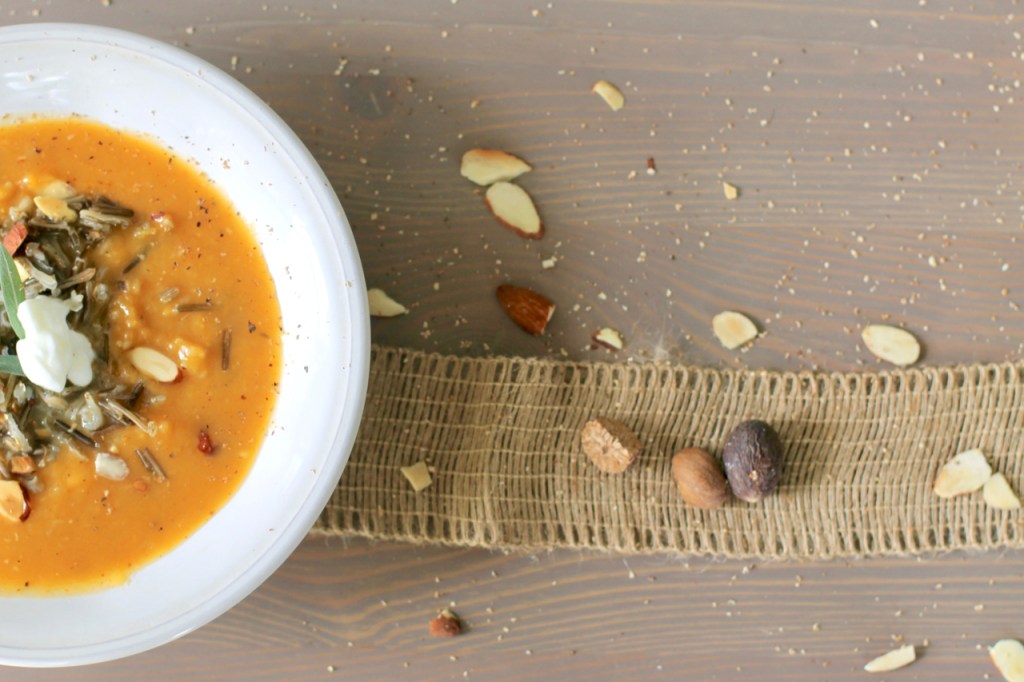
The warming sweet butternut squash is simmered with the white onion, garlic, potatoes and is balanced with the bitter celery root and the lovely pungent spices. At the end, it is topped with cream and the sweet almond slivers for a bit of crunchiness.

RECIPE

Ingredients

  • 1 medium sized butternut squash- about 3 lbs
  • 1 medium sized Russet potato, peeled and cut into cubes
  • 1 finally chopped large onion, white is the best
  • vegetable oil (sunflower)
  • 2 slices smoked bacon (optional)
  • 1 Tbsp fresh ginger, about 1 inch long
  • 1 tsp of sweet Hungarian paprika (make sure it is authentic)
  • 1 smaller celery root, peeled and chopped up into 4 pieces
  • 5 cups stock (vegetable or chicken)
  • 3 garlic cloves, crushed
  • 1/4 tsp freshly ground nutmeg
  • 1 thyme spring
  • salt and pepper to taste
  • 1/4 cup heavy cream
  • red hot pepper to taste (optional)
  • 1 cup almond slivers
  • 1 cup uncooked wild rice or rye bread to serve

Directions

Preparing the squash. Peel and cut squash lengthwise, take out the seeds. Cut them into cubes. Warm up some oil on medium high heat and sautee the cubes for a good 10-15 minutes.

Make the soup base. Have 1/2 cup of cold water ready. In a medium size pot warm up the oil. Sauté the onion, and the bacon(optional). When translucent and you can smell the aroma of the the onions and the bacon and the chopped ginger for a few minutes, stir. Add the crushed garlic and 1 tsp paprika, stir for 1 minute to activate. Add the little cold water that you had set aside earlier, stir.

Add the potatoes, thyme, and the celery root in the pot. Add the stock, enough to cover by about 1 inch above everything and cook for 30 minutes.

Cooking the wild rice (optional). Cook 1 cup of wild rice with 2 cups of water, partially covered for about 20 minutes or until the rice is soft and crunchy.

Roast the almond slivers. Preheat the oven to 350F. Lightly oil a baking sheet and spread the almond pieces evenly on the sheet. Bake for 5 minutes. Serve on top of the soup.

When ready, let the soup cool for about 10 minutes. Add the cream, salt, freshly ground nutmeg, and black pepper. Stir.

If you want the soup to be a little chunky, set aside about 20% of the cooked squash pieces. Use a hand held blender and puree the rest of the soup. Make sure you blend the celery chunks. Transfer the whole pieces back to the rest of the pureed soup. (If you prefer a smooth soup, just puree everything).

Check to see if more salt, black pepper, red hot pepper are needed.

Serve with wild rice or rye bread and the almond slivers.

enjoy!

Recipe, photo and text by twincitiesherbs.com.