Borscht

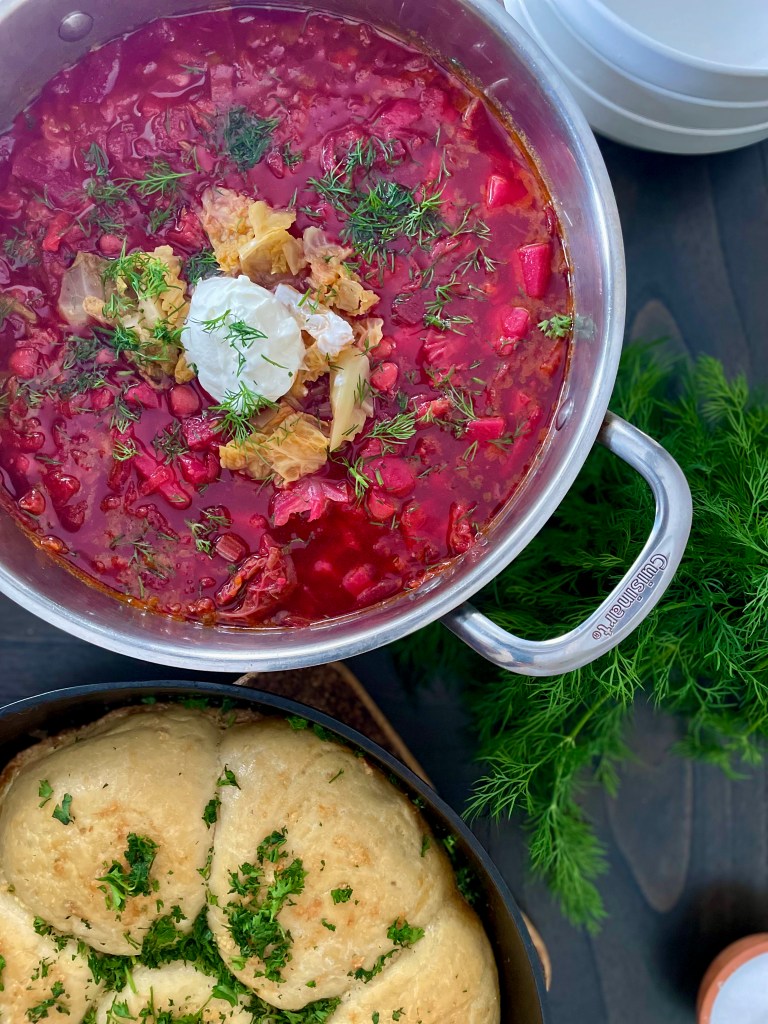
Borscht is a traditional Ukrainian dish and is popular all over Eastern Europe. This iconic soup is an ideal soup for the winter. It is made with hardy root vegetables: potatoes, beets and carrots. These vegetables can be stored in a root cellar over the winter. The soup gets its gorgeous red color from the beets and zesty flavor from the Zacharka.. Zacharka is made with sautéing onions, carrots and beets and is briefly simmered in a tomato sauce mixed with vinegar. At the end, cabbage, garlic and beans are added. Put a dollop of sour cream and chopped dill in the soup. Traditionally, it is also served with Pampusky.

RECIPE

Serves 8 people

INGREDIENTS
Broth
  • 1 lb beef bones or chicken bones or 2 large celery roots for vegetarian option
  • 3 bay leaves
  • 3 parsnips
  • 1 onion
  • 3 cloves garlic
  • 1 heaping Tbsp black pepper corns
  • 3 carrots
  • water
Soup
  • 10 cups broth (vegetarian, beef or chicken)
  • lard or olive oil
  • 2 strips bacon, chopped (optional)
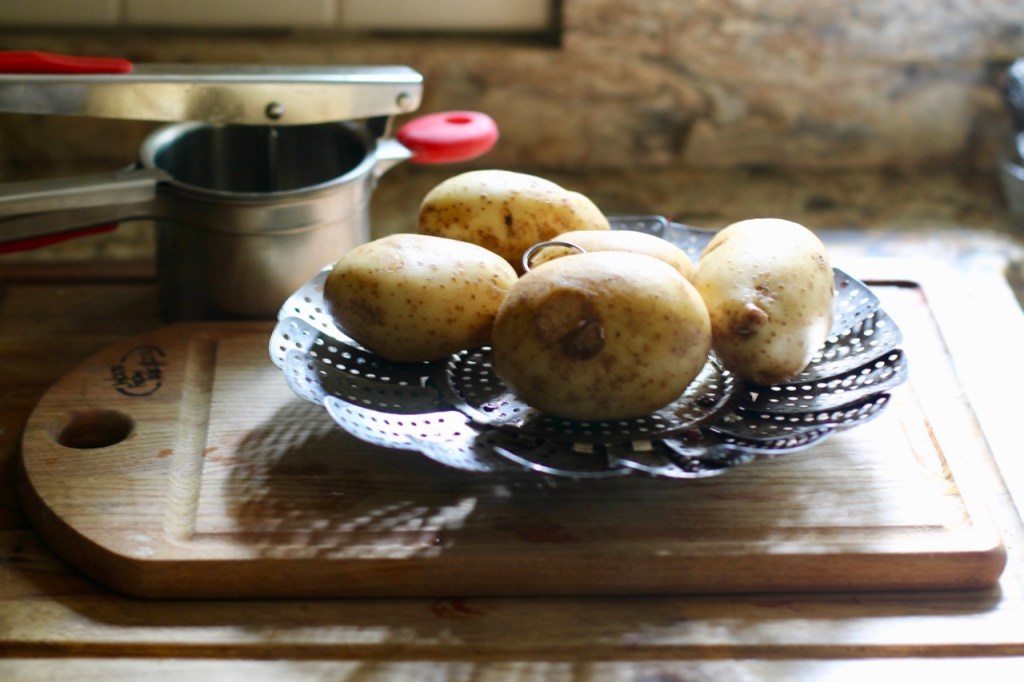
  • 3 potatoes (Yukon, Russet), peeled and cubed.
  • 4 medium beets, match stick
  • 2 larger carrots, peeled and shredded
  • 1 onion, finally chopped
  • 2 celery stalks, chopped
  • 1 larger tomato, chopped
  • 1 Tbsp tomato puree
  • 2 cloves garlic, crushed
  • 4 Tbsp ketchup
  • 1 Tbsp vinegar
  • 1/4 small savoy cabbage, deveined, shredded
  • 1 cup dry cannelloni beans or 1 can (14 oz) with the liquid
  • salt and pepper to taste
  • fresh or dried dill

METHODS

1. Making the stock. In a large pot, combine all the stock ingredients and add water well covering all the ingredients. Bring to a boil, turn down and cook for 2 hours. (Omit if using canned broth)

2. Cooking the beans. Soak the beans overnight. Place the raw beans in a smaller dish and cover well with water. Next day remove the soaking water, discard. In a medium sized pot cook the beans in fresh water. Bring to a boil and turn down. Cook for 1 hours or until soft but not mushy. (Omit if using canned beans).

3. Preparing the vegetables. Potatoes (peel and small cubes). Chop the onions. Carrots (peel and grate through large greater holes). Beets (sliced and cut lengthwise). Chop the tomatoes. Slice the cabbage leaves thin. Chop the garlic. Chop the dill.

4. Heat a large soup pot, pour in the stock, add the potatoes. Bring to a boil, turn down and cook for 30 minutes.

5. Meanwhile, in a smaller frying pan, saute onion in a small amount of lard or oil for 5 minutes. Add and render the chopped bacon for 5 minutes. Add carrots, chopped celery, beets, vinegar, ketchup, tomato and tomato paste. Continue sauteing for another 5- 10 minutes or until vegetables are soft. Set aside. (This mixture is called Zacharka).

6. Add the Zacharka from earlier, garlic, cabbage and the beans to the potatoes stock mixture. Mix. Cook for 10 minutes.

7. Add the salt and black pepper. Let the soup rest covered for about 20 minutes before serving. The flavor deepens as the soup sits.

8. Serve hot with a dollop of sour cream and dill. Traditionally it is also served with rye bread or Pampusky.

Enjoy!

Photo and text by Twincitiesherbs.

Dried orange peel

Orange peel can be used for cooking and baking especially in the winter. The aromatic sweet orange peel gives a hint of bitter flavor to desserts and savory dishes alike. It doesn’t shout, it is there to balance the dishes. I like to use all five flavors when I cook and orange peel can be used for the bitter flavor. I especially like to add it in my desserts when I need just a hint of the bitter flavor. They can also be used in cocktails and mulling spices.

It is very easy to make dried orange peel! I collect peels throughout the winter. After I eat the oranges, I dry them. Use this recipe so you can have some on hand when you need it. Most oranges will work. Just remove any wet, fleshy parts that might have stayed on the peel.

RECIPE

INGREDIENTS

peel from organic, untreated oranges (washed)- I use navel oranges.

METHOD

1. Carefully peel an orange. Remove any wet, fleshy parts that might have stayed on the peel. Place the peels on a paper towel in a single layer and put them in a dry place. The top of the cupboard is great. Don’t layer them as they can get soggy. Dry them for 1 month.

2. If you don’t want to wait for an entire month for the peels to dry, you can just dry them in the oven. The peels can be baked at 200 F for 90 minutes. They should be brittle and dry. If they are soft, continue baking them.

3. You can use the whole peels or grind the dried peels in a blender. Whole peels will last longer, finally powder will have a shorter shelf life.

4. Store in an airtight container in a cool place. They last for about 6-12 months depending how coarse you grind them.

Text and photos by Twincitiesherbs.

Chicory, not just a coffee alternative!

I am in a face book group where somebody asked what our favorite herb right now was. I always have a hard time answering these questions as I have many favorites … but right now I can say with ease, it is chicory!

Chicory is known as a coffee alternative but it is not just a coffee alternative! It has an earthy, rich flavor and is caffeine free! It has a coffee like flavor and has many benefits. It would be beneficial for the body after eating all the rich foods during the holidays.

Chicory can help our digestion. The bitter flavor is especially helpful in removing the dampness that is caused by the rich, heavy meals and sweet foods. The dampness can adversely affect our digestive system. (1)

Chicory also contains Inulin, a prebiotic. Inulin can help feed the beneficial bacteria in the gut, that supports digestive and immune health.

Disclaimer: If you tend to have a drier, weaker body, drink chicory with caution or omit from your diet. (1)

RECIPE

INGREDIENTS

  • 1 tsp chicory root -cut and sifted or powder (roasted if fine too)
  • 1 cup of water
  • powdered cinnamon for serving (optional)
  • pinch of salt (optional)

METHODS

1. Boil the water and pour it over the chicory roots.

2. Strain.

3. Serve it hot with cinnamon sprinkled on top and a pinch of salt added.

Sources

1. Paul Pitchford. Healing with Whole Foods

Photo and text by Twincitiesherbs.

Fizzy fermented pine needle drink

Make this delicious fermented winter drink! Edible pine needles have a wonderful minty, citrusy flavor and pair well with some lemon juice. When the pine needles are mixed with water and sweetener like sugar or honey, the natural yeasts on the needles initiates fermentation. During this process, the yeast on the pine needles consumes the sugar and bubbles are produced making a fizzy drink.

Pine needles are edible! You can use any pine needles, just make sure they are edible and are free of pesticides. Most pine trees are suitable; however, it is important to exercise caution when eating pine needles, as some species may contain toxins or irritants. Needles of pine trees like Norfolk Island Pine, Yew and Ponderosa Pine are not edible. I used needles of White pine trees.

Needles of edible pine trees are a living medicine chest. They are particularly useful for anyone who is in the forest, whether living there or just going out on a day-hikes. It is good as a first aid remedy, treats respiratory problems and can be used as food. In addition, it can help musculoskeletal problems, promotes digestion and can help with mental, physical fatigue. Oh and let’s not forget about its vitamin and mineral content! This is truly an amazing remedy!

RECIPE

INGREDIENTS

  • 16 oz mason jar
  • a good handful of edible chopped pine needles of your choice – I used white pine needles.
  • 1-2 Tbsp sweetener of your choice like sugar, brown sugar, maple syrup, honey. (Sugar substitutes like stevia, erythritol will not work).
  • spring water
  • Lemon juice (optional)

DIRECTIONS

  • Collect the pine needles. You can wash them if you think they are dirty but is not necessary otherwise.
  • Fill your jar with the chopped needles and add water leaving 1 inch of space open on the top for the bubbles to form.
  • Add sweetener of your choice.
  • Stir the content to distribute the sweetener to allow the fermentation process to occur.
  • Now leave the bottle in a warmish place that is not too hot or cold. The counter in the kitchen would be fine.
  • Let it ferment for 2-5 days, less in the summer more in the winter. When you can see bubbles formed on the the top, the drink is ready. Strain and you can start drinking it.
  • If not consumed right away, store the strained liquid in the refrigerator.
  • Serve with lemon juice.

Enjoy!

Photo and text by twincitiesherbs.com.

Source: Matthew Wood: The Earthwise Herbal

Fusion style curry pumpkin soup

After the rich foods of the holidays, we often just want to eat something simple yet nourishing. It can get a bit tricky in January to do this as it is still cold here. To stay in tune with nature, I really enjoy eating some warming soups. This tasty soup is more of a fusion style pumpkin soup. Its main ingredient, the butternut squash is cooked in a coconut milk base with some warming spices from the East. This soup should feel refreshing after all the rich, heavy foods of the holidays. Oh and those warm aromas in your kitchen while the soup is cooking … enjoy!

RECIPE

Ingredients

  • 1 medium sized butternut squash, peeled and cubed
  • 1 small onion, chopped
  • 1 Tbsp coconut oil
  • 1 tsp curry powder
  • 1 Tbsp graded fresh ginger
  • 1-3 garlic cloves
  • 2 cans coconut milk
  • 1 cup vegetable stock or water
  • 3 Tbsp-whole bottle (to taste) Thai Kitchen Roasted red chili paste, 4 oz
  • Nuts (pumpkin, almonds), slivered
  • Salt to taste

Preparation

  • In a medium sized pot, heat coconut oil on medium high heat. Add onion and sauté for 5 minutes or until it is translucent.
  • Add ginger and cook for a few minutes until you smell its aroma. Add the powdered curry and garlic cloves and stir for 1 minute.
  • Pour in the coconut milk, vegetarian stock/water and the Thai Kitchen red chili paste. Stir and bring back to a boil. Reduce heat to a low medium heat and cover.
  • Cook for 30 minutes. Turn off heat and let the soup cool.
  • Add salt.
  • Use an immersion blender and puree until smooth.
  • Reheat before serving.
  • Serve with nuts, yogurt, bread

enjoy!

Photo and text by twincitiesherbs.com.

Festive Plum Gnocchi With Poppy Seeds (Szilvás gombóc)

Hungarian plum gnocchi (szilvás gombóc) is basically a dish with plums wrapped in dough made with mashed potatoes. It is often served as a second dish after a heavier soup but can be a dessert as well.

This dish is a little variation to the recipe that most people use in Hungary. I added poppy seeds instead of bread crumbs to coat the balls. In Transylvania, plum gnocchi is often coated with poppy seeds.

Poppy seeds are popular at Christmas time as they are full of flavor and are supposed to be calming and nourishing as well. Oh one more, Hungarians believe that poppy seeds are supposed to bring good luck for the new year.

Also, I used prunes instead of fresh plums because fresh plums are not available right now. Honestly, I can’t tell the difference.

These 2 changes to the recipe would make this otherwise already fabulous dish a perfect dish for the holidays.

RECIPE

INGREDIENTS
  • about 1 lb russet potatoes (4-5 potatoes)
  • 2 cups flour
  • 1 egg
  • 1 Tbsp butter
  • 1/2 tsp salt
  • 18 sweet prunes – depending on the size

Coating

  • 2 cups poppy seed, ground
  • 1 cup walnuts (finally chopped)
  • 10 Tbsp butter or coconut oil
  • 1 tsp cinnamon or apple pie seasoning
  • 6 Tbsp sugar
  • pinch of salt
DIRECTIONS

Place the potatoes with the skin on in a large pot. I like to put them on a metal steamer with ‘feet’ so the vitamins and minerals don’t leach into the water and so they don’t soak up too much water. If the potatoes are too wet, the dough will need more flour and will be harder. Add cold water to the pot with a little salt. Bring it to a boil. Turn the heat down to medium low. Cook them with the lid on for about 45 – 60 minutes or until the potatoes are tender. Peel them while they are still hot but you can handle.

Puree the potatoes while they are still warm, I was able to do it as soon as the peels were taken off. I used a potato ricer. I put the potatoes through the larger holes of the ricer, then the smaller ones. It is worth investing in a potato ricer if you want a nice and soft dough. You can use a potato masher too, I have used it before and did a good job too. Let potatoes cool to room temperature.

Add flour, salt, 1 egg, 1 Tbsp of butter to the mashed potatoes. Mix and form into a ball shape. Do not over do it. The dough should not be wet but should stay in one piece. Make sure your potatoes are at room temperature. If they are warm they will take up too much flour. You can use the fridge for 5-10 minutes minutes if needed. (Before adding more flour, cool the dough in the refrigerator).

Let the dough rest for 1 hour on the counter.

Meanwhile, soak the prunes in water to soften them. Set aside.

Melt the butter on low heat and add the poppy seeds stirring frequently for about 10 minutes. Make sure the butter doesn’t burn. Add the cinnamon, sugar and chopped walnuts. Mix. This will be used to coat the balls.

Also, mix the 3 Tbsp sugar, 1 tsp cinnamon and a pinch of salt for the stuffing. This will be used when the balls are served.

Fill a 5 quart pot with about 3 quart water. Bring to a boil with a little a little salt.

After 1 hour, take the dough out of the refrigerator. Cut the dough in half. Place one of them on a flat, floured surface. Roll out the dough on a lightly floured surface with a rolling pin. Cut out about 9 squares about 3 inches wide and 1 cm thick.

Squeeze the liquid out of the prunes from earlier step.

Assemble the balls. Place one of the dough squares into your palm. Put a plum in the dough. Fold corner by corner gently tucking the stuffing inside and then roll it to make a ball. Do this with each square. Coat them in flour. Please look at the pictures for clarification.

http://twincitiesherbs.com

Take the other half of the left over dough and repeat rolling the dough and making little squares. Just like earlier, fill the squares with the prunes. Do this procedure until all the dough is used up.

When the water starts boiling, you can drop the balls in the water one by one with a slotted spoon. Try to gently stir them to prevent them from sticking to the bottom of the pot.

When the dumplings come to the surface, cook them for about another 5 more minutes and remove them with a slotted spoon. 

Coat the dumplings with the poppy seed mixture that you prepared earlier and roll them around until they are well coated. 

Serve warm with a little vanilla sugar, cinnamon sugar or honey. Or all three.

Enjoy! Jó étvágyat!

Recipe, photo and text by twincitiesherbs.

Cannellini Bean Vegetarian Meatballs

Wow that is quite a mouthful for the name of a simple recipe!

We were invited to a banquette where the organizers decided that the vegetarian alternative to spaghetti with meatballs dinner would be to leave out the meat; however, most vegetarians like protein so leaving out the meat is not a solution. So I decided to come up with a vegetarian alternative. This challenge got me this amazing recipe though so no complaints.

These bean balls are mouthwatering, even my corgi thinks it is meat. How do I know he likes it? He starts putting out his paw to shake my hand without being asked and he licks his bowl for another 10 minutes after he finishes eating hoping he can find some more.

Let’s talk about the cannellini beans briefly. They are the main ingredient and with their high protein content they replace the meat easily.

These beans originated in South America, most likely in Peru or Argentina. Today, they are popular all over the world but surely are a vital part of the Northern Italian cuisine. They are part of the kidney bean family so with its kidney supporting qualities they are beneficial during the winter time. Also, there is evidence that these beans help with diabetes and weight loss.

When trying to find a replacement for meatballs, cannellini beans seemed like the perfect choice. These nutty, earthy and savory flavored beans are a fabulous addition to this Italian staple. They taste more like chestnuts so they really add a lot of flavor to the dish. I would suggest to make the beans at home from scratch rather than buying the canned version. I could taste the difference for sure.

Enjoy this tasty dish!

RECIPE

Makes 10 bean balls (2 inch in diameter).

Ingredients

  • 1 cup dried cannelloni beans (15 oz canned), strained
  • 1 small yellow onion, grated or 2 Tbsp dehydrated onion
  • 1 Tbsp olive oil
  • oil for baking
  • 1 egg
  • 1 cup breadcrumbs
  • a handful of hazelnut or walnuts, chopped
  • a handful of fresh parsley, chopped
  • 1/4 cup tomato sauce
  • 3 garlic cloves, chopped
  • 1 Tbsp Italian seasoning,
  • 1 Tbsp balsamic vinegar
  • 1 tsp salt

Tomato sauce:

  • 1 bay leaf
  • salt and pepper to taste
  • garlic
  • 1/4 cup of balsamic vinegar
  • 1 Qt jar of tomato sauce

Italian seasoning

  • 1 tsp fennel, ground
  • 1 tsp oregano
  • 1 tsp thyme
  • 1 tsp basil
  • 1/4 tsp chili pepper

METHOD

  • Preheat oven to 350 F.
  • Soak beans overnight or at least for 8 hours. Next day discard the soaking liquid. Add cold water and in a large pot cook the beans for 2 hours or until done. (Omit if using a can).
  • Coat a baking sheet with a thin film of oil.
  • Put the beans in a large bowl and mash them with a potato masher.
  • Add the rest of the ingredients chopped pistachio nuts, 1 egg, breadcrumbs, oil, tomato sauce, parsley, salt, Italian seasoning, garlic cloves, balsamic vinegar and onion.
  • Mix well.
  • Using about 1/4 cup of the mixture, form balls by rolling between the palms of your hands.
  • Place the balls on the prepared baking sheet evenly spaced.
  • Bake for about 30 minutes or until the balls have a nice golden brown color on the outside.
  • While the bean balls are baking, prepare the tomato sauce. Choose your favorite Pasta sauce, add 1/4 balsamic vinegar, 1 bay leaf, 1 Tbsp Italian seasoning, garlic and salt to taste. Cook for 10 minutes.
  • Boil a big pot of water and cook spaghetti according to its instructions.
  • Serve the bean balls with the warm with tomato sauce and spaghetti.
  • Garnish with parsley and Parmesan cheese.

enjoy!

Receipe, photos, text by twincitiesherbs.com.

Creamy Celeriac Soup with croutons

This delicious dish uses this forgotten vegetable, celeriac. The sweet and bitter celeriac is the perfect vegetable to eat as we enter the colder months. It can nicely offset the heaviness of other dishes that we eat during the holidays. The celeriac along with the potatoes are cooked in a stock and are infused with thyme and bay leaves. Serve with cream and some croutons or hazelnuts on the top. Enjoy!

RECIPE

INGREDIENTS
  • oil
  • 1 medium onion
  • 2 large garlic cloves
  • 1 tsp dried or 2 tsp fresh thyme
  • 1 bay leaf
  • 1 1/2 lb celeriac root, peeled and cut into 1/2 ” chunks
  • 1/2 lb potatoes, peeled and cut into 1/2″ chunks
  • 1 slice of bacon, cut into small pieces (optional)
  • 4 cup of vegetable or chicken stock
  • 1/2 cup heavy cream
  • 1/2 cup hazelnuts or croutons
  • chopped parsley
  • crushed red hot pepper to taste

PREPARATION

Cook bacon on medium high heat, in a little oil for 10 minutes. Remove and set aside.

Sauté the onion in a little oil for about 5 – 10 minutes, stir often. Gently fry the garlic for a short time, do not burn. Add the thyme, bay leaf, celery, the potato chunks, bacon pieces and the stock. Bring to a boil and reduce the heat to medium low heat. Cook for about 40 minutes or until all the vegetables are nice and tender.

Remove the bay leaf and let the soup cool off to room temperature. Pour in the cream. Puree the soup. You can use an immersion blender or a regular blender.

Add salt, pepper and red hot pepper to taste.

Serve with hot with croutons or hazelnuts and parsley.

If using hazelnuts, heat up a pan and lightly roast the hazelnuts for 6-8 minutes. Make sure they are toasted on all sides. Chop the cool hazelnuts. Serve on to of the soup.

Enjoy!

Photo and text by twincitiesherbs.

History of spiced heart honey cookies (no recipe)

Winter is not over yet, in fact we are still in the middle of it. To be a little more exact, we are half way between winter and spring on the northern hemisphere. I can usually feel the Earth’s energy starting to wake up but spring is not here yet. We can finally experience the promise of the light, fertility and growth.

Come celebrate this Winter Magic! In accordance to Pagan traditions, this occasion has been celebrated for thousands of years by Europeans. One special food they make is the honey cookies. So yes this celebration is similar to Valentine’s day. The cookies were gifted as a fertility token to girls by boys or given as good luck charm to little children. Heart was always a popular shape but sun or animal themes were often used as well.

There is so much folklore, legend and history behind these lovely spiced cookies! They are made to honor the old, wise women in their culture. In Ireland they call her Brighid, in Russia they are called Baba Yaga. These women are the Earth’s Goddesses. The cookies are not just beautiful but are packed with nourishing ingredients that grandma would use.

This is still the time to stay focused inward and get ready mentally for the year to come. Clean and clear the space you live in and invite love or universal love into your life. Set your intentions. Do things that your heart desires.

Another spectrum of love is hatred, anger and jealousy. When you invite love into your life, you might experience these feelings too. Don’t be afraid of them just acknowledge them. These emotions can be found in the Grimm story of Hansel and Gratel.

Traditionally, honey, rye flour and forest herbs were used to make these delicious cookies. Honey, the main ingredient has been used as medicine since ancient times. It is well known for its nutritious value and supposedly sweetens life as well. Oh and it is aphrodisiac! In addition to honey, our ancestors prepared the dough with rye flour but today people tend to use white flour. They also put foraged herbs and dried fruits in the cookies. Of course, these ingredients varied from country to country and region to region but often included fennel, lavender, rose petals, juniper berries, sumac etc. Since the exotic spices arrived from the East, people have been baking the cookies with these spices. These included a mixture of ginger, cardamom, cinnamon, all spice, nutmeg etc.

Photo and Text by wordpress.com.

French Onion Soup (soupe à l’oignon)

There is a little more to the soup than just throwing all the ingredients together … follow this recipe and you can make a perfect onion soup. Oh and when you serve it, play some nice French music. Last time I ate French onion soup, we were at the restaurant called Naniboujou by Grand Marais, Minnesota after canoeing at the Boundary Waters and they happened to play the Cd from the movie Amelia… ah total bliss…

I love French onion soup.

Today, we often see this soup in fancy restaurants; however, it traditionally started out as a peasant food made with the simple ingredients: onions, beef broth and cheese. It is the perfect soup for the winter. The secret is in the preparation. Of course, it is made with lots of onions … and these caramelized onions give the soup its rich color and flavor. It takes a long time to slowly caramelize those onions but it is so worth it! You get this wonderfully savory flavor with a little hint of sweetness.

Oh and of course the ingredients. Your soup will be as good as the ingredients used. I prefer making the beef stock at home and let’s not forget the cheese! Try to get the best cheese you can buy! I like using Gruyere cheese, but you can try other rich flavored cheese as well.

RECIPE

Serves 8 people

Ingredients

  • 6 larger onions (1 kg) onions, sliced
  • 5 Tbsp unsalted butter
  • 1 tsp sugar
  • 1 Tbsp flour
  • 1/2 cup white wine
  • 3 Tbsp brandy or cognac
  • 2 Qt beef stock
  • 2 bay leaves
  • few fresh thyme springs or 1 tsp dried thyme
  • toasted sliced French bread (about 2 slices per serving)
  • cheese (1/4 cup per serving)

Method

Peel the onions, cut them in halves (Make sure you remove the first 2 tougher layers of the onions). Cut them into very thin slices.

In a large pot melt the butter. Add the onions and the sugar, stir. Cook on medium high heat for about 15 minutes until onions are translucent. Stir occasionally.

Turn heat down a notch and continue cooking the onions for 40 – 45 more minutes or until they are nice and brown but not burnt. Stir occasionally. Do not cover the pot.

Stir in the flour and mix. Let it cook for 5 minutes.

Add the wine and the brandy if using alcohol. Mix. Cook for 3 minutes.

Add the stock, bay leaves and thyme springs and cook for 25 – 30 minutes partially covered.

When done, add salt and pepper to taste.

You can serve the soup in individual bowls if you wish. Add the toasted bread and 1/4 cup of cheese per bowl on top. Broil on high for 5 minutes. Or you can serve the soup in a big pot and just let people serve themselves.

Serve hot with some French wine if you wish. I used Famille Bogrier Vouvre Chenin Blanc white wine, a very lovely wine from France.

enjoy!