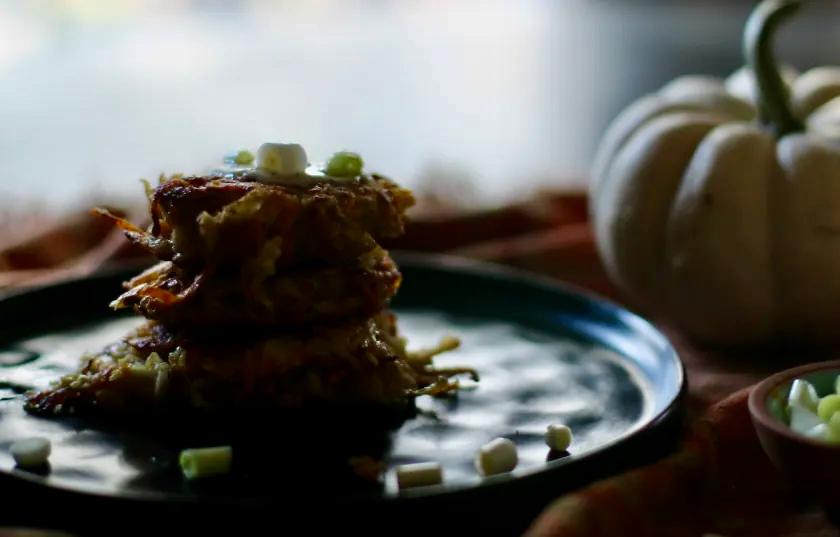
Parsnip sweet potato latkes can be a great addition to your autumn meals! Grated parsnips, sweet potatoes and onions are mixed with eggs and made into patties. They are super easy to make and are delicious too. Serve them with some sour cream and scallions!
RECIPE
6-7 servings
INGREDIENTS
2 cups sweet potatoes or potatoes, grated
1 cup parsnip, grated
1/2 onions, grated or 2 Tbsp dehydrated onions
2 eggs
salt and freshly ground pepper to taste
1/3 cup flour
3 scallions plus more for serving, sliced
oil for frying
INSTRUCTIONS
If you decide to leave the skin on, soak the sweet potatoes (or potatoes, if used) and parsnips. Scrub off any dirt. Otherwise if you prefer not to have the skin on, peel them with a vegetable peeler.
Coarsely grate them with a box grater. Try to squeeze out as much liquid as possible. Add the rest of the ingredients except the oil. Mix.
Let the mixture rest for 1 hour if possible.
Heat a skillet with some oil. Take out 1/3 cup of the mixture and form patties. Put them in the skillet and flatten them down with a spatula to about 1/2 – 1 inch thickness.
On medium high heat, cook the patties for about 5 – 10 minutes on each side until crisp and brown
This is a very nourishing, easy to make soup based on the Hungarian egg-drop soup recipe. It is a sweet and sour soup made with eggs, carrots and sorrel and is seasoned with the wonderful synergy of the caraway seeds and paprika. Serve with bread of your choice!
This recipe uses sorrel. Unfortunately, it is harder and harder to get in stores so I decided to grow my own. We actually built a raised bed garden so I can have sorrel every year. It is such a giving plant. It is a perennial plant and it will come back year after year. You get to harvest it in late spring and early fall. I have harvested it even during the summer when it was not too hot.
Sorrel is a unique vegetable with a distinctive sour, lemony flavor. Try to find it in your grocery store, farmers market or if possible grow your own. If you don’t have sorrel, you can use mustard greens, arugula, yellow dock or even spinach. If you use these alternate vegetables, make sure you add 1 tablespoon of lemon juice.
TIP
MAKING THE ROUX I use roux in this recipe. It is made with an easy French culinary technique that gives dishes an interesting nutty taste and thickens the dish. All you have to do is add flour to some oil in the sauce pan on medium high heat and stir for a couple of minutes until it turns a nice, orange color. Then add cold or room temperature water, stir and it is ready. Just make sure the liquid you add is at cold or room temperature to avoid lumps from forming. Warm or hot liquids will make the roux lumpy, unappealing. Once the cold or room temperature water has been poured in, hot water can be added. Making the roux is not necessary. According to many Hungarians, adding roux would ‘frenchify’ the dish. Hungarians must have added this technique after people from France immigrated into Hungary. I have made the soup with it and without it and both worked great.
DRY ROASTING THE CARAWAY SEEDS I like to dry roast the caraway seeds to remove its stronger flavor and make it more pleasant tasting. Just simply roast the caraway seeds and add this finished product to the soup. I prefer the caraway seeds whole in the soup; however, if you don’t like seeds in your soup, feel free to grind the seeds and then add the powder to the soup.
Oh I can still smell that wonderful aroma that the synergy of paprika and dry roasted caraway seeds create … Enjoy this delicious unique sweet and sour soup!
RECIPE
4-6 servings
INGREDIENTS
8 cup broth (vegetarian or chicken) or water
1 tbsp lemon juice if not using sorrel
oil (vegetable or lard)
1 tbsp flour (optional)
1 bunch sorrel, washed and chopped
1 cup carrots, peeled and shredded or match sticks
1 medium onion, finally chopped
1 tsp Hungarian sweet paprika
1 bay leaf
1-2 tbsp whole caraway seeds
2 egg yolks, (you can leave the whites in if you prefer)
1 tbsp vinegar
1 tbsp dehydrated vegetable seasoning (optional)
parsley, chopped for serving
Hot pepper to taste
Salt and pepper to taste
bread or croutons for serving
METHOD
1. Have 1/4 cup of cold stock or water ready.
2. TOASTING CARAWAY SEEDS. Put the whole seeds in a dry skillet over medium low heat. Toast for 2-3 minutes, shaking the pan until they become fragrant. This simple step mellows the sharpness and unlocks a beautiful, nutty warmth. You can grind the seeds if you wish. Set aside.
3. Sauté the onion in a medium sized pot for 5 minutes. Add the shredded carrots and continue cooking them for another 5-10 minutes. This mixture gives a really nice flavor to the soup. I invite you to taste it.
4. Add 1 Tbsp flour to make the roux. Stir for 3 minutes or until it turns a beautiful orange color. (You can omit this step).
5. Add 1 tsp paprika and stir for 1 minute.
6. Add the cold water that was set aside in the first step. Stir well.
7. Add stock, bay leaves, sorrel and caraway seeds. Bring to a boil and turn down. Cook for 15 minutes covered.
8. Turn off the heat and take off the top.
9. Separate 2 eggs and lightly beat the yolks. (You can keep the whites). Add a small amount of liquid from the soup, mix and slowly add to the soup while stirring. (My mom made this soup with just the yolks but if you prefer that silky egg white texture, feel free to use the whole eggs). Mix.
10. Add vinegar and dehydrated vegetable seasoning (optional).
11. Season with salt, black pepper and hot red pepper to taste.
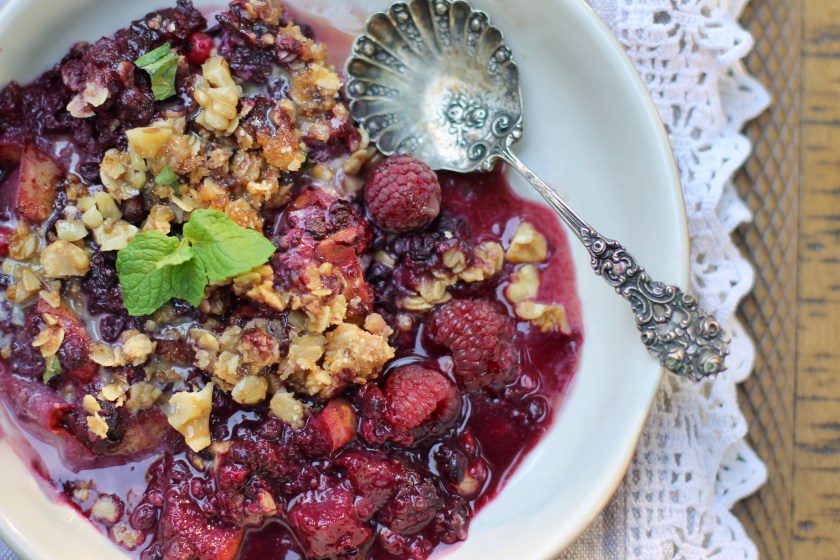
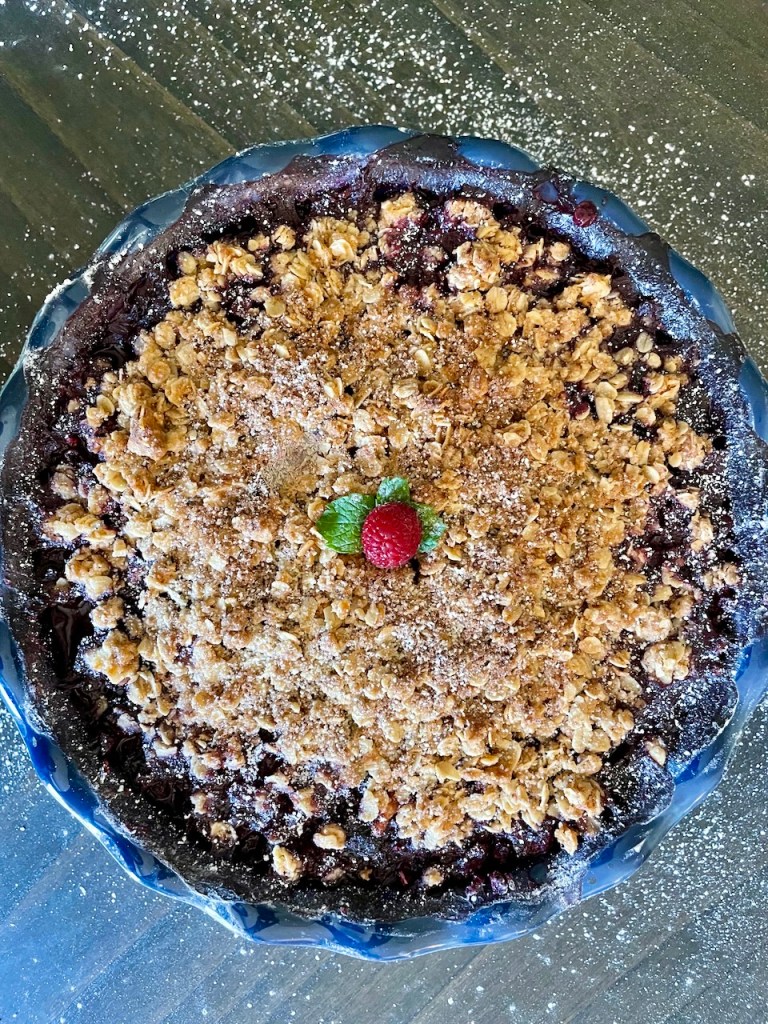
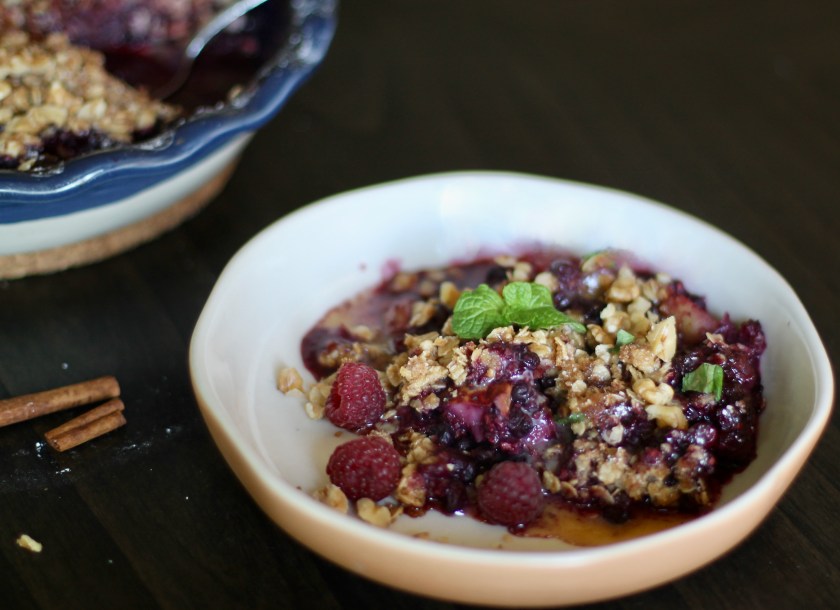
This is a lovely sweet dish for the autumn! The buttery pears work nicely with the tangy berries … and this delicious sweet fruity mixture is covered with the nutty oatmeal topping. Serve it with caramel sauce to satisfy your autumn cravings. It can be a fancy breakfast or a simple, quick dessert
TIP
This is a sweet dish so ideally sugar should be used. I included a range for the sugar content. Please feel free to use as little sugar or as much sugar as you’d like. Of course, the amount will depend on your sweet tooth and how sweet your fruits are.
RECIPE
INGREDIENTS
INGREDIENTS FOR THE TOPPING
1 cup old fashioned rolled oats
1/2 cup white flour
1 stick (8 tbsp) butter, melted
1/4 – 1/2 cup brown sugar + 2 tbsp for the top (regular sugar is fine)
1/8 tsp salt
zest of 1 lemon (optional)
1 tsp apple pie spice or 1/2 tsp cinnamon + 1/4 tsp nutmeg + 1/4 cloves+ little mace or 1 tsp cinnamon
1/2 cup chopped pecans or walnuts + more for serving
caramel sauce for serving
INGREDIENTS FOR THE FRUITS
4 ripe (about 2 cups) but firm fresh pears, cored and chopped (I used Bartlett)
2 cups organic berries, fresh or frozen (I used raspberries and blackberries)
o – 1/2 cup of brown sugar (I didn’t use any as my fruits were sweet enough but if you have a sweet tooth or the fruits are not very sweet, feel free to add sugar)
2 tbsp flour or 1 tbsp corn starch
1 lemon’s juice (use the lemon from earlier)
1/8 tsp salt
2 tbsp grated dried orange peel (optional)
1 tsp apple pie spice or 1/2 tsp cinnamon + 1/4 tsp nutmeg + 1/4 cloves+ little mace or 1 tsp cinnamon
1 tbsp grated fresh ginger or 1.5 tsp dried ginger (cut and sifted)
2 tbsp whiskey (optional)
METHOD
1. Preheat oven to 375 F. Have baking rack in the lower third of the oven.
2. Make the topping. Cream the melted butter with the sugar. Add oats, flour, apple pie spice, salt and lemon zest. Mix well. Fold in the nuts. Let it sit for an hour.
3. Wash, core and cut up pears into small cubes. You can peel them if the skin is tough, otherwise if they are soft no need to peel them. Set aside.
4. Assemble the fruit base. In a larger bowl, mix the chopped pears, berries, sugar, 1 tsp apple spice, salt, flour or cornstarch, orange peel, ginger and whiskey (if used) together. Spread evenly in a 2 qt size baking dish.
5. Put topping on the top of the fruit base. Sprinkle the top with some sugar (optional). I also graded a little nutmeg on the top.
6. Bake for 30 minutes or until the middle portion becomes hot.
7. Serve with caramel sauce. Spinkle some extra nuts if you wish.
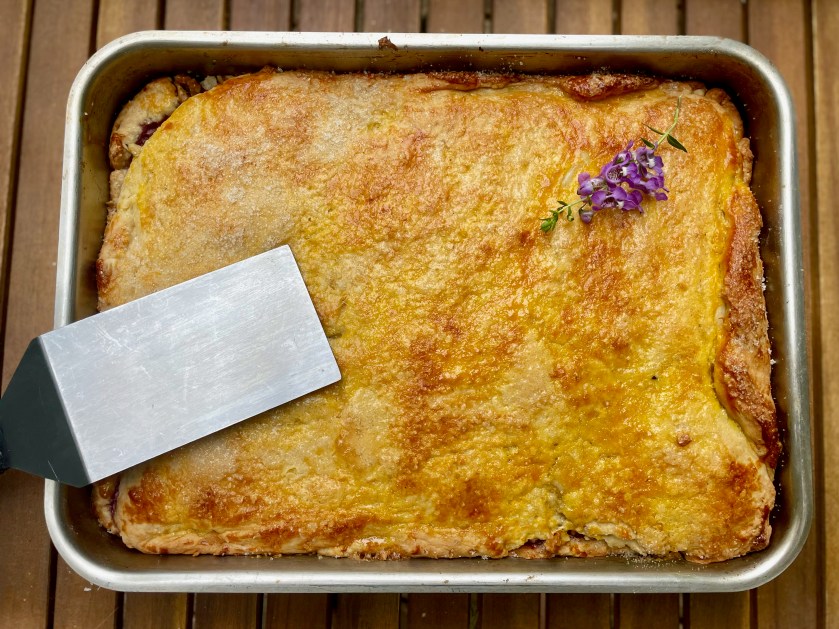
This mouth-watering pastry makes me feel like I am in a Hungarian cafe. The fluffy sour cherry filling is placed between 2 layers of the crumbly dough. I also added ginger and additional walnuts to make this tasty dessert even more exciting. The recipe is based on Hargitai György, Master chef’s mother’s recipe.
TIP
You will need a lot of sour cherries, about 1-1.6 kg (2.25 – 3.5 lbs)! The recipe asked for 1.6 kg (3.5 lbs) but I only had 1 kg (about 2 lbs) and it worked fine. Ideally, fresh sour cherries are used but honestly frozen sour cherries would work too. I bought the cherries at the farmers’ market earlier but wasn’t able to use them right away so I ended up freezing them. The frozen cherries worked well too. Just make sure they are sweet and have a nice flavorful!
RECIPE
Serves: 9 – 12 slices
INGREDIENTS
4 cups (500 gr) flour, cut and sifted
pinch of salt
15 tbsp (260 gr) cold unsalted butter
2 1/2 tsp dry yeast
1/2 cup milk
4 large eggs, divided
10 tbsp powdered or cane sugar, divided
peel and juice of 1 lemon
1 tsp vanilla extract
1-2 tbsp rum (optional)
1 – 1.6 kg (2.25 – 3.5 lbs) fresh or frozen sour cherries (pitted)
1 tbsp ginger
1 tsp cinnamon
2 tbsp bread crumbs
1 cup + 2 tbsp walnuts
METHOD
Preheat oven to 350 F. Butter a baking pan (11 x 9 x 2 inches or equivalent size). Sprinkle some flour on the bottom.
Dough
Preparing the yeast mixture. Add lukewarm milk (92 – 98 F) to the yeast with a little sugar. Let it rise.
In a larger bowl, sift the salt in with the flour. Crumb the butter with the flour with your finger tips or you can use a food processor as well.
Add the prepared yeast mixture from earlier.
Add 3-4 tablespoon sugar, 3 egg yolks, vanilla extract and rum (optional). Mix quickly. Save the egg whites for later for the filling).
Refrigerate for 1 hour.
Meanwhile prepare the filling.
Filling
In a medium sized bowl, add ginger, cinnamon, 6 tablespoons of sugar, lemon juice and peel, 2 tablespoons of chopped walnuts and 2 tablespoons of breadcrumbs. Mix. Set aside.
Beat the the egg white saved from earlier until it is hard. Gently fold in the earlier prepared mixture.
Assembling the cake
Take the dough out of the fridge. Cut into two parts. Put 1 part back in the fridge while you work with the other.
Roll out the dough into the shape of your pan and carefully place it onto the baking pan. Place the filling on top of this dough. Sprinkle 1 cup of the walnut on the top of the filling.
Take the other part of the dough out of the fridge and roll it out into the shape of the pan. Place it on top of the filling.
Lightly whisk 1 egg and spread it on top of the assembled dough. Sprinkle a little sugar on top. Prickle the top with a fork.
Bake in the preheated oven for 40 minutes or until the top has a nice golden color top.
Take out of the oven and let the cake completely cool off. Slice the cake.
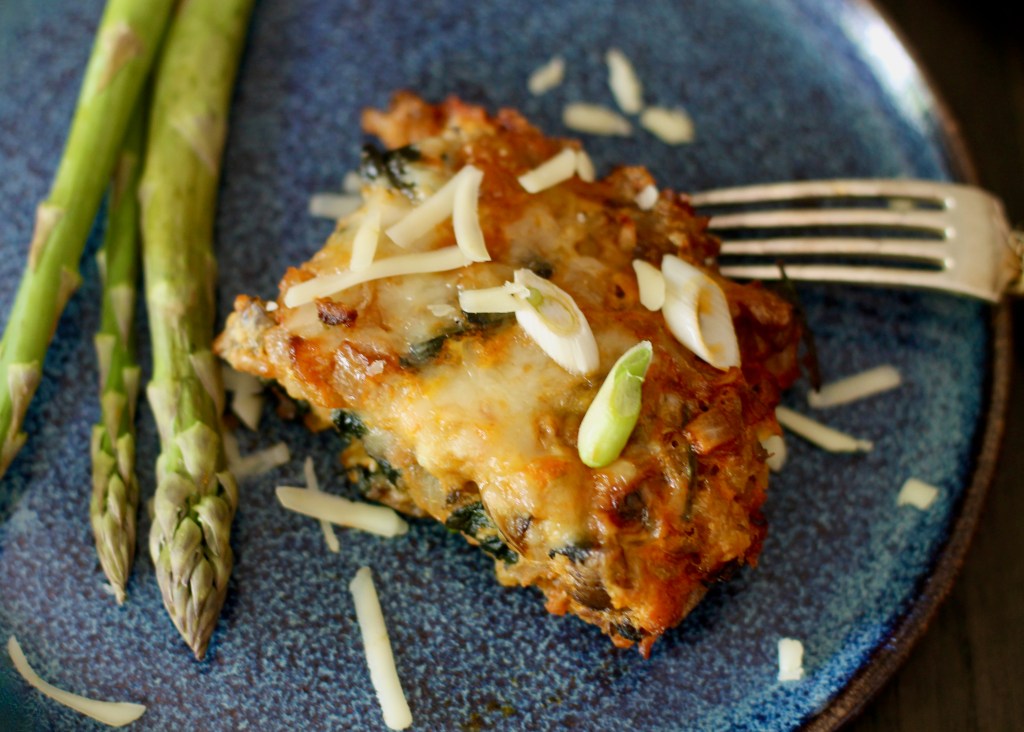
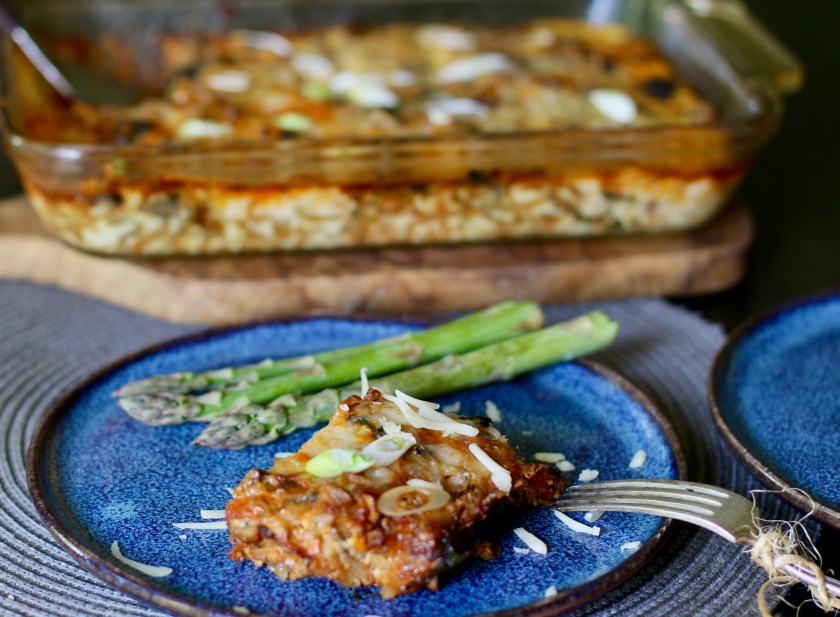
I could eat this whole dish in one sitting. It is rich, crispy and cheesy…. seriously it is so delicious! This savory casserole dish is great to serve for breakfast or any time of the day. It is especially useful if you have to feed many people all at once. Best of all, it can be prepared ahead of time! Just prepare the dish the day before your event and bake the next day. Enjoy socializing with your guest the next day…
The main ingredients are shredded potatoes, cheese and eggs and I also added spinach and mushrooms. Feel free to make doubles, triples …
Please try and let me how you liked it! I’d love to hear from you!
RECIPE
4-6 Servings
INGREDIENTS
3 cups (1 lb) grated potatoes (I used Russet)
4 oz chopped mushrooms (I used crimini)
1/4 cold water
1 cup spinach
2 strips of bacon, chopped (optional)
1 medium onion, chopped
3 garlic clove, crushed
oil (I used lard)
1 tsp Hungarian paprika powder
6 large eggs, lightly beaten
1/4 cup heavy cream
1/4 cup of milk
1 1/2 – 2 cups grated pepper jack cheese, divided. (cheddar cheese would also work)
1/4 cup sliced scallions (optional)
1 jalapeno pepper, chopped (optional)
salt and pepper to taste
METHOD
Preheat oven to 375 F. Grease a casserole dish (11 x 8 x 1 inch).
Grade the potatoes on a cheese grader. I used the larger holes.
Heat a large skillet over medium high heat. Fry the potatoes for 10 minutes. (The potatoes should be cooked to perfection so they are ready to eat). Set aside.
In a separate skillet, sauté onions on medium high heat until translucent. Add the sliced bacon for 5 minutes (omit if not using bacon). Add the sliced mushrooms and continue cooking them for another 5 minutes. Add paprika and garlic, stir for 1 minute. Add 1/4 cup cold water, stir. Add the spinach. Cook for 5 minutes covered. Turn off heat. Add the whisked eggs, milk, cream, salt and half the cheese. If using, add the chopped jalapeno peppers. Set aside.
In the pre-oiled casserole dish, spread the cooked hash-browns on the bottom. Pour the egg/vegetable mixture on top of the potato layer from the previous step. Spread the remaining cheese on top.
Bake in a preheated oven for 30 minutes. (Increase temperature to 400 F for the last 10 minutes if you want a crispy edge). The dish is done when the top has a nice golden color.
Add pepper and salt to taste.
Serve warm with salsa or ketchup. You can also add sausages, ham etc. In the summer, I like to add seasonal vegetables like lettuce, asparagus. In the winter, I like to add pickles.
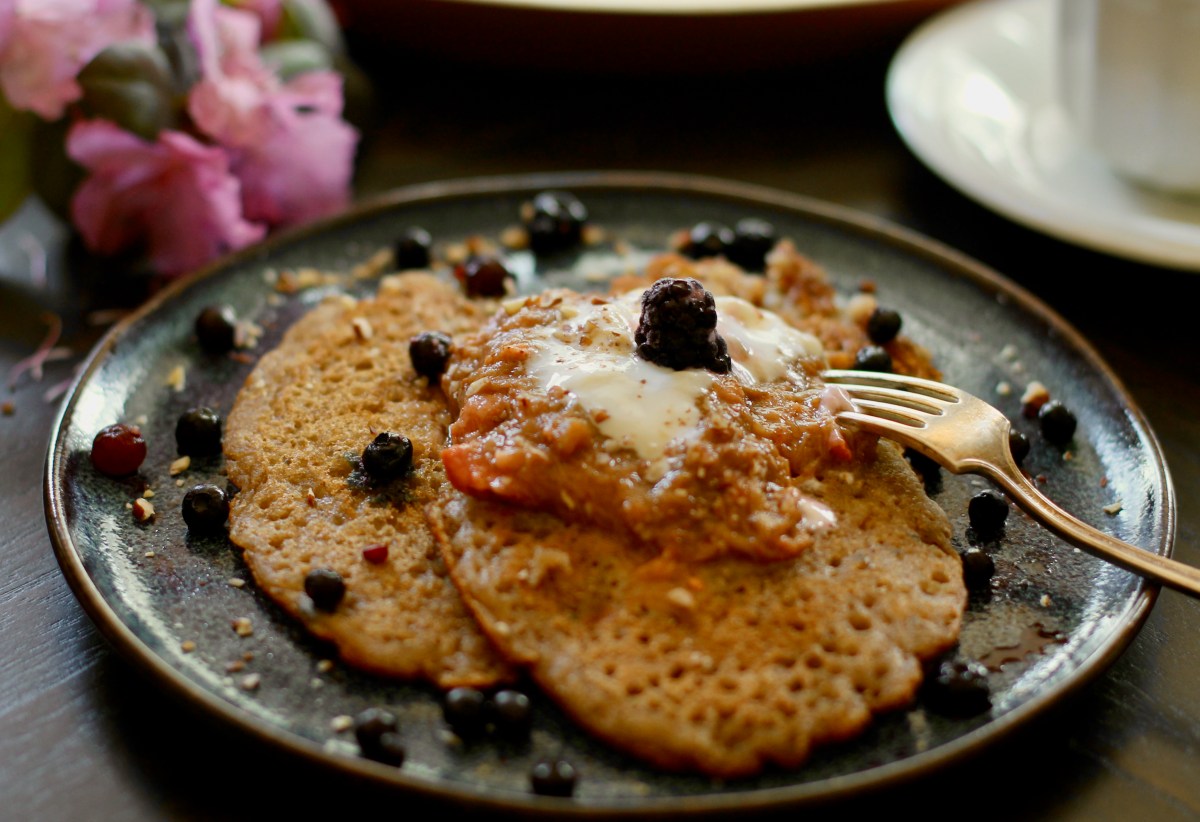
Surpriseyour mom for breakfast with these delicious, fluffy pancakes for Mother’s Day or just treat yourself any time!
These pancakes are a happy marriage of the traditional American buttermilk pancakes and the Russian blini. The mixture of the buckwheat and the tapioca gives these pancakes a fluffy and tender texture with a sweet and nutty flavor. This pancake recipe is naturally gluten-free.
I wanted to replace the white flour in the traditional American pancake recipe with something healthy as white flour is tasty but is not very nutritious or filling. I remembered the Russian pancakes called blini; however, blini on its own is too dry for me. Furthermore, many of the flour alternatives can be lesser quality. So after using buckwheat and tapioca over the years, I decided to experiment. I have to say the result quickly became a family favorite.
Buckwheat is an ancient plant but has been forgotten. It has recently become popular again in the West because it lacks gluten. Gluten can cause gastrointestinal problems in so many people. Buckwheat is a staple food in Russia, in fact, the Russians have survived on it for centuries and got them through difficult times. Eating buckwheat might have been one of their secrets.
So why should we eat buckwheat on a regular basis? Even if there is no crisis, buckwheat can be included in our diet as it is incredibly nourishing and tasty.
Buckwheat is very healthy. It is not a grain but it is the seed of the buckwheat plant. It does not cause digestive problems like wheat does. Instead, it actually nourishes the digestive tract. Its neutral thermal nature and sweet flavor are an indication that it is a tonic food. It is rich in protein. It also has intestine cleansing, strengthening and appetite improving abilities.
To improve the texture of the pancakes, I added tapioca. Tapioca is a type of starch that’s derived from the starchy vegetable called cassava root. It is a popular flour to use for its starchiness when replacing wheat flour but it doesn’t provide many important essential nutrients. Combining tapioca with the nutritious buckwheat solves this issue though.
You can serve these pancakes with anything your heart desires. I think nuts and maple syrup are essential. In the summer, I like to serve them with fresh fruits and rhubarb sauce and in the winter apple compote or apple sauce. Please check out my rhubarb sauce recipe that I had posted earlier.
TIPS
This is my well tested pancake recipe, I have been making them for many years regularly on the weekends. I tested the recipe with butter and with coconut oil, both worked great! Also, I used milk and almond milk, both worked well as well.
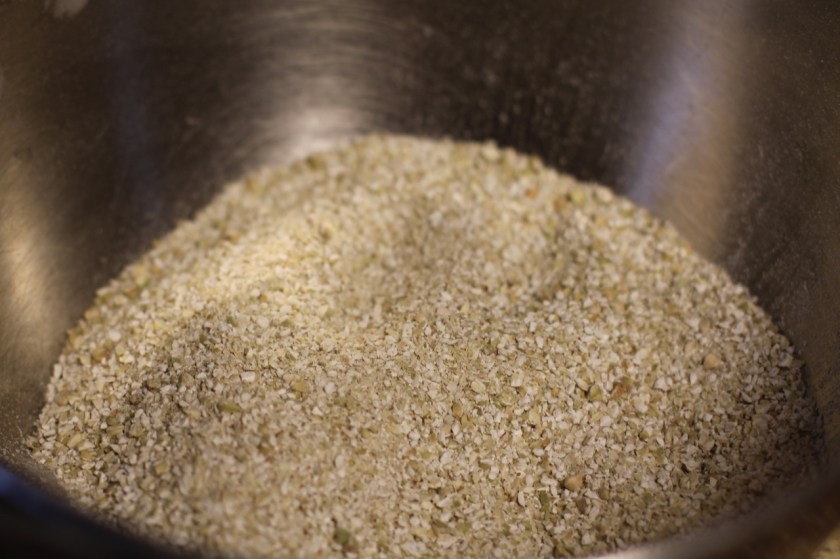
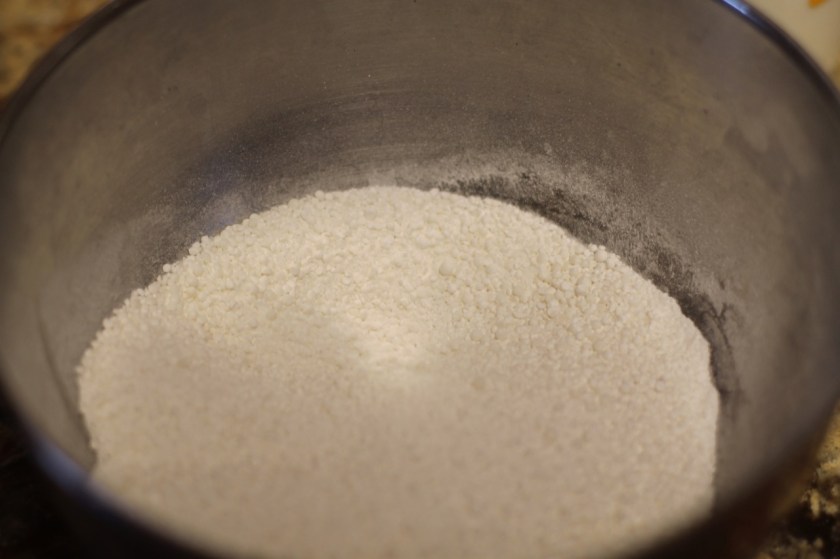
The trick to making these pancakes is to grind both the buckwheat groats and the tapioca pearls in a blender fresh before you make the pancakes. It is worth it! I have a Vitamix but any blender will work. The store-bought flour yields a lesser quality in texture and flavor in my opinion. Of course, you can make the recipe with flour that you get at a store.
Another trick is when you grind the grains, leave the flour a little coarse. This gives the pancakes a bit of texture. Keep checking the flour to figure how much time you need for grinding. I grind the buckwheat for about 3 seconds and the tapioca for about 15 seconds. Hint: stop grinding them before they become a fine flour consistency, they should be grainy.
Also, I like to use buttermilk. Traditionally, buttermilk is used in pancakes. I like using it because it makes the pancakes taste better. You get this really nice buttery flavor and soft texture. Also, it makes the pancakes healthier as it helps digestion.
I used to buy buttermilk but since I found this simple hack, adding apple cider vinegar to milk, I don’t buy buttermilk anymore. Try it, it works well. This method can be used with almond milk as well. Check out my recipe on how to make buttermilk.
If you make the recipe please feel free to share your experience in the comment section. I’d love to hear from you!
RECIPE
Makes about 21 pancakes
I created this recipe so please don’t share it without giving proper citation.
INGREDIENTS
1 cup freshly grounded buckwheat groats or buckwheat flour (please read note above)
1 cup freshly ground tapioca pearls or tapioca flour (please read note above)
2 whole eggs, lightly beaten or 1/2 cup unsweetened apple sauce
2 Tbsp of melted butter or coconut oil
oil for the pan
½ tsp salt
1 Tbsp sugar (optional)
Chopped nuts, for serving
maple syrup, for serving
fruits, for serving
yogurt, for serving
Ground buckwheat flour
ground tapioca flour
METHOD
Grind buckwheat and tapioca. Grind buckwheat on the highest setting for about 3 seconds. Grind tapioca on the highest setting for 15 seconds. Of course the time will depend on how strong your blender is. Please check for more info in the introduction and pictures above. (Omit if using store bought flour).
Put buckwheat and tapioca flours in a large bowl. Add the buttermilk, mix. Let the mixture sit overnight but at least for 4 hours. (I leave it on the counter overnight. If you put it in the fridge, make sure the batter is at room temperature before making the pancakes).
Add baking soda, baking powder, salt, eggs, corn starch or arrowroot, melted butter or oil and sugar (optional). Mix well.
Heat a skillet or griddle over low to medium-high heat and grease with oil if need be. When skillet is hot (if you flick water onto the skillet, it should sizzle), take a ¼ cup of batter and pour onto skillet. Let cook for a couple of minutes (until the pancakes begins to bubble slightly). Flip and let cook for another 1-2 minutes until pancake are a slightly brown .
Serve hot with your choice of yogurt, rhubarb sauce, maple syrup, nuts, fruits, jam etc.
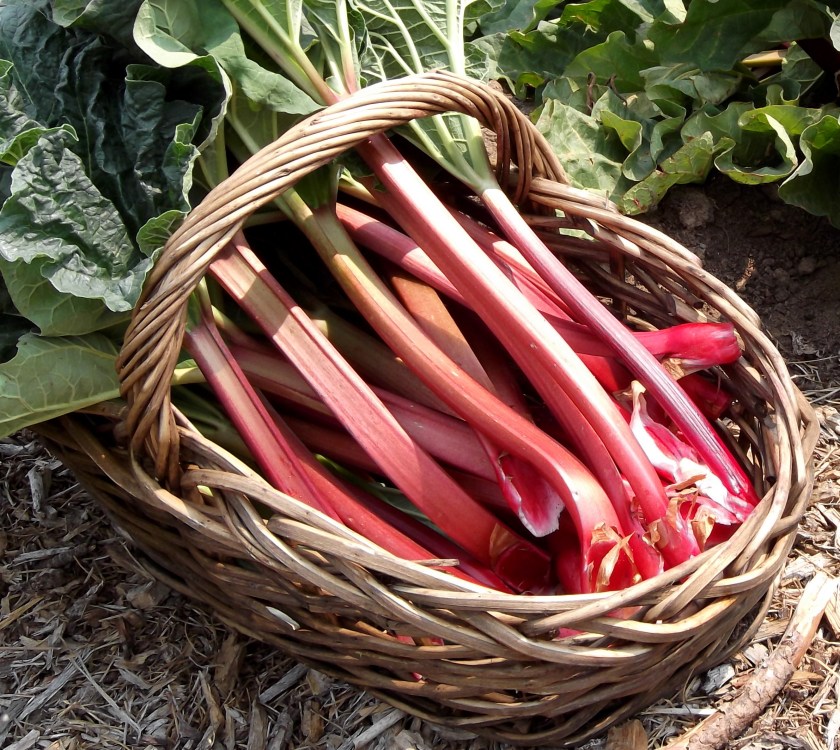
I get excited when my rhubarb plants are ready in my garden. One of my favorite ways to use rhubarb is to make a delicious sauce. The main ingredients are rhubarb stalks, sugar and spices. It is very easy to make. You just have to let the stalks sit in sugar until it exudes its liquid, add some spices to offset its sourness and cook gently on low heat for a short time. That is it! I like to serve it with pancakes.
Rhubarb is the first fruit here, oops I meant to say vegetable. Yes, people often think it is a fruit because of its fruity, sour taste; however, it is in fact a vegetable. While it is not a fruit, it can be prepared with sugar to kind of pretend that it is a fruit. Nevertheless, rhubarb sauce goes well with pancakes and other desserts or you can just eat it alone.
Yes, the rhubarb is sour so we need to add a few things. Sugar is a must for sure! Also, chefs like to add some chopped ginger and cinnamon to offset the sourness. In addition, I added berries to help make this sauce even tastier.
No water needs to be added. I let the stalks sit in sugar before cooking them. They will release enough liquid so no water needs to be added.
Also, rhubarb has favorable health effects. It has been used in the culinary world all over the world as it helps digestion and has an interesting flavor. It suits the spring season as it is cooling and detoxifying to the liver.
The leaves are not edible as they contain oxalic acid and should be discarded. Do not eat them! But the stalks are edible and delicious. Just on the side, if you eat one leaf by mistake, no worries, nothing will happen! I was fine, just be aware that they are not edible.
When selecting the stalks, choose firm stalks that are not wilted. This should not be a problem if stalks are freshly picked.
Wash and trim the top greens off. Discard the green parts.
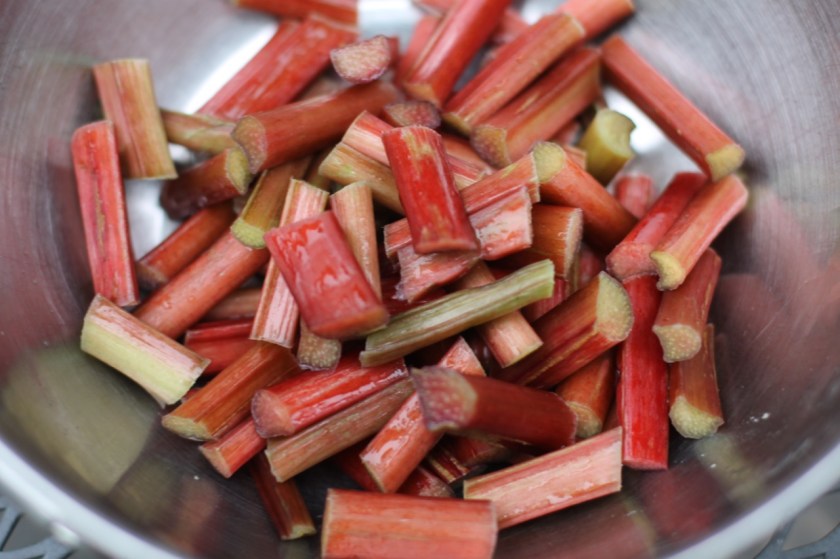
Cut the red stalks into 1 inch pieces.
Put rhubarb and sugar in a smaller pot for about 15 minutes or until the rhubarb exudes some juice. No need to add water!
Add the strawberries.
Bring the mixture to a boil over medium-high heat. Stir.
Cover and simmer on low medium heat, stirring occasionally until the rhubarb stalks soften for about 30 minutes. There should be no hard, large lumps remaining. Add the ginger and lemon or orange peels in the last 10 minutes.
If you want some chunkier pieces in your sauce, take a small amount of the soft larger pieces out with a slotted spoon. Set aside. Let the rest of the sauce cook until the stalks fall apart and the liquid thickens.
Add the pieces back to the pot that were removed earlier.
Turn the heat off. Add cinnamon. Stir.
Let it cool for 15 minutes, the sauce will thicken as it cools.
Serve with pancakes or yogurt.
Store in the refrigerator in a closed jar for up to 1 month.
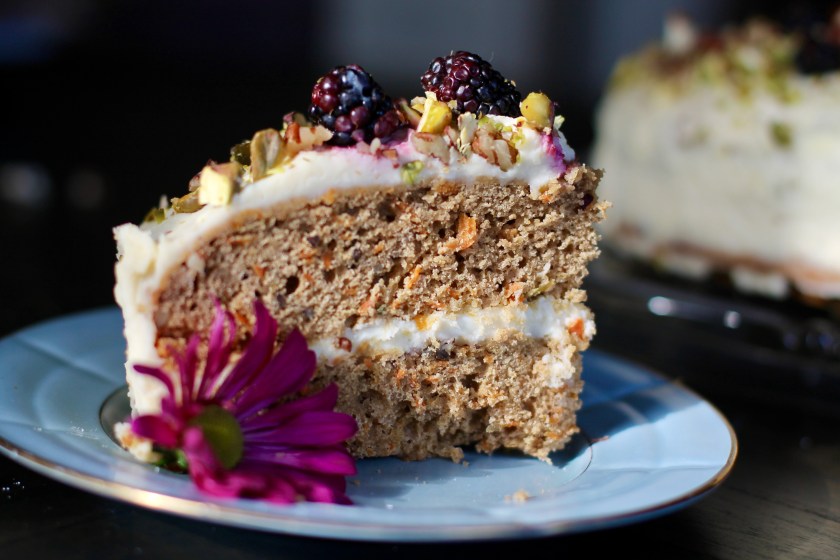
Every year, I make sure that I have some local carrots saved from last fall so I can make this cake for Easter. The local carrots add so much to this cake, they are sweet and full of flavor. With these carrots, I am able reduce the sugar content in this recipe. We all agreed the cake is plenty sweet and delicious. I included a range for the sugar content so you can decide how much sugar to use in your cake.
This is a delicious carrot cake that I make for Easter; however, it is not just for Easter, it can be made for any occasion! It is made with the moist, spiced carrot bread base and is wrapped by the luscious lemony cream cheese frosting. It is definitely a crowd-pleaser!
Please try and let me how you liked it! I’d love to hear from you!
RECIPE
Makes 16 slices
Make sure all ingredients are at room temperature.
CAKE INGREDIENTS
1/2 – 2 cups brown sugar or confectioners sugar
4 large eggs
1 cup oil (I used coconut oil)
3/4 cup smooth unsweetened apple sauce
1 tsp pure vanilla extract
2 1/4 cups all-purpose flour (cut and sifted)
2 tsp baking powder
1 tsp baking soda
1/2 tsp fine see salt
2 tsp apple spice or cinnamon powder
2 cups grated carrots
1 cup raisins (optional)
1 cup pecans for the cake, chopped, optional
4 oz fresh fruits for decoration, optional
1 cup nuts for the top, optional
FROSTING INGREDIENTS
Make sure all these ingredients are at room temperate
16 oz full-fat brickcream cheese
1/4 – 1/2 cup cream
4 Tbsp unsalted butter
1 – 3 cups confectioners sugar
1 tsp pure vanilla extract
juice of 1 lemon
pinch of salt
INSTRUCTIONS
Making the cake
Set oven to 350°F. Butter and lightly flour the cake form. You can use parchment paper instead.
In a large bowl, whisk the wet ingredients (eggs, oil, applesauce, and vanilla) together until combined.
In separate large bowl, whisk dry ingredients (the flour, baking powder, baking soda, salt, sugar, cinnamon) together.
Mix the wet ingredients with the dry ingredients until just combined. Do not over mix!
Fold in the fun ingredients (carrots, raisins and the chopped pecans).
Divide the batter evenly pouring the batter into the two cake pans.
Let the dough rest for 1 hour if possible.
Bake for 30 – 35 minutes. Test the center with a toothpick. If it comes out clean, the cakes are done.
The cakes must be completely cool before frosting and assembling. Remove the cakes from the forms and set them on a rack.
Making the frosting
While the cake is cooling, make the cream cheese frosting. In a large bowl, beat the cream cheese and butter together with a handheld mixer.
Add the sugar, vanilla extract, lemon juice, cream and a pinch of salt and continue beating the frosting until smooth. Frosting should be soft, but not runny.
Assembling the cake
Place 1 cake layer onto a serving cake platter. Spread some of the cream cheese frosting evenly over the cake layer (about 1/4 of the batch). Add the other cake layer. (Tip: Place the top cake layer upside down so you get a nice flat top that is easy to decorate). Using a spatula, spread the cream cheese frosting evenly over the top of the cake and the sides.
Serving
Decorate the top of the cake with the fruits and nuts of your choice.
Refrigerate cake at least for one hour before serving. This helps the cake hold its shape when cutting.
To store, cover and refrigerate. Keeps for up to 7 days.
Try this delicious, healthy meal, it is very easy to make! It is a popular dish sold in US health food stores. Quinoa and black beans are drizzled with some olive oil, lime juice, and spices. It is vegan and gluten free. I especially like to take it to parties.
Makes 6 cups
INGREDIENTS
1 cup dried black beans (15 oz canned black beans), rinsed
1 cup quinoa, washed and rinsed
2 cup stock (vegetable or chicken) or water
1/2 cup olive oil or avocado oil
juice of 2 limes or 4 tbsp lime juice
2 tsp cumin powder
2 tsp coriander powder
1 tsp smoked paprika
2 bunches scallions, chopped
1 smaller cucumber, cubed
1 bunch cilantro, chopped
crushed red pepper flakes, to taste
chopped tomatoes, optional
salt and pepper to taste
DIRECTIONS
Clean and soak the beans for 8 hours. Remove the soaking liquid, discard. Cook the beans in fresh water for 1.5 hours. Strain. (Omit if using canned beans).
Wash the quinoa well with cold water. Let it soak in cold water for at least 1 hour. Remove the soaking liquid and discard. Add the stock or fresh water. Bring to a boil and cook covered for 10 – 15 minutes or until all the water has cooked away. Turn off heat and keep lid on for 15 more minutes. (You can omit the soaking time if you don’t have time).
Meanwhile, prepare the dressing. In a medium sized bowl, mix oil, lime juice, spices, salt. Add the quinoa, scallions, tomatoes, black pepper and cilantro to this mixture and stir.
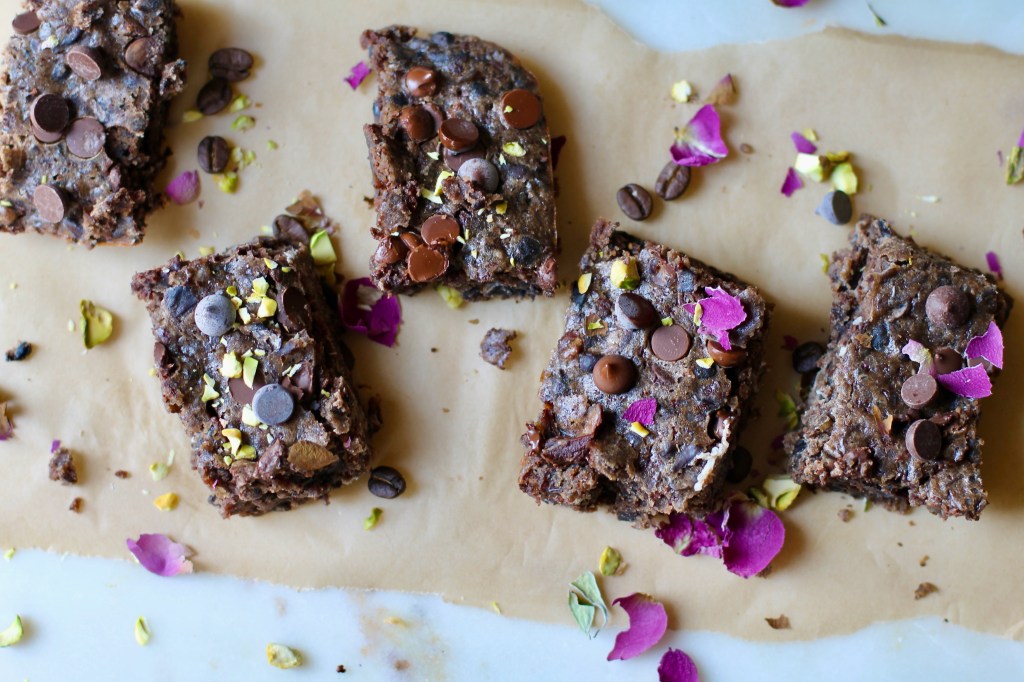
A few years ago, I had black bean brownies at a potluck. I love brownies but they tend to be rich and heavy. I remember looking at the brownies on the table and wished I could have had one … and soon afterwards the woman who baked the brownies came to me and invited me to try it … I explained to her that I really wanted to have one but brownies were a bit rich for me. Then she assured me that these brownies were not the regular brownies but they were made with black beans. Hmm I thought this was an interesting take on brownies … I kind of hesitated but then I gave it a try… and I am so glad I did! These are absolutely delicious, decadent brownies even better than the original!
These are very tasty, chewy and chocolaty brownies, no one will guess they are made with black beans. Try to use the best quality chocolate that you can possibly get as the chocolate is still an important part of the recipe. This is definitely a very healthy alternative to the original brownie recipes.
So why use black beans? Well, they are actually sweet. They also add protein to the brownies. The protein in the black beans helps to curb the blood sugar spikes that you would see with regular desserts.
RECIPE
Yields 12 slices
Ingredients
1 cup dried black beans or 1 can (15 oz) black beans, rinsed and drained
1/2 – 1 cup sugar
1 tsp baking powder
1/4 tsp salt
1 large egg, lightly beaten
1/4 cup coconut oil or unsalted butter, melted
1/2 cup cocoa powder
1 tsp vanilla extract
1 tbsp coffee liquor
1 cup chocolate chips, divided
1/2 cup walnuts, chopped
Directions
Preheat the oven to 350°F (175°C). Grease an 8 x 8 x 2 inch baking pan or line it with parchment paper.
Clean and soak the beans for 8 hours. Remove the soaking liquid and discard. Cook the beans in fresh water for 2 hours. Strain. (Omit if using canned beans).
Add the black beans without its liquid to a food processor and chop until smooth. I don’t have a food processor, so I just mash the black beans with a potato masher. It works great.
In a bowl, mix the chopped black beans, egg, coconut oil, cocoa powder, sugar, baking powder, coffee liquor, vanilla extract and salt until the mixture is smooth and well combined.
Stir in the chocolate chips and the nuts. You can do 1/2 cup of chocolate chips and save the other half for the top.
Pour the batter into the prepared baking pan and spread it evenly.
Put half the chocolate chips on the top.
Bake for 20 – 25 minutes or until a toothpick inserted into the center comes out clean.
Let the brownies cool completely in the pan before slicing.