Often when you ask children what their favorite holiday is they say … Christmas! And then you ask why … because they get presents. I’m sure that is how I would have answered those questions back when I was a little girl. This is a very magical holiday for sure … but as we get older, we start thinking about giving too.
Many people enjoy giving treats at Christmas time. But where did the idea of Christmas gift giving come from? … and what about Santa and his rein deer?
Let’s go back in time. It is believed that it came from an old Pagan tradition. Giving gifts can strengthen the ‘family and well-being of others’, an important theme during this time of the year. This custom was part of the tradition of exchanging mushrooms as a gift at the time in the Northern part of Siberia. Mushrooms were special because of their connection to longevity. People delivered the wrapped carefully prepared dried mushrooms to people’s houses for celebrating the winter solstice. There was so much snow that they could not open the doors. The packages had to be dropped off through the holes on top of the yurts, where the smoke could escape. Also, these people used rein deer for transportation in the snow. And there is even more check this out … I need to mention that their traditional clothing is red and white … hence comes the story of Santa dressed in red and white, delivering presents through the chimney down the fire place with the help of some rein deer…
After so many years, we are still exchanging gifts. Giving home-made foods can be meaningful for both the giver and the receiver. If you are not sure what to give this year, maybe consider giving cookies. I’m presenting two different cookie recipes that can be gifted during the holidays. They are ‘Christmas’-y and mouth watering.
Wishing everyone a very merry Christmas!
COOKIE RECIPES
Please check out the following links for the recipes.
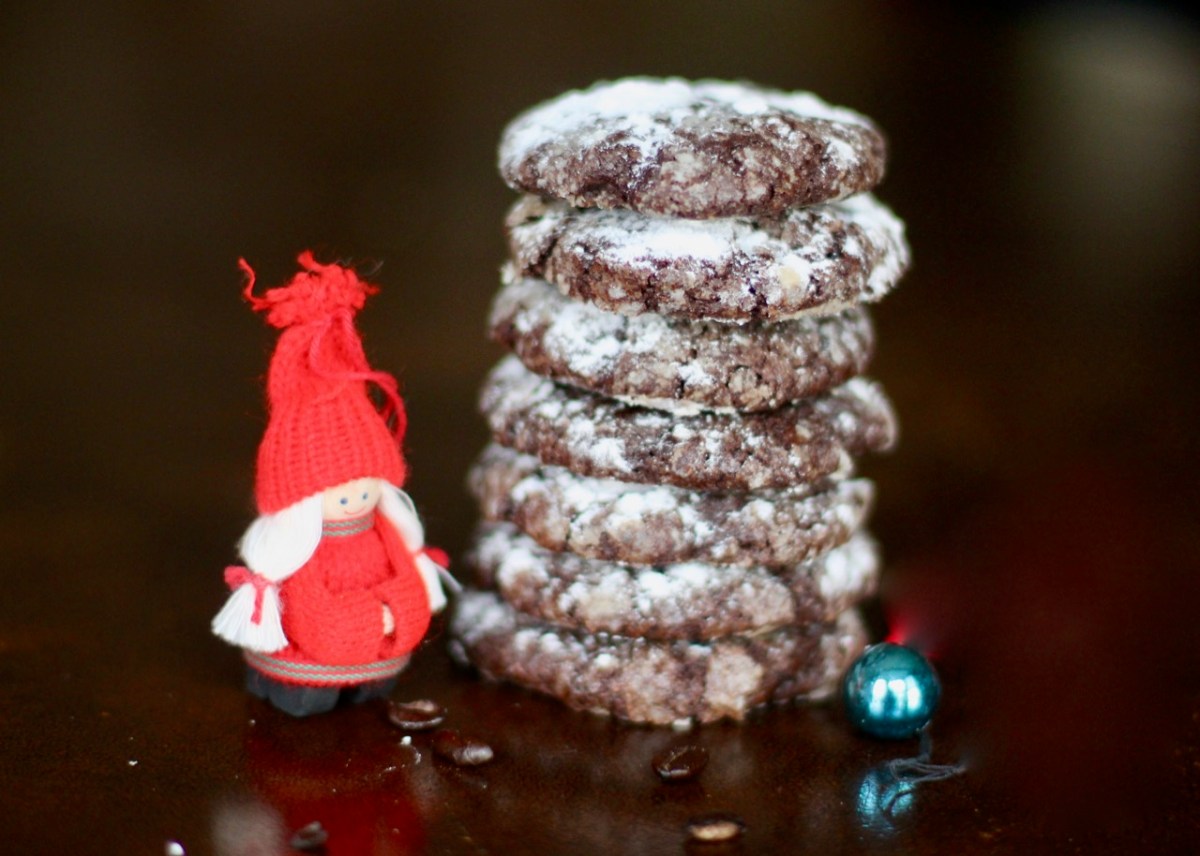
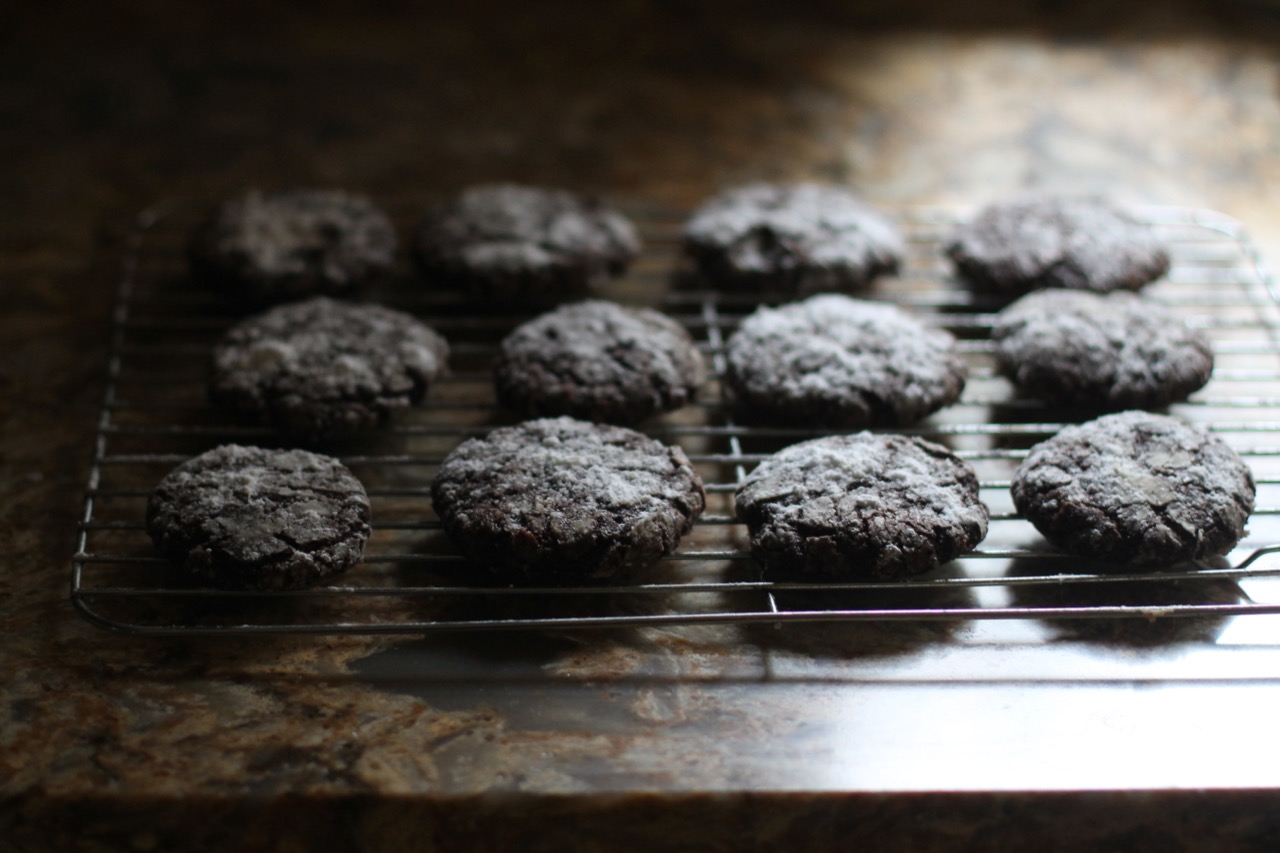
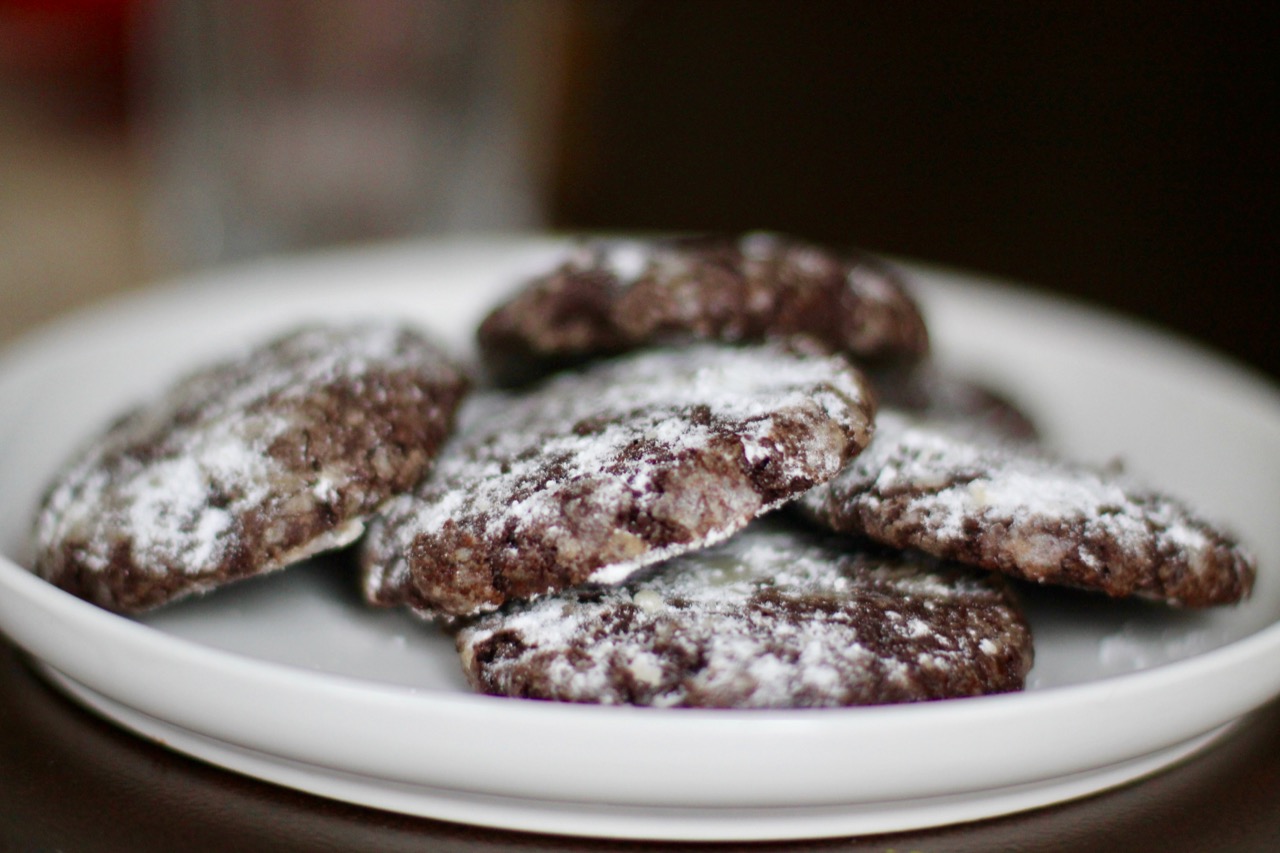
You can surely impress your guests with these rich chocolate cookies or maybe you can just use this recipe for a last minute gift for your neighbors… The crunchy outside is coupled with the melt-in-your-mouth soft inside and is elevated to another level with the espresso flavor. Enjoy!
Recipe
Makes 16 cookies
Ingredients
1/2 cup all-purpose flour
1/4 cup unsweetened cocoa powder
4 tsp instant espresso powder
1 tsp baking powder
pinch of salt
4 Tbsp unsalted butter
2/3 cup brown sugar
1 egg, lightly beaten
4 ounces bittersweet or semisweet baking chocolate
1 Tbsp milk
1/2 cup powdered sugar, for coating
Preparations
Preheat oven to 350 F.
Start melting the chocolate. I used a double boiler.
In a larger bowl, sift together flour, cocoa, espresso powder, baking powder and salt. Make sure you use some kind of a sifter, tea strainer as the powdered sugar and the cocoa powder need to be without knots. Set aside.
In a separate bowl, cream the butter with the brown sugar. Add the egg and mix until incorporated.
Mix in the melted chocolate and the milk.
Add the flour mixture from earlier until you get a ball shaped dough. Put in a plastic bag and place in the freezer for 45 minutes.
Butter a cookie sheet. Form 2 inch balls.
Pour 1/2 cup of powdered sugar in a medium sized bowl. In batches, roll the balls in the sugar and let the balls sit for a minute in the sugar. Repeat one more time.
Place the balls about 1 inches apart on the cookie sheet.
Bake for 12 – 14 minutes. They should be soft but not fall apart. Let the cookies stay on the baking sheet for 5 minutes to cool.
Transfer them on a wire rack for 15 minutes. They will harden.
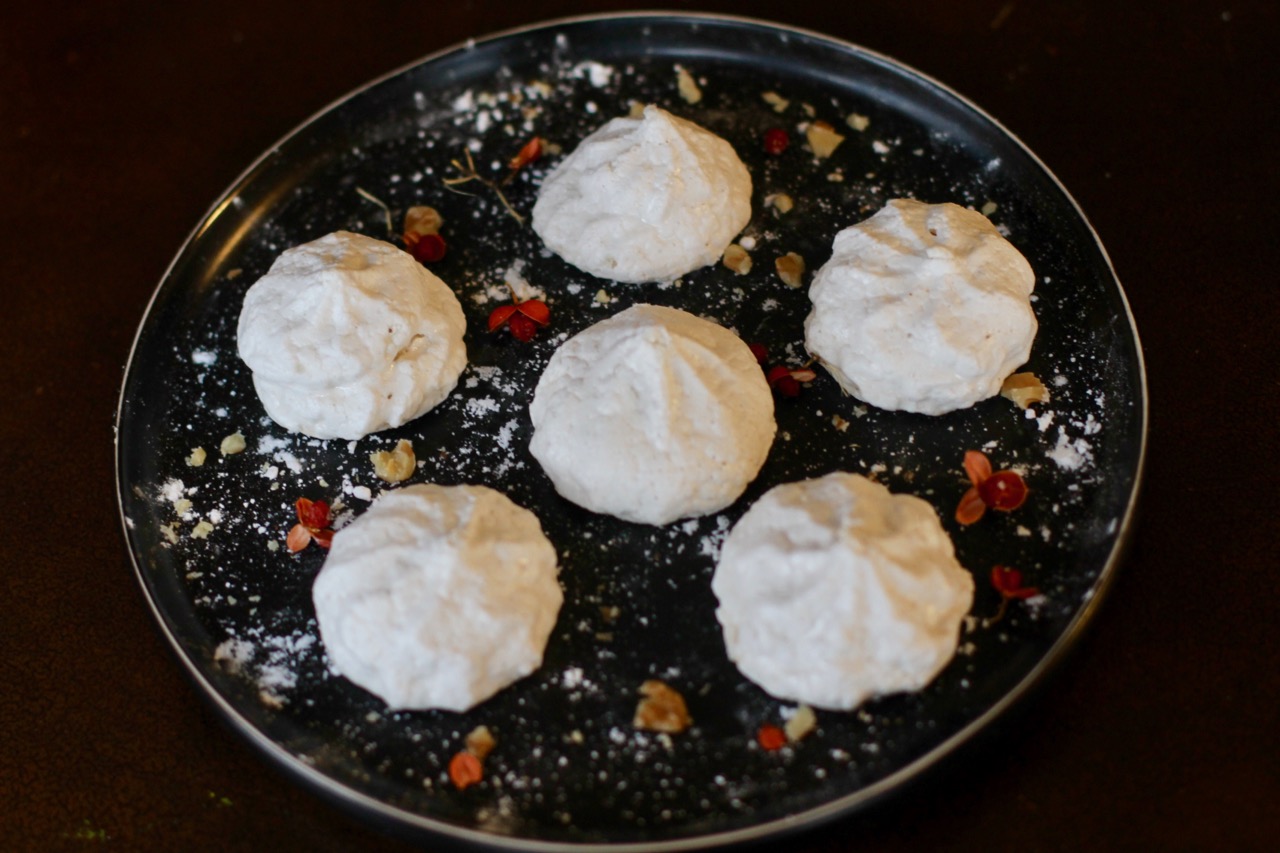
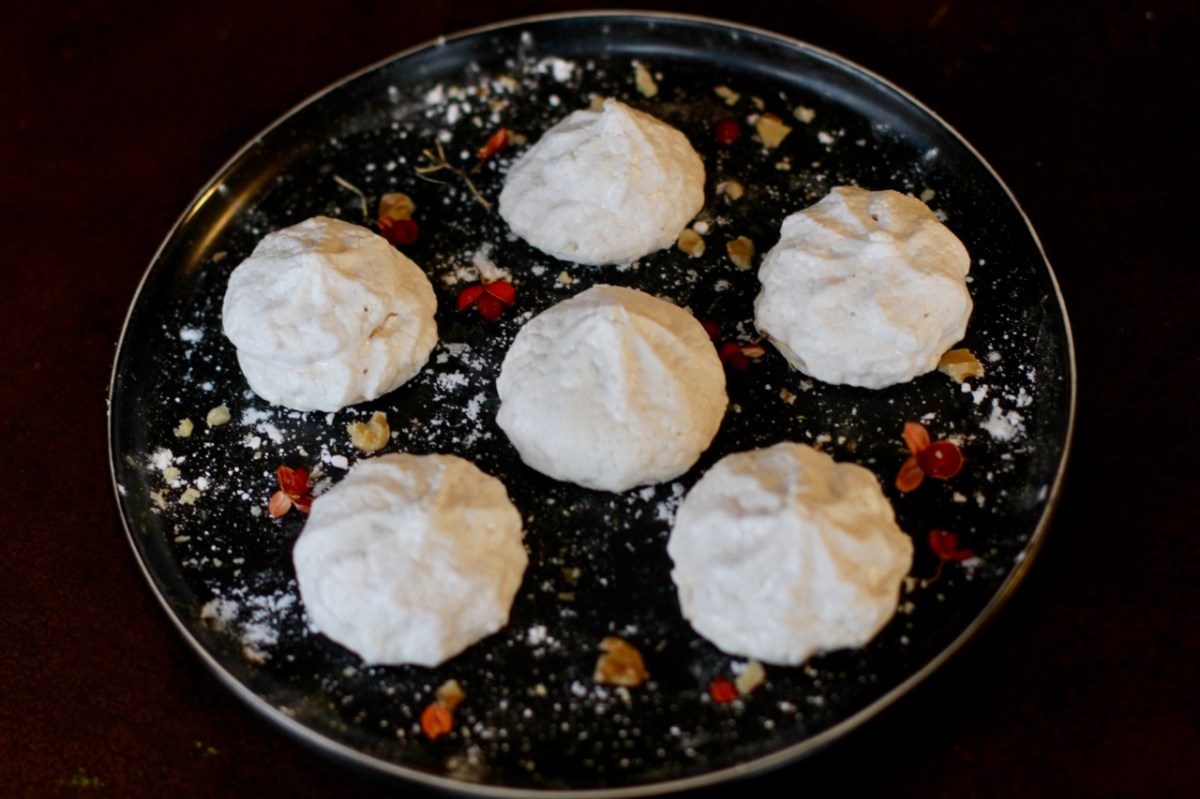
Meringue cookies have been one of my favorite Holiday desserts since my childhood … maybe because I don’t care much for the heavier desserts but still enjoy a bit of sweetness during Christmas time. These simple cookies are delicious and airy. They have just the right amount of texture with the nuts and the almond essence. They would be a great gift for those friends and family members who like something sweet with a little bit of crunchiness or eat gluten free foods. Of course, this is a great recipe to have on hand so you can use up all those left over egg whites. Enjoy!
RECIPE
Ingredients
(makes about 2-3 dozens)
4 egg whites, room temperature
1/8 tsp salt
1 cup of granulated sugar (regular sugar pulsed for about 10 seconds in a food processor)
1 tsp almond extract
1/2 cup of finally chopped walnuts or pecans or almonds
1/4 tsp cream of tatar
Preparation
Preheat oven to 225 degrees.
Line a baking sheets with parchment paper.
In a larger sized bowl, on medium high speed quickly beat (few minutes) the egg whites until they are frothy but not hard. Do not over beat.
Add the sugar gradually on high speed. It is important to add the sugar 1 Tbsp at a time to make sure they get incorporated nicely. I had a family member who did this. On a low setting beat in the vanilla, cream of tartar, almond extract and salt. Gently fold in the nuts with a spatula.
Drop a tablespoon-full of the egg white mixture onto the parchment paper lined cookie sheets, spacing them about 1 inch apart. I used a piping bag with a large nozzle to get a more uniform shapes.
Bake for 50 – 60 minutes. Cookies should not be damp. Leave them in the oven for another hour while the oven is cooling.
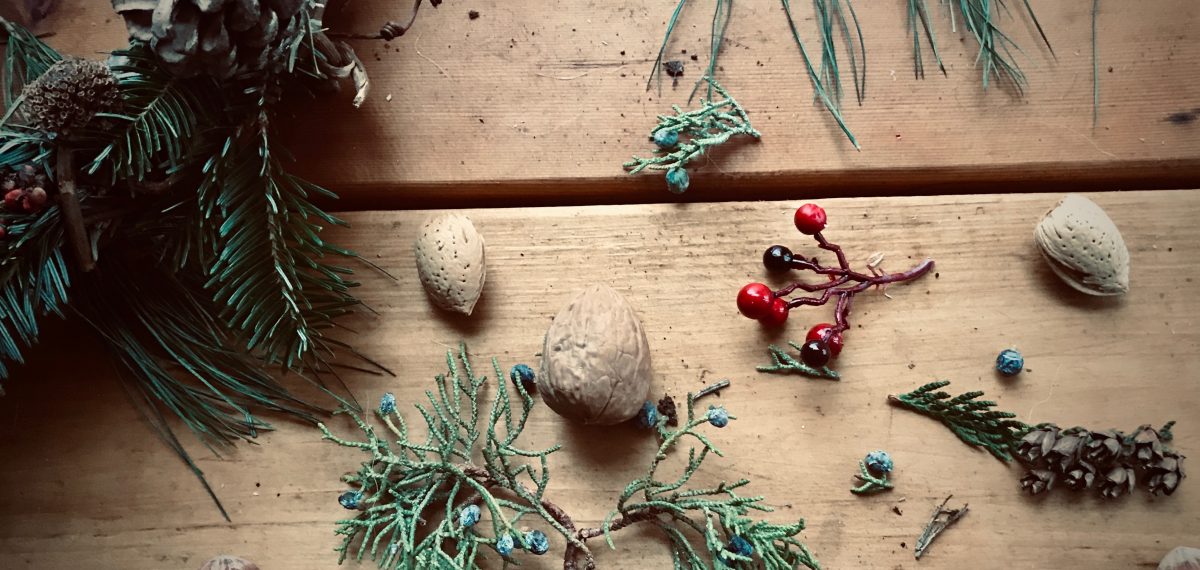
December brings forth Winter Wonderland and the Holidays. When I think of Christmas dishes, warming and festive winter foods come to my mind. For me Christmas is a lot about cooking and baking … and of course music. I’m already looking forward to all the baking and cooking I will be doing and singing along my favorite Christmas music…
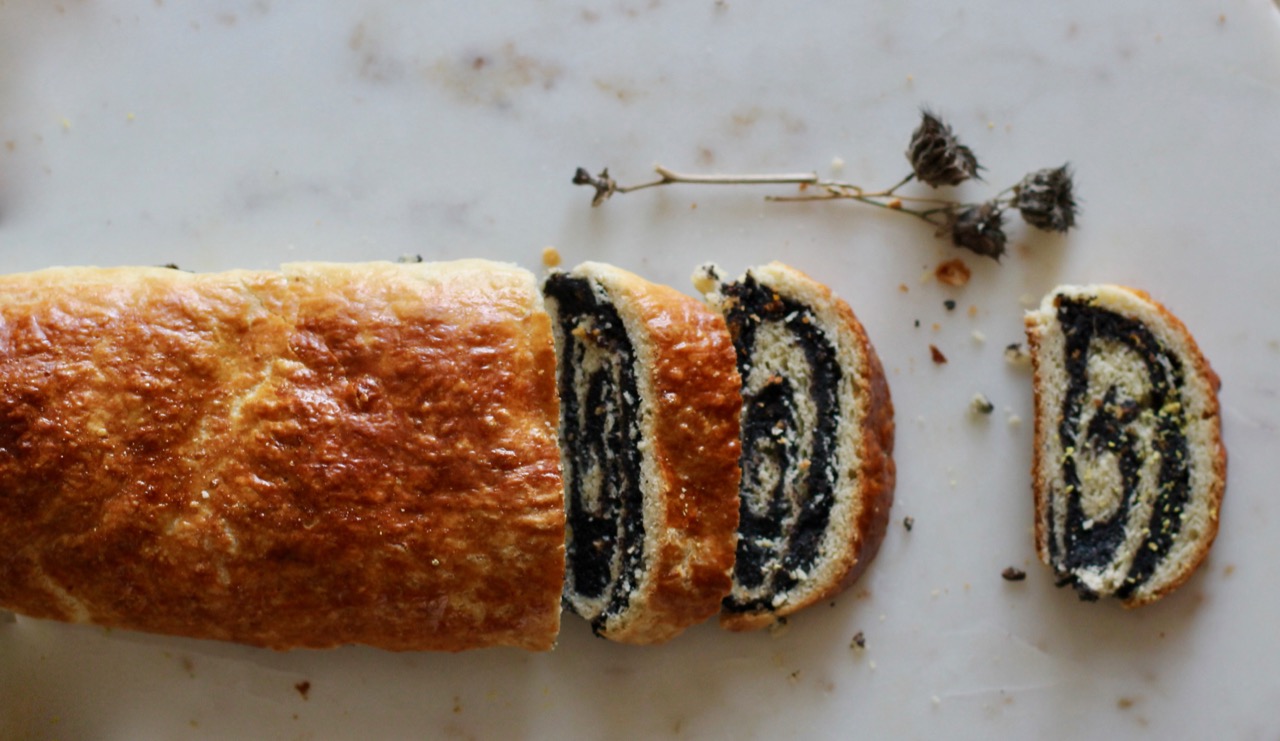
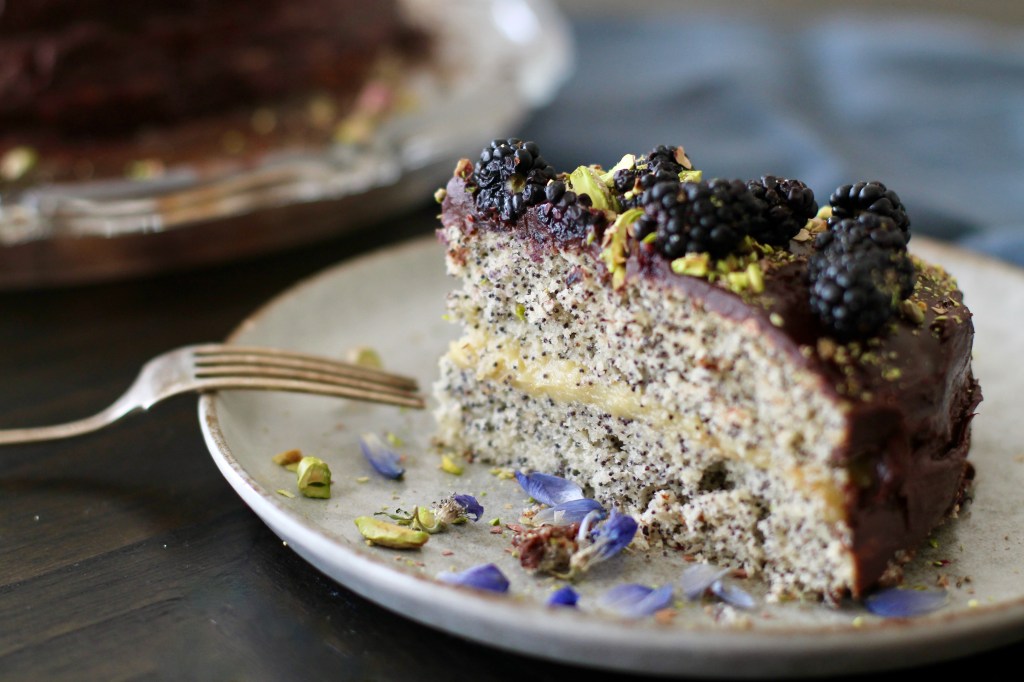
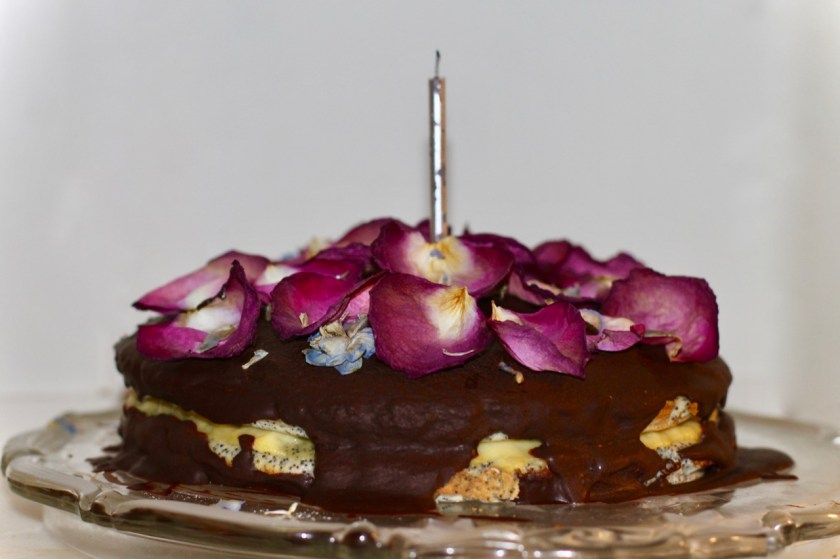
This is my husband’s favorite cake that his mom made for his birthday every year. The recipe comes from the New York Times Cookbook, even his grandmother made it. When I talked to my husband’s cousins, they all raved about this cake, the Poppy seed cake … No surprise they all think it is the best cake on Earth … it is moist, crunchy and delicious …
This cake takes some time and patience to make but is not too difficult. Make sure all ingredients are at room temperature, it should be around 65-70 F.
The recipe has three parts: the dough, the vanilla creme (creme patisserie) and the chocolate ganache. Please read the following notes on how to make the cake.
The dough requires sifted flour. Sifting flour is an easy process, cooks generally use a flour sifter. If you don’t have one no worries, you can use a strainer or a wire whisk. The idea is to get air into the flour. Then once sifted, measure out the 2 cups, using a knife to level the top. Return the extra flour into the flour bin.
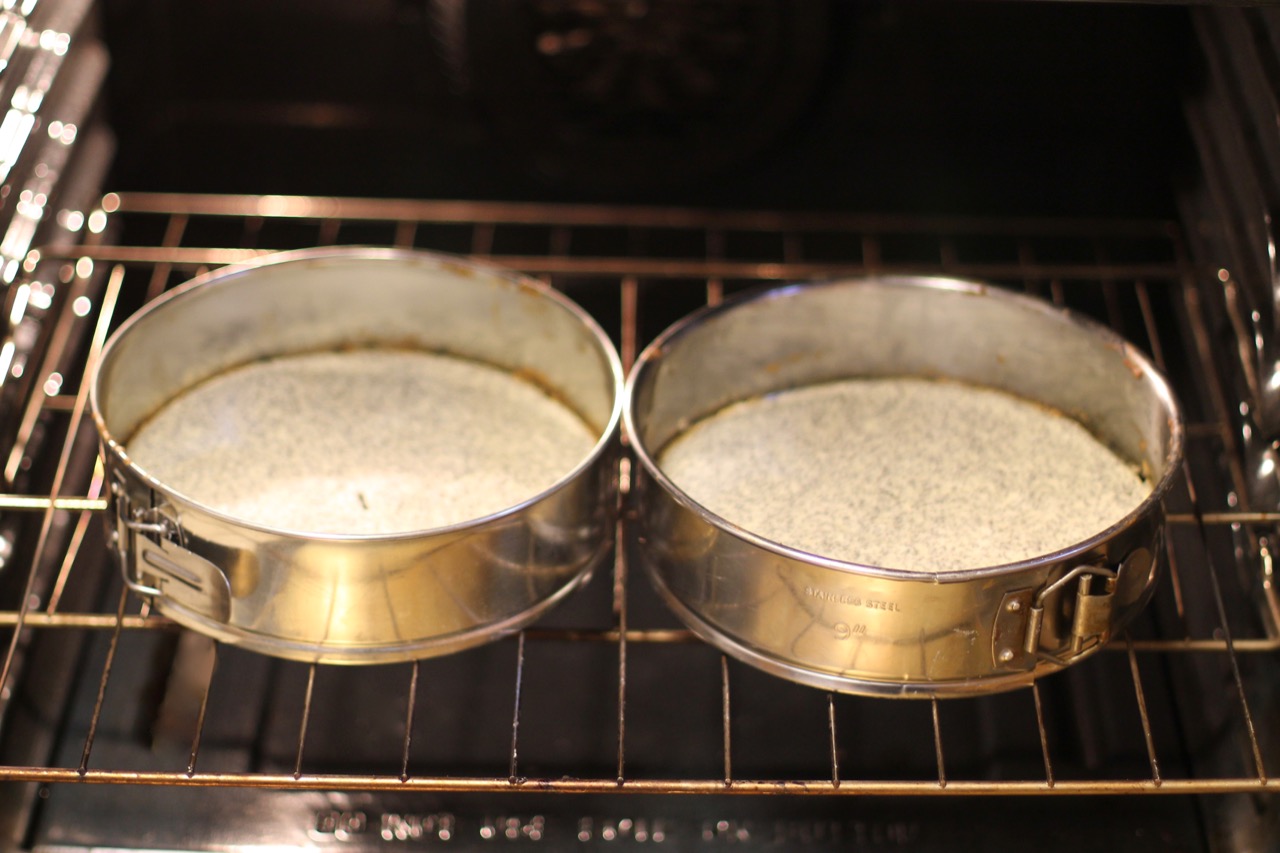
You need two 9″ round cake forms. For a long time I only had one cake form and I was fine. I just had to wait until the form cooled off after baking the first batch. I ended up buying a second one a few years ago. It is nice to have two but you can get by with only one.
The vanilla creme is pretty straight forward. I used a double boiler to cook the ingredients. If you don’t have a double boiler, you can use a metal bowl that fits on the top of the bottom pot securely but does not touch the bottom of the pot.
The chocolate ganache is what brings all the ingredients, the cake together. It should be made a little softer than generally made for cakes … should stick to the surface but not become hard. Also, the sweetness of the chocolate is a personal preference. I like the semi sweet chocolate personally but you can use whatever you prefer, of course.
RECIPE
Makes about 8 slices
Ingredients
Dough
2/3 cup whole poppy seed
1 cup milk
11 Tbsp (5.4 oz) butter, soft
1/2 -1 1/2 cups of sugar (to taste)
2 cup unbleached wheat flour, CUT/SIFTED
2 1/2 tsp baking powder
1/8 tsp salt
1 tsp vanilla extract
4 egg whites (save 3 yolks for creme)
Vanilla cream
1 cup milk
3 egg yolks (saved from earlier step)
3 Tbsp sugar
3 Tbsp flour
1 tsp vanilla extract
Chocolate ganache
12 oz baking chocolate, bitter sweet
1.5 cups heavy cream
1/8 tsp salt
1 -3 cups sugar
1/2 tsp vanilla extract
Preparation
Please check notes above for more info on how to make this cake.
Making the dough
Preheat oven to 350 F.
While still cold, separate the eggs. Set aside 1 egg yolk so you get 4 egg whites and 3 egg yolks in separate bowls.
Have all ingredients at room temperature (70 F).
Soak the poppy seed in 1 cup milk overnight but at least for 2 hours.
Cream butter with sugar and add the vanilla extract. Set aside.
Cut and sift flour. Please note the amount of flour used is for cut and sifted amount. So measure out 2 cups of flour and sift. Take the measuring cup again and measure out 2 cups of the sifted flour and using a knife level the top. Return remaining four to its bin.
Sift in baking powder and salt.
Mix the butter/sugar mixture with the flour. Cut and mix the butter mixture until you have small clums of butter coated in the flour. Make sure to scrape from the bottom of the bowl to catch any hidden pockets of flour. Do not over-mix. I do the mixing by hand but you can used a food processor on a low setting.
Add the poppy seed mixture (from earlier), mix gently.
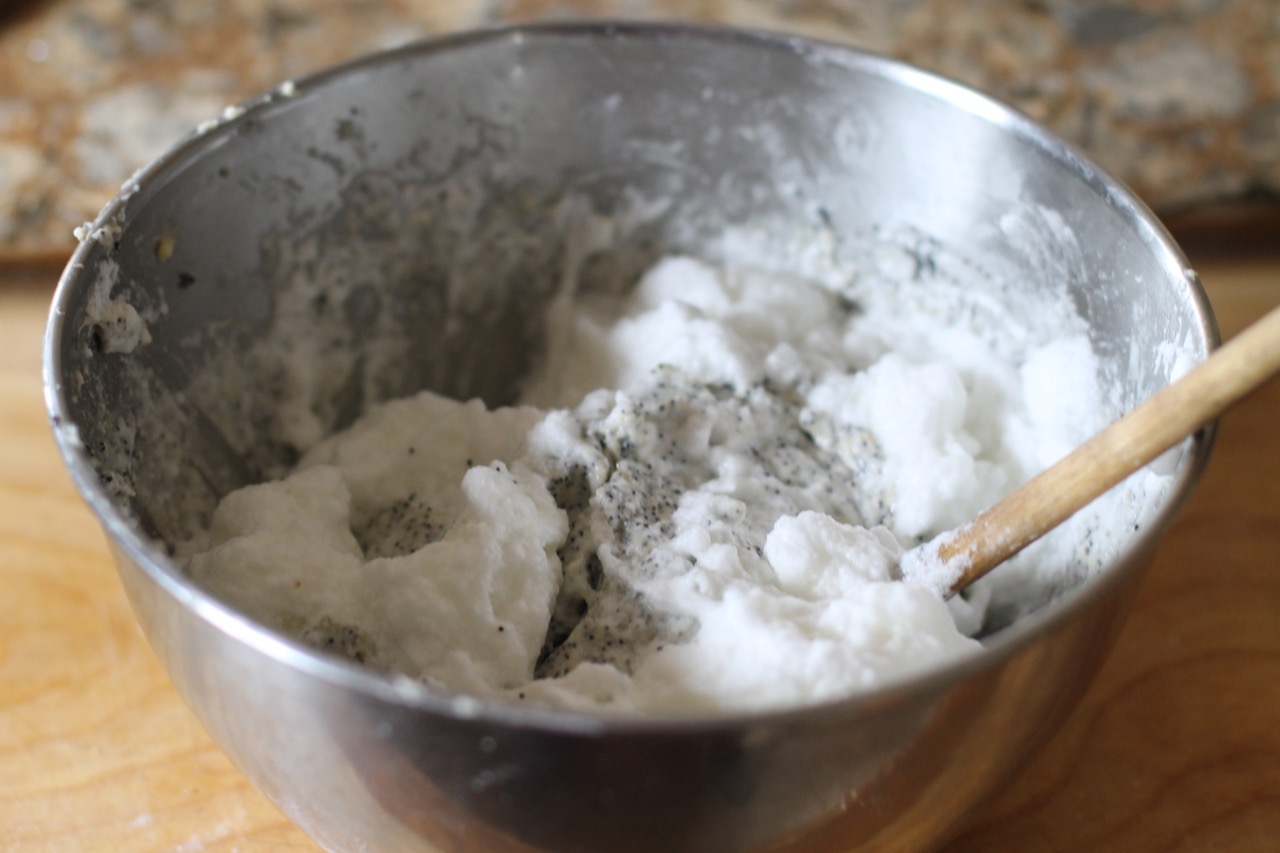
Beat the 4 egg whites on high speed until stiff.
Gently fold egg whites into the dough.
Grease and lightly flour cake forms or just simply use parchment paper.
Separate dough between two cake forms.
Try to make sure the top stays flat.
Bake for 20 – 30 minutes or until an inserted tooth pick comes out clean.
Let the cake forms cool completely before removing the cakes.
Making the vanilla cream
In a double boiler, bring milk to a gentle boil over medium heat.
Meanwhile, whisk the three egg yolks, sugar together. Add flour, mix. Add warm milk gradually and mix.
Pour mixture back into the double boiler pot and cook on high medium heat. Whisk continuously for about 5 minutes or until mixture thickens.
Take off heat and add vanilla.
Let it cool.
Making the chocolate ganache
You can use a clean double boiler here again. Melt the chocolate and add the heavy cream, vanilla extract and sugar. Mix.
Assembling the cake
Place the vanilla creme in-between the two cake layers. (Use the ‘prettier’ cake for your top layer. You can also flip one of the cakes over and use the bottom for the top so you get a more even appearance). Spread chocolate ganache on the top. This ganache will be slightly liquidy when placed on the cake but will harden in the refrigerator.
Decorate the top to your liking.
Refrigerate the assembled cake for at least 1 hour before serving.
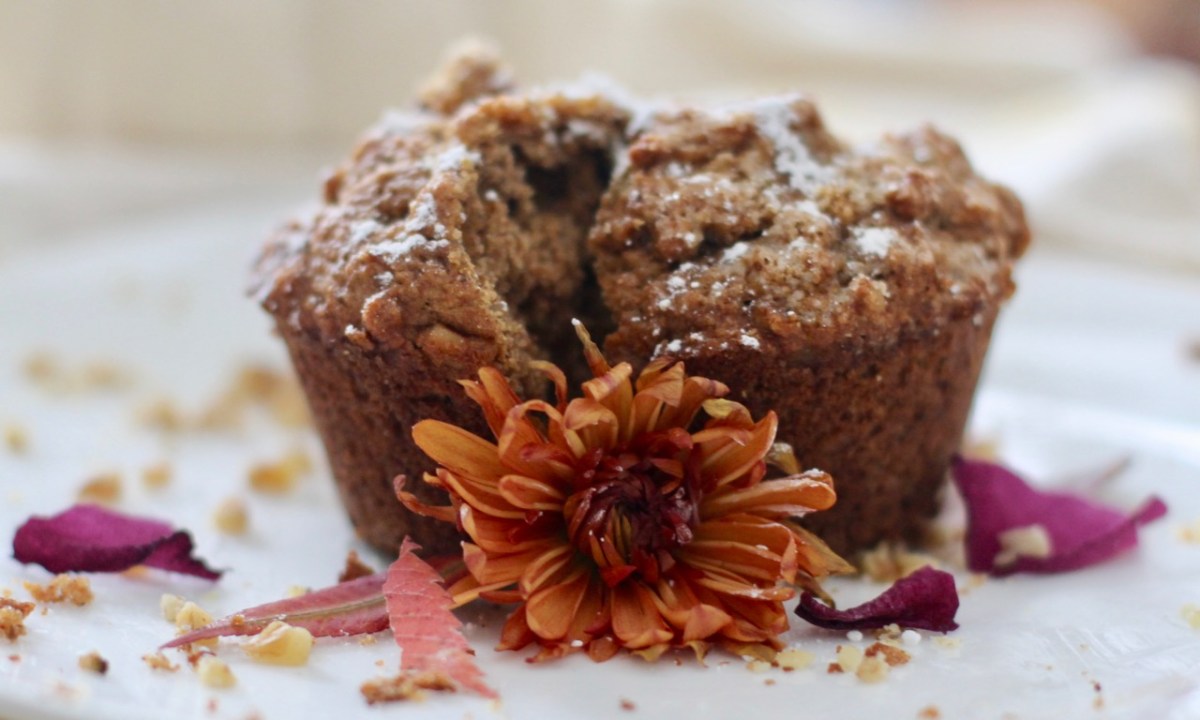
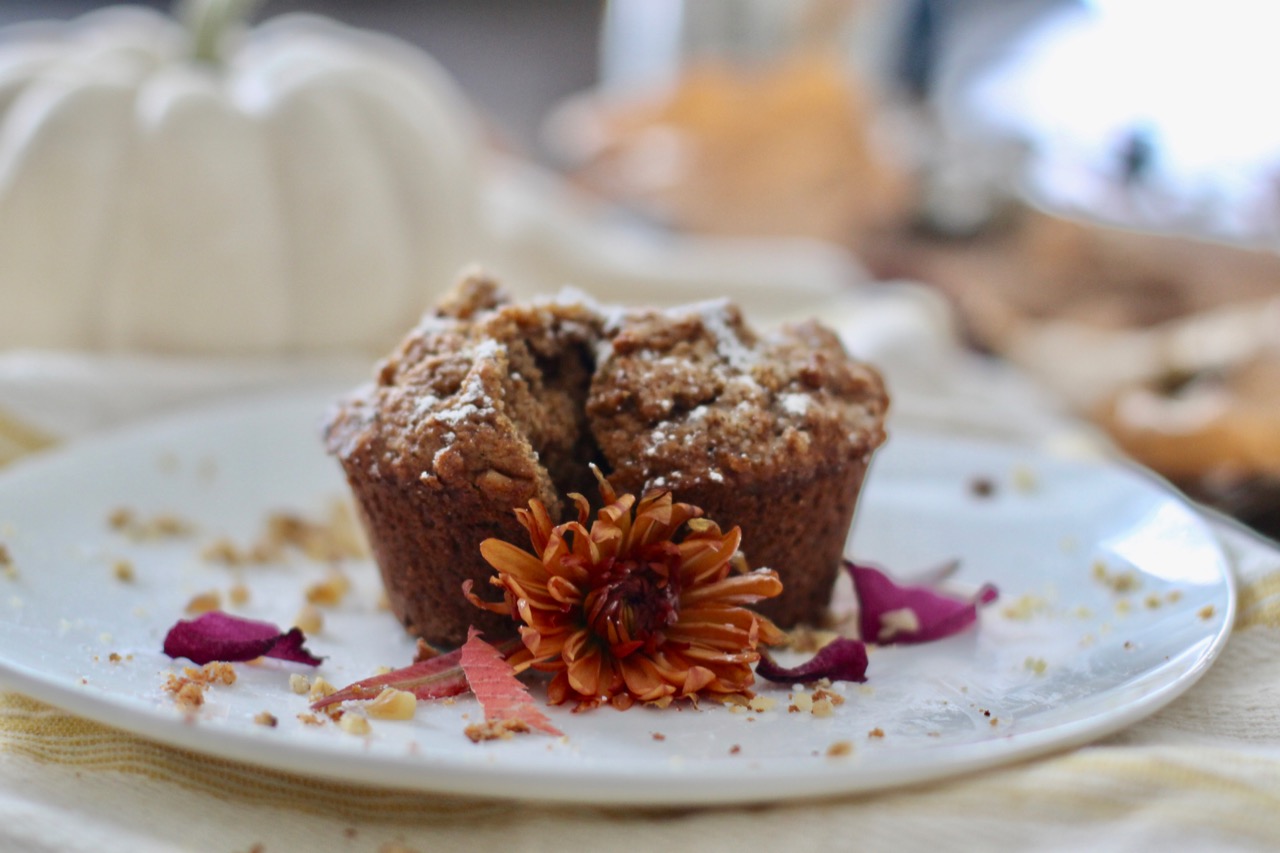
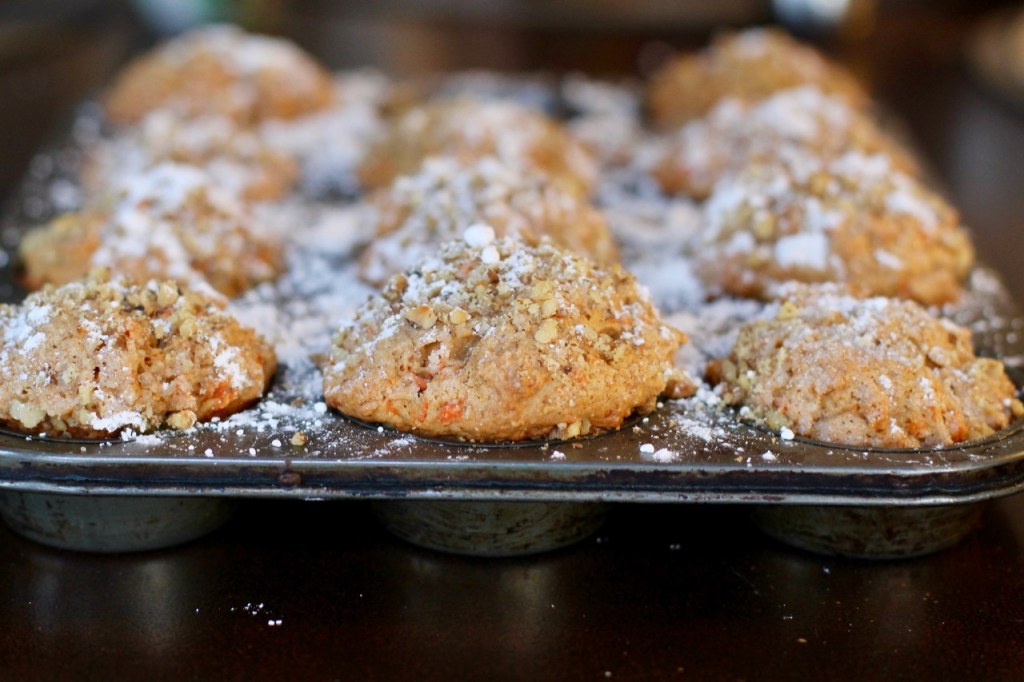
These sweet potato muffins are lovely autumn muffins! They are packed with nutritious ingredients of the season and get their special flavor from the spices: cinnamon, allspice, nutmeg, ginger, mace and cloves. enjoy!
RECIPE
RECIPE
INGREDIENTS
2 cup / 240 gr of whole wheat flour (white flour is fine too)
2 tsp pumpkin pie spice ( China cinnamon, allspice, nutmeg, ginger, mace and cloves)
1 stick (8 Tbsp) of butter (115 g) at room temperature
1 cup of sweet potato, mashed (1 medium sized sweet potato)
I like challenges … well ok sometimes it is a bit uncomfortable … but then I end up with something delicious like the dish I’m presenting here today.
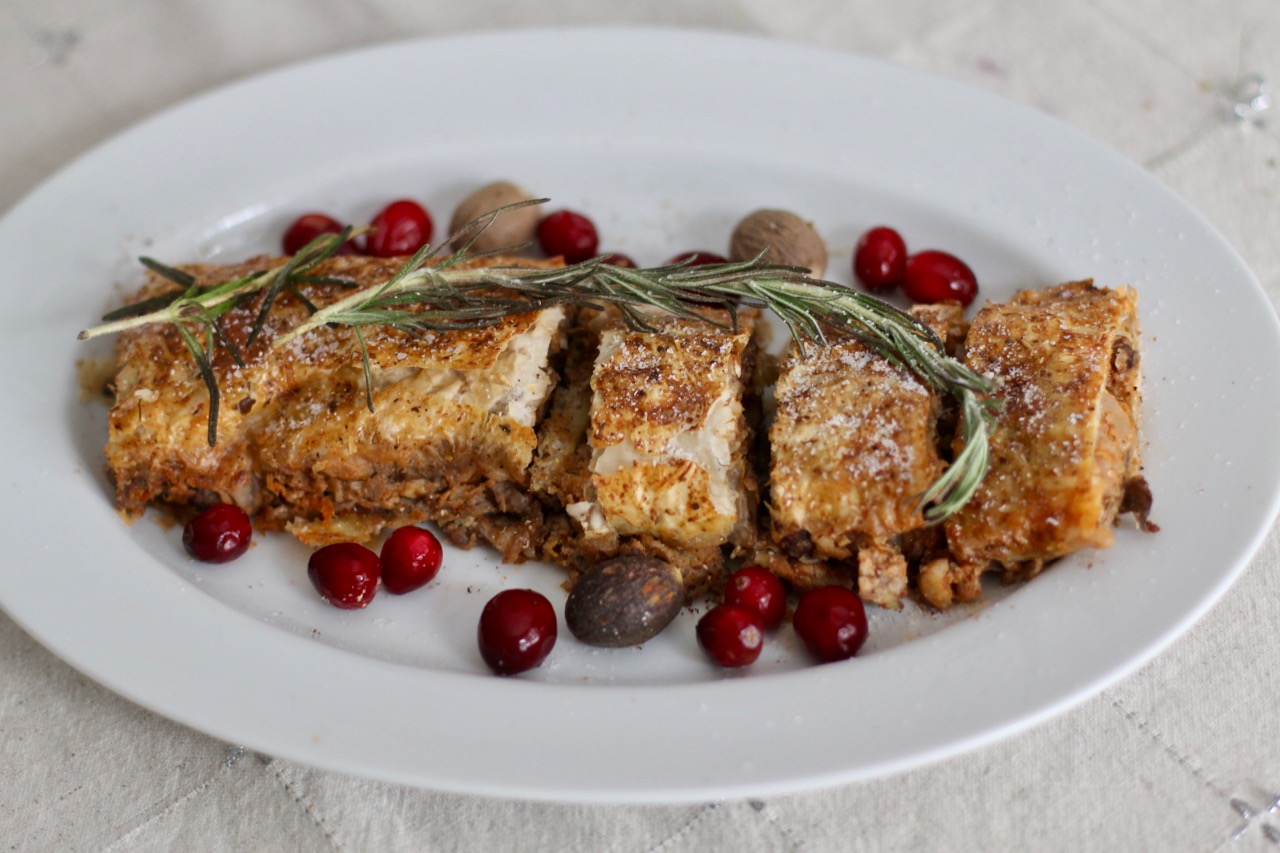
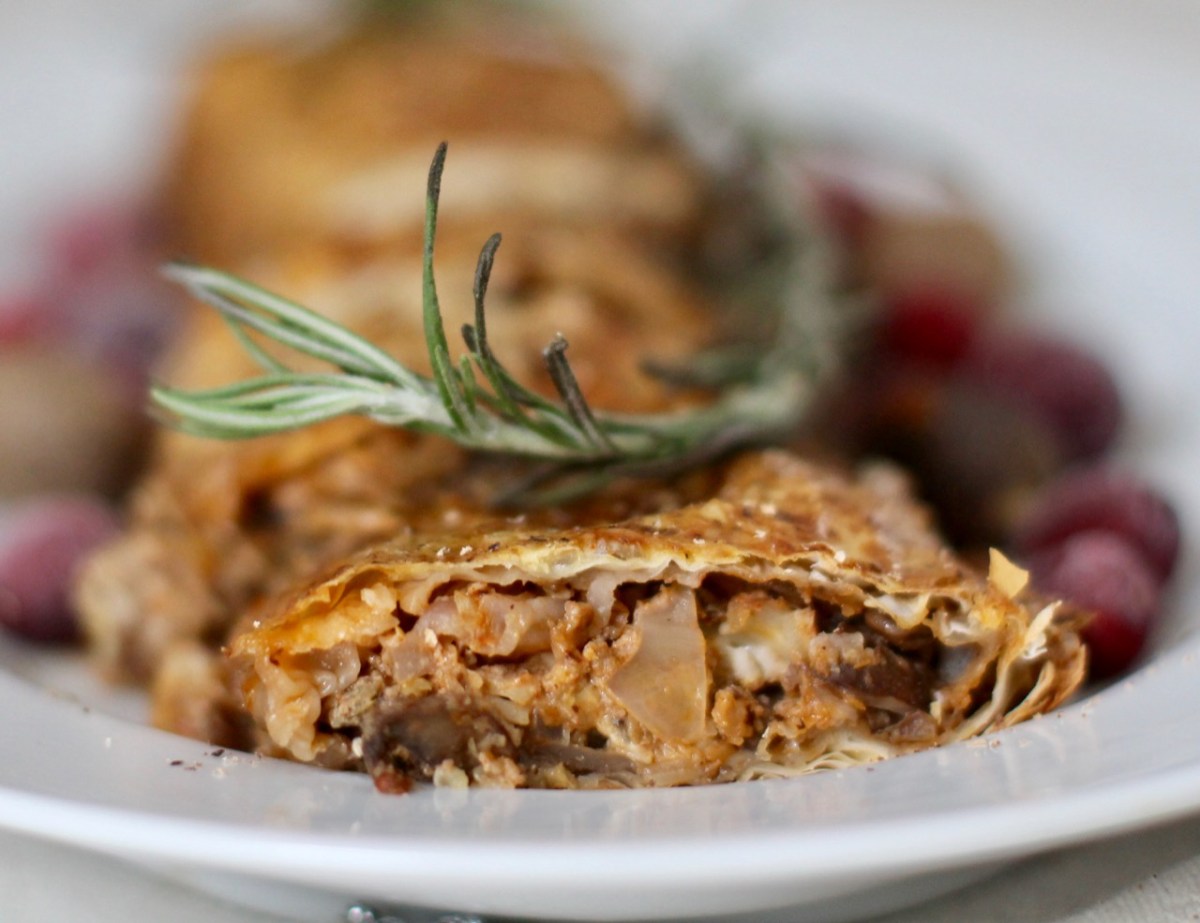
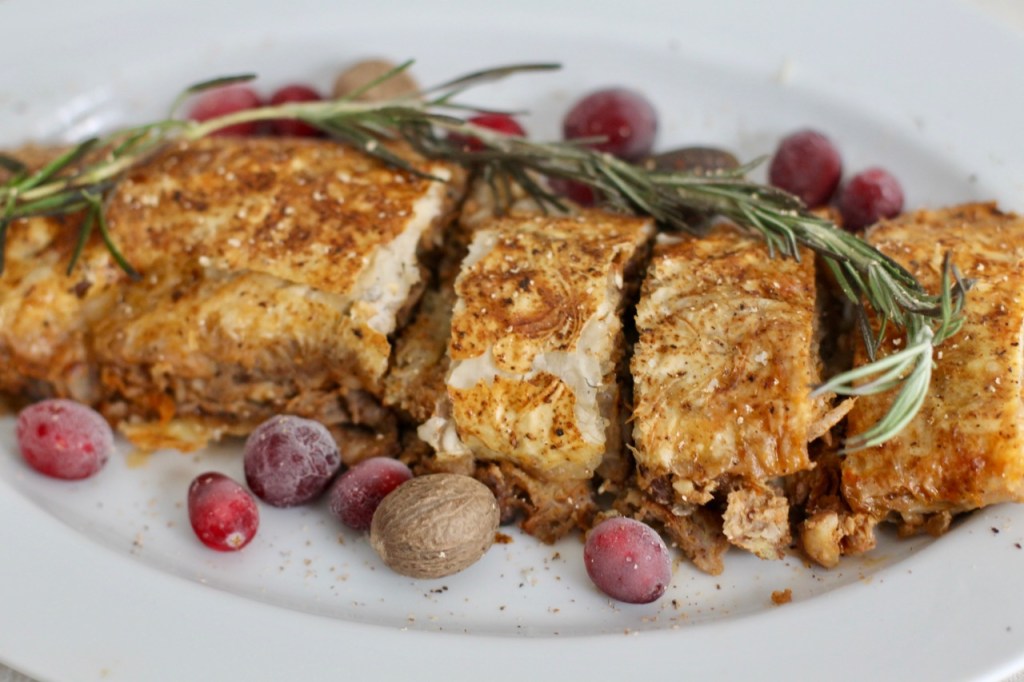
The savory stuffing made with cabbage, mushrooms and lentils is wrapped in a flaky strudel dough and is seasoned with the warming spices of the season. To make it even more festive, serve it with port sauce and brussel sprouts with chestnuts.
I was looking for a vegetarian Christmas dish… seriously, traditionally would there be such a thing? I have seen mushroom strudel served in the winter before but did not find it filling enough as a main dish. Then came the idea … maybe because I was craving cabbage strudel the whole fall … to make the strudel with half mushrooms and half cabbage … then added the lentils and the cheese in place of the meat, a few spices and … this festive dish was born. Cabbage is a staple vegetable for the winter and has been traditionally paired with mushrooms. My non-vegetarian guests really enjoyed a slice with their meat dish. Of course, the vegetarians were asking for seconds.
RECIPE
Ingredients
oil
5-7 sheets of filo dough
1/4 cup chopped shallots
4-8 oz mushrooms (crimini) (chopped into small pieces)
Quarter sliver of a medium sized savoy cabbage. ( Discard the lager veins of the cabbage so you are left with the tender leaves only).
1 celery stalk
2 garlic cloves
1 tsp paprika
1/4 cold stock (vegetarian or chicken) or water
1/4 cup uncooked lentils (1/2 cup of cooked lentils)
Take filo dough out of the freezer. Let it thaw slowly.
Clean and soak the lentils for a few hours. Cook lentils.
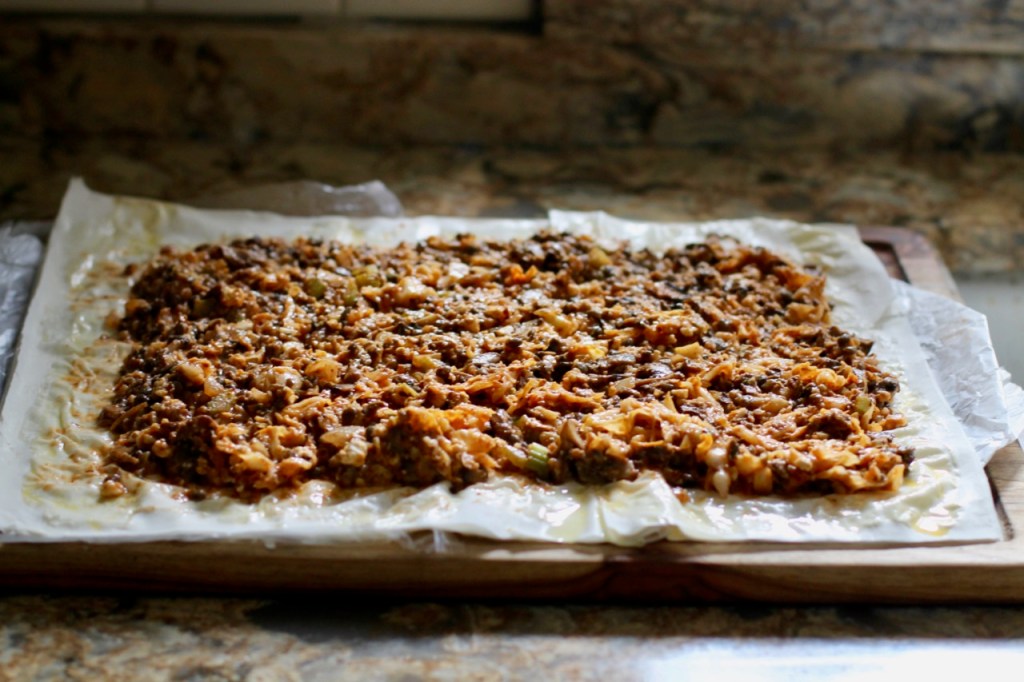
Chop up the shallots and the celery and sauté them in some oil for 5- 10 minutes. Add the mushrooms and continue sauteing for 5 more minutes or until the mushrooms are tender. Add paprika and the garlic to activate for 1 minute, stir and add the cold stock (1/4 cup). Add the cabbage. Add chopped thyme leaves, nutmeg and chopped rosemary leaves. Cook the mixture for about 10 minutes on low heat. Set aside.
Chop up the nuts. I leave the hazelnuts chunkier. The walnuts are coarsely chopped. A small food processor can be used. Add to previous onion mixture.
In a medium sized bowl, add 1 lightly beaten egg, mustard, the nuts, the cooked lentils, mushroom/ cabbage mixture from above, feta cheese, salt and pepper. Mix well.
Let the stuffing cool, refrigerate for about 1 hour.
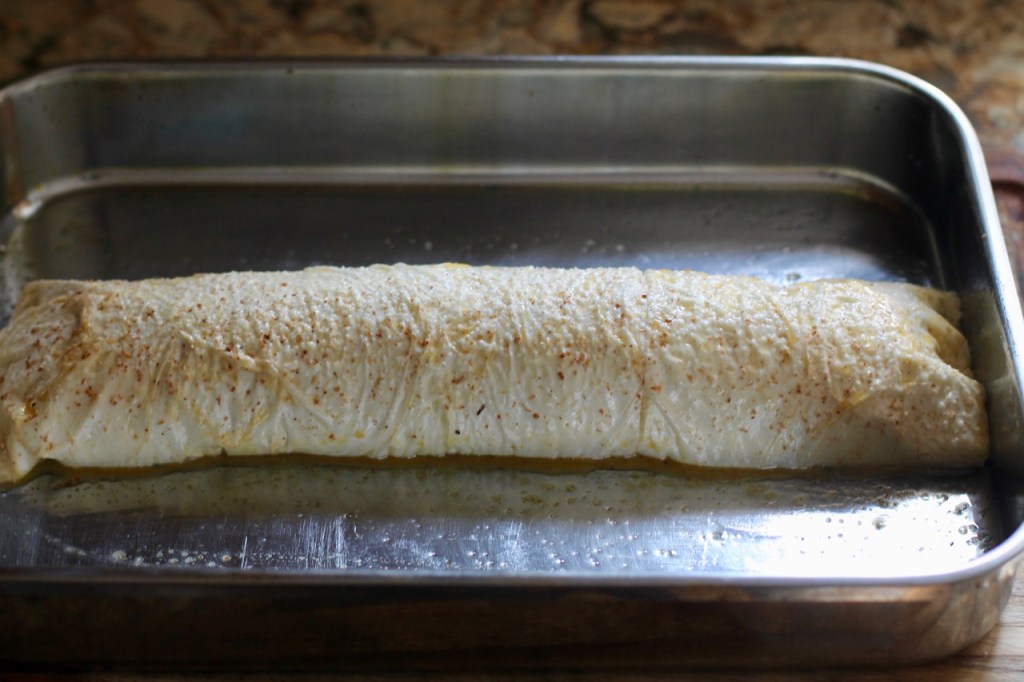
Take 7 sheets of filo dough and lay it on a wooden board. I like to put a piece of parchment paper below the filo dough, it is helpful for rolling. Drizzle some oil and grade some nutmeg. Spread the filling evenly on the sheet leaving 1 inch on each side empty. Roll it up. Placed it in an oiled baking dish.
Lightly beat 1 egg, add some freshly graded nutmeg and salt. Spread it on top of the rolled strudel. Wait for 5-10 minutes until egg wash is absorbed. Apply the egg-wash again. The 1 egg should cover the strudel both times. You can sprinkle additional salt and nutmeg on the top. This will make the crust really tasty.
Bake in the pre-heated oven for 25-30 minutes or until top is nice and brown.
Put left-over filo dough if there is any left in the fridge gently wrapped up in plastic bags so the leaves don’t dry out.
Serve hot with the port sauce (see below) and brussel sprouts with chestnuts. I also like to add cranberry sauce (recipe).
Directions for the port sauce
In a small pot, saute the shallots in some oil or butter. Add the flour for 1 min, stir. Add the garlic, stir for 30 seconds.
Add the wine and stock. Stir.
Add the thyme and rosemary springs. Cover the pot.
Cook for about 20 minutes.
Take out the bay leaves, thyme and rosemary springs.
Take off the heat, add the cream, salt and pepper.
Serve right away. Can be stored in the fridge for many days.
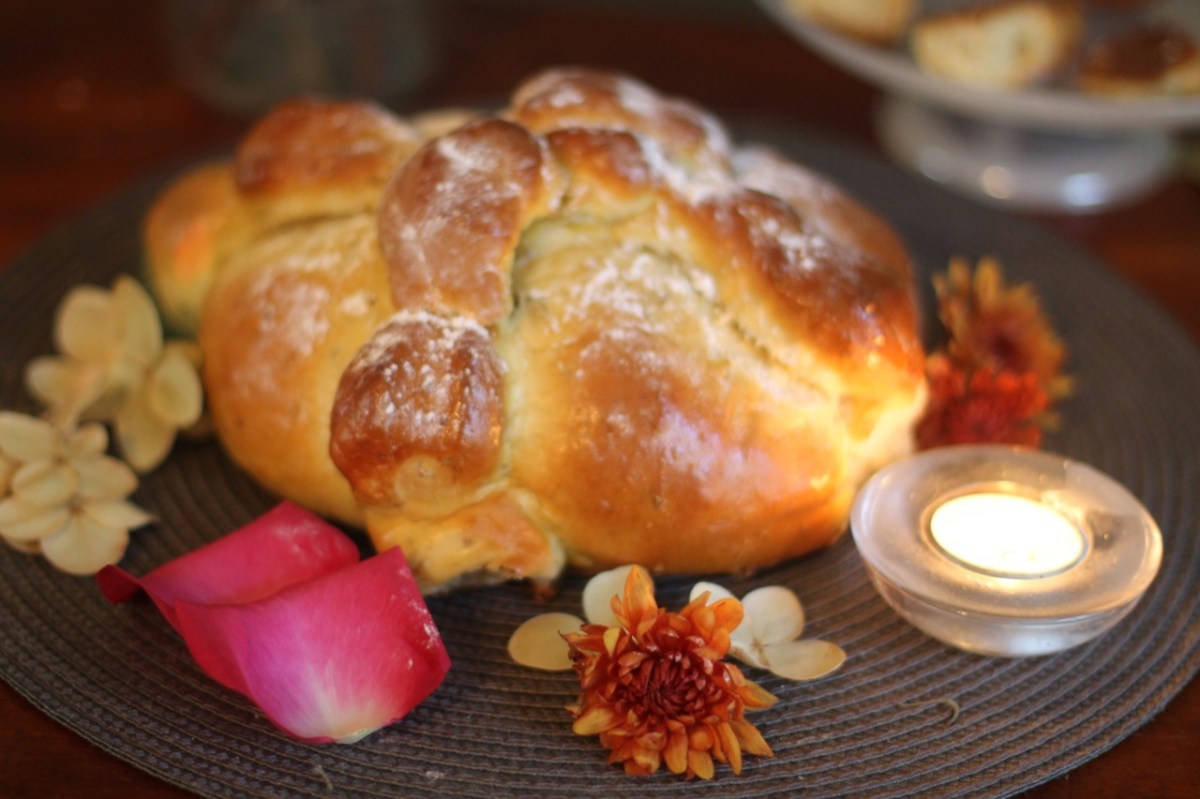
This is a soft buttery sweet bread to help us bring back the sweet memories of the people who can not be with us anymore. Baking this bread helps me honor my mom’s spirit. It feels like she is with me while I am baking the bread. What a neat way to honor her and her love for cooking. I am so glad I was introduced to this custom. If you make this bread please feel free to share your experience in the comment section.
Pan de Muerto is traditionally made in Mexico for the Day of the Dead celebration. It is flavored with orange zest or anise seeds and brushed with a glaze and sprinkled with sugar. The preparation depends on the region as everybody has their own recipe. This recipe is from the Mexico City region.
Día de los Muertos, the Day of the Dead is a celebration in Mexico between October 31st and November 2nd. During this time period, Mexicans remember their ancestors who have past away. It is not a scary, spooky time but rather a joyous, spiritual time. People go to the cemeteries, to the altars of their deceased friends and relatives. They also lavishly decorate an altar in their homes with candles and memories.
This celebration’s roots are in the Pre-hispanic times. Native Americans celebrated this time period because they believe that our ancestors’ spirits return to Earth to be with us during this time period. After the Catholic Spaniards arrived, they had combined this tradition with their own celebration, All Saint Day and this unique holiday that the Mexicans celebrate today was born.
As I have mentioned before, it is a festive, spiritual celebration. There is music, candles and special foods served. One food they serve is a special bread called Pan de Muerto. It is given as an offering to the ancestors’ spirits and has special meanings. While the exact meaning is not known, it is believed that the crosses on the top represent the bones. The circular shape in the middle could be a tear dropp, or a skull or the heart.
Traditionally, they always use oranges to make the bread and anise seeds are sometimes added too. I don’t have oranges so I ended up using almond extract and anise seeds. I believe they worked nicely here and the anise seeds are used traditionally anyway.
For another Halloween treat for this special time please try my Barmbrack bread recipe from last year (source).
RECIPE
Ingredients
4 oz butter (110 g) at room temperature
3/4 cup sugar + more for the top
1/2 tsp salt
5 cup flour + more for kneading the dough
4 eggs + 1 egg for the top (room temperature)
1 1/4 cup warm milk
2 pkg dried yeast or 5 tsp
zest and juice of 2 oranges
2 Tbsp vanilla or almond extract
1 Tbsp anise seeds
Preparation
For clarification, please view the video provided at the end of the blog.
–Makes 2 loaves
Preheat oven to 350 F.
Prepare the yeast. Add the yeast to warm milk (104 – 108 F). Cover. It is ready when the yeast comes up. Set aside.
Cream the butter, sugar, salt and 1/2 cup of flour. Set aside.
Mix eggs, 1/2 cup flour, orange zest and juice or almond extract and anise seeds.
Combine all above ingredients plus 1/2 cup of flour.
Slowly add the rest of the flour 1 cup at a time and mix until all ingredients are incorporated.
Turn the dough out onto a lightly floured surface and knead for 10 minutes.
Cover it with a clean, damp cloth and let it rise for 90 minutes.
Separate about 1/4 of the dough and use it to make the decorations for the top. These are the bone shapes to drape across the top and the balls to place them in the middle.
Divide the rest of the dough into two ball shaped loaves and place them on lightly oiled cookie sheets.
Making the decoration. I divide this 1/4 piece from the original dough into 6 parts, four for the bone shaped decorations and two for the middle part.
For the bone shaped decoration, shape the dough into a flat-bottomed semi-sphere. Position them on top of the bread and press lightly down to make sure they adhere. Put the little balls in the middle to connect the bones.
Let the assembled loaves rest for 1 hour.
Spread lightly beaten eggs and sugar on the surface of the loaves.
Bake in the preheated oven for 30 minutes.
When cool, glaze the loaves with melted butter and sprinkle on some sugar.
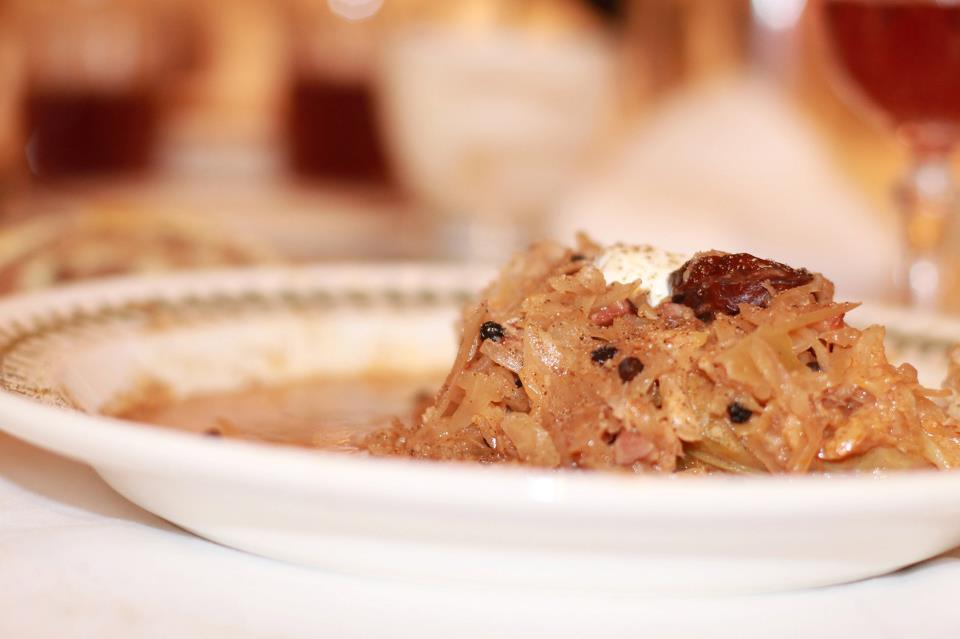
Here is an old time favorite of mine … It was getting colder here so I thought it would be time to prepare for the winter. I enjoy eating garlic during the colder months, it is very healthy but I can live without that harsh taste. Pickling the garlic keeps all its health benefits but the garlic loses its strong taste. So this week, I would like to post a recipe for pickling garlic, the Chinese way. It is so easy to make and it is so delicious … but yes it will take 12 weeks to make…
In the recipe, proportions are given. The amount will depend on how much garlic you use. I used 4 heads of garlic. You can figure out the liquids after you put the garlic in the jar. Add the peeled garlic, enough to fill about 3/4 of the jar. Mix the 2 liquids, about half the soy sauce and half the rice vinegar and pour over the garlic. Make sure the liquid covers the garlic.
You will also need a jar. I like to use a wide mouth jar so I can take the garlic out easily. Also, I sterilize the jar before putting anything in it.
RECIPE
Ingredients
garlic cloves , peeled
1/2 part soy sauce
1/2 part rice vinegar
1/2 part honey
Directions
Please see above for directions.
Peel the garlic. When you peel the garlic, make sure you do it gently and not cut the garlic. If you do, not a big deal, just the cloves will be a little unappealing but still edible.
Fill the jar 3/4 full with the peeled garlic.
Pour the vinegar/soy sauce mixture over the garlic and let it macerate for 6 weeks. Make sure the garlic is well covered with the liquid.
Then after 6 weeks remove the vinegar/soy sauce mixture and discard half of it. Replace it with honey. Pour this liquid back in the jar. You can gently warm up the honey so it can be mixed with the macerate.
Wait for six more weeks and then the pickled garlic is ready.
Here is my new favorite dessert! This tasty dessert will satisfy your autumn sweet tooth any time. They are simple, puffy and delicious. No need to buy puff pastry from the store, you can make the buttery, flaky puff pastry with the three simple main ingredients: butter, cream cheese and flour. There is something about simple, delicious dishes that are just that … simple and delicious… and this dish is surely just that… My recipe came from this blog (source).
RECIPE
Ingredients
1-2 apples, firmer baking apples (I used Cortland)
1 pkg cream cheese (220 gr)
2 sticks of butter (220 gr)
1 1/3 cups flour (220 gr)
pinch of salt
1 Tbsp sugar
1 tsp vanilla essence
1 tsp apple pie spice or cinnamon
1/2 cup powdered sugar
handful of chopped nuts
Directions
Have all ingredients at room temperature.
Preheat oven to 400 F.
Combine the cream cheese, butter, flour, salt and sugar. Put the dough in the refrigerator for 1 hour.
Take the cold dough out of the fridge, cut it in half. Put one half back in the fridge to keep it cold while you are working with the other half of the dough..
Roll out the dough on a lightly floured surface with a lightly floured rolling pin about 2-3 mm thick. Cut out round shapes with a cookie cutter. My cookie cutter is 2 1/2 inches in diameter but you can use whatever size you have. Cut the circles big enough so they can fit the apple slices or vice versa cut your apples so they can fit in the circle.
Place the apple slices on half of the cut out shapes and fold the other half of the circle over the apple slice. Put the prepared pieces on the pre-oiled cookie sheet.
Bake for 18 – 20 minutes in the preheated oven.
Repeat with the other half of the dough.
Make the sugar coating. Add 1 tsp apple pie spice or cinnamon to the 1/2 cup of powdered sugar. Put the apple turnovers into a bigger bowl and toss them with the sugar/cinnamon mixture. I did this when they were still warm. I found that when done while hot, the sugar sticks better but please feel free to experiment.