When I was a little girl, I used to go to the farmers’ market with my grandmother to sell her goods. I was in charge of the fruits. Whatever I was able to pick the day before, I could sell. I loved climbing up the tree and picking the fruits. We took the train to the nearest town where the market was. So of course I sold the cherries and the sour cherries. I remember I used to wonder though why the heck people got so excited about sour cherries, why not just buy the delicious sweet cherries. Well, try this soup and you will understand too :).
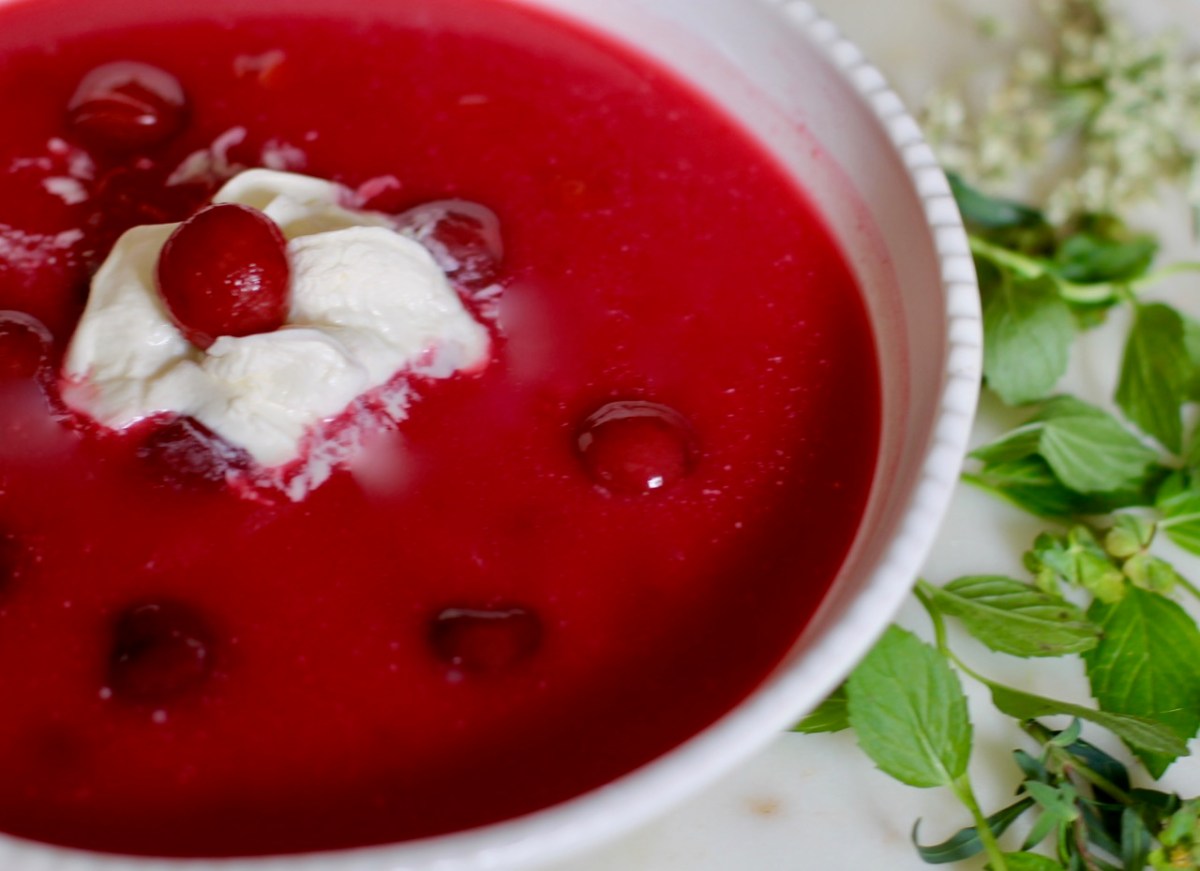
Honestly, nothing tastes as good as a bowl of cold sour cherry soup on a hot day. Sour cherry soup is popular in many Central European countries. I added a small amount of ginger, cloves and cinnamon to offset the sweetness and sourness of the cherries and orange peel and salt to balance it out nicely. At the end, I thickened the soup with egg yolks. Oh and I added a bit of alcohol, more exactly white wine and brandy (pálinka). The alcohol content will boil away so no worries, kids can have it too.
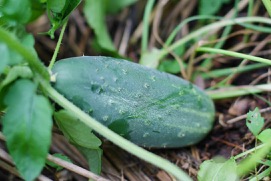
The main ingredient is the sour cherries. If you have a tree growing in your back yard, it is the best source for sure. I have seen it in health food stores, farmers’ markets and some specialty shops too but otherwise it will be most likely hard to get fresh. You can get frozen sour cherries, they will work well as long as they are tasty, of course. Also, you can use soft cherries too but the harder kind, the bing cherries will not work. I leave the pits in but take the stems off. In addition to the cherries, I like to add some goose berries or currents to the soup, too.
RECIPE
INGREDIENTS
2 lb sour cherries or soft cherries (Please see note above).
1 cup goose berries, currants (optional)
water
1/2-1 cup sugar (depending on your taste)
1 lemon, sliced
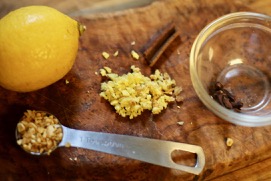
1 Tbsp dried orange peel or 2 Tbsp dried
1 Tbsp fresh ginger (chopped)
1-3 whole cinnamon sticks
3-5 pieces of cloves
1-2 cup white wine (Vermouth is fine)
water
2 Tbsp of brandy (cherry would be ideal but others are fine too)
1/8 tsp of salt
2 egg yolks, lightly beaten
whipped cream for serving
DIRECTIONS
Wash the cherries.
Put them into a medium sized pot along with the sugar, orange peel and lemon slices. Add water, wine and brandy. (The liquid should be about 1-2 inches above the cherries).
Bring to a boil and cook for about 10 minutes on medium heat with the lid. Continue cooking as you add the cloves, cinnamon, ginger and and cook for 10 more minutes on low heat with the lid on. We add the ginger, cinnamon and cloves in later because they only need 10 minutes of cooking.
Turn off the heat and take the cover off. Wait for 5-10 minutes before adding the egg yolk to the soup.
Add the egg yolk. Mix the yolk with a little liquid from the soup. Stir in gently so it is mixed nicely in the soup.
Let the pot cool on the counter.
Chill the soup in the refrigerator overnight but at least for a couple of hours.
Take out the cinnamon sticks, lemon slices and cloves.
Pickles are so easy to make and are so good for you. It is just a win-win situation so why not give it a try? Fermenting fruits and vegetables has a long history and today it is more popular than ever. I remember my relatives had their pantries filled with jars of pickled vegetables. One vegetable that they made regularly was cucumbers or more exactly pickling cucumbers.
Our ancestors used fermentation to preserve fruits and vegetables so they could eat them all year along. It is hard to imagine today but they had no freezers or canning machines. To supply food for their families they had to rely on the process of lacto-fermentation. So let’s look at what this process is.
Lactic acid producing bacteria that is abundant on roots and leaves of plants converts starches and sugars in vegetables and fruits into lactic acid. Lactic acid acts as a natural preservative preventing the formation of putrefying bacteria.
The salt also aids this process creating an alkaline environment that helps destroy the bad bacteria and helps the good, probiotic ones to thrive. This environment will help keep the bad bacteria out. Using whey can also aid this process.
In addition to its preserving ability, lacto-fermentation also has health benefits for people. Today, these benefits are well known as it is living its renaissance … but for the records, here it goes. Eating smaller amount of fermented foods helps our digestion as it particularly helps revive the beneficial bacteria in the intestinal flora by improving the growth of healthy Lactobacillus acidophilus. So the same substance that was responsible for the preservation of the foods is also beneficial for our digestion. They create enzymes and are antibiotic and anti-carcinogenic as well. In fact, historians believe that pickled vegetables were one of Cleopatra’s beauty secrets for a good reason.
It is easy to make but you will need to get fresh pickling cucumbers. I find farmers’ markets to be a great place to get them or even better if you can grow them yourself. It is crucial that the cukes are fresh and firm as they can spoil in a few days after they had been picked. Ideally, they should be made within a day of picking. If you can’t make them within a day, you need to keep them in the refrigerator. Also, if your cukes become soft, I found a trick – hehe obviously I have done it many times before. Soak the cukes in cold water and they will become nice and firm again. You need to do this step anyway because soaking will remove the dirt.
Another consideration is size. Any size works great, there are smaller ones and bigger ones. I personally prefer the tiny cucumbers (gerkins) because they are crunchier and have a stronger skin. Some people like the bigger ones. They tend to have larger seeds and are softer. Size also makes a difference in how you process them. If you get bigger ones, you will need to cut them up into four parts or make four slits inside. You do not have to cut the small ones.
So what else will you need besides the pickling cucumbers? You need sterilized large mouthed bottles, salt, water, and spices. This is fairly easy process and should not be skipped. Just boil the bottles in water for 5-10 minutes and that is it. Or you can sterilize them in your dishwasher if it has this function.
I personally prepare my pickles the European way. My favorite combination is dill, mustard seeds, cayenne peppers, horseradish roots and garlic. Of course this list is endless and you can use whatever your heart desires. My great-grandmother also put in grape leaves to enhance the health benefits but you can put other leaves in as well like cucumber, white oak, raspberry, mugwort leave. Oh speaking of health benefits, I always add a slice of sourdough bread. Sourdough is highly nutritious and added to the pickles will further enhance its intestinal flora promoting property.
Once ready, taste the unique tangy flavor that is produced with the lacto-fermentation process. It will not be over-powering like the pickles that are made with vinegar but it will have a refreshing, mild flavor. When you try the pickles and they are still raw, just leave them in the jar for another day and try again.
I always try to drink the liquid, the brine that pickles were processed in. It is also beneficial for digestion, so don’t throw it away… and I believe it makes a fabulous summer drink. Once you make it yourself, you will never want to buy pickles at the store again.
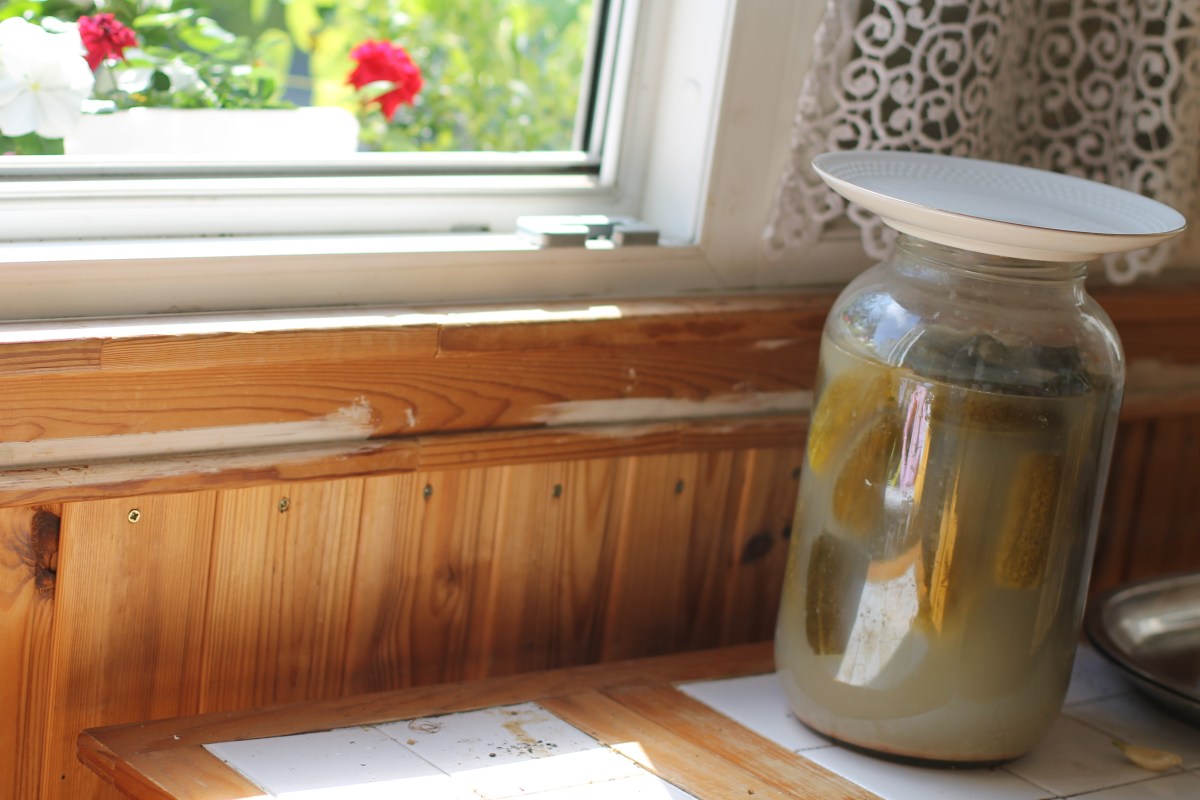
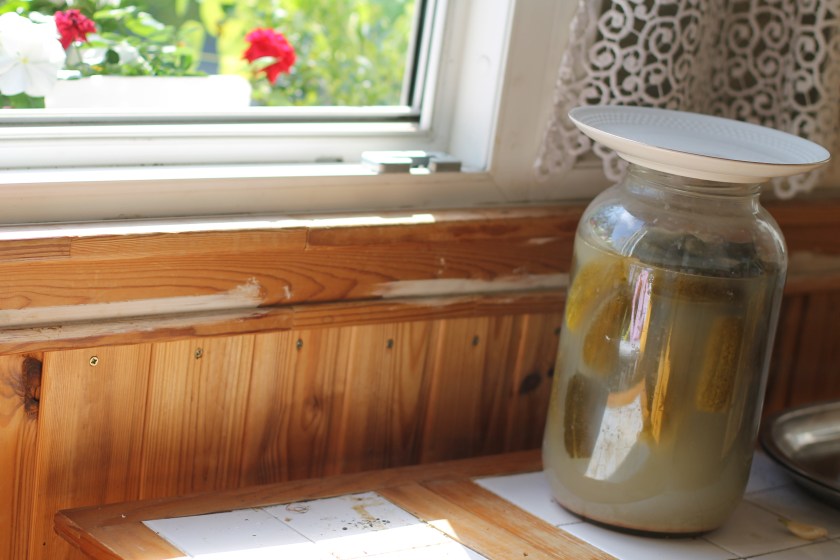
In Hungary, you can see pickle jars ‘brewing’ in window seals all over. It is quite impressive how creative people can get who live in small places.
Pickling cucumbers
Recipe is for a quart of water
Sterilized wide- mouthed mason bottles (3 pint or 1.5L)
about 15-20 pickling cucumbers (3lbs)
3 T salt
3 cloves of garlic, crushed
1 bay leaf
1 Tbsp mustard seeds
3 stalks fresh dill or 1 Tbsp dried dill. I prefer the larger pickling dill but the dried one works too.
Small piece of Cayenne pepper
Small piece of horseradish root
1 grape leaf and its top or other leaves like cucumber, white oak, raspberry, horseradish or mugwort would work great too.
sour dough bread (To prevent the bread from getting mushy, I use the dried out crust or rolls) or 1 larger piece of potato.
Directions
Sterilize the bottles. Put the bottles in a big pot and cover with water. Bring to a boil and keep boiling for 5 more minutes.
Meanwhile soak cukes in cold water for at least 1/2 hour.
Boil water. When done turn off heat.
Meanwhile, I put all the seasoning on the bottom of the jar except the sour dough bread that I put on the top.
Rinse the cucumbers well. Cut the bigger ones like I mentioned above. Tightly place them in the jar in a vertical position. It is important that you put them tightly into the jar because you will be able to fit more in and also you want to make sure that they don’t move around and are covered with water.
Pour in the water. You want to make sure the water covers everything including the bread on the top as well. Put a plate on top and let it sit for 3-7 days in a warm place. The time will depend on the amount of heat it is exposed to. It will take 3 days on hot days but can take up to 7 days if it is cooler. You will see bubbles while the brine is ‘cooking’. Avoid hot, direct sun.
Check the bottles everyday and add more boiling water if needed.
Do a taste check after 3 days or when you think they are ready. They are ready when they don’t taste raw but are not mushy either.
When they are done put them in the refrigerator. This stops the process of lacto-fermentation that would make the cucumbers too soft if continued brewing too long.
Now it is ready, enjoy!
If you find this blog helpful, please consider liking it. Thank you!
Yes Kohlrabi soup! … a simple and tasty soup! I am vacationing at my parents’ house and rediscovering this interesting vegetable. My mom apparently used to make it when we were kids but somehow it didn’t get my attention back then. I do throw it into soups in the summer but have never thought of using it as a main ingredient. What an amazing soup with an interesting flavor.
Honestly, when I heard she made kohlrabi soup, I can’t believe but I actually told her that the kids will not eat it. Well, to my biggest surprise, my kids loved it and asked for seconds! So I think I can add, it is a kid friendly soup as well.
Kohlrabi is a cross between wild cabbages (kohl) and turnips (rabi). It has a distinct earthy, nutty flavor and is mildly sweet and pairs well with the sweet carrots. There are several varieties and can be purplish and white greenish in color. I personally like the purple ones for its beautiful vibrant color but there is no difference in flavor.
They tend to be ready late spring and early summer. If they are left on the vine too long, they get too big and woody. Try to pick them on time to avoid this as it can effect the flavor or buy the smaller or medium sized ones avoiding the larger ones. The meaty part above the ground is used in general but the leaves are edible, too. In fact, the leaves have even more vitamins and minerals than the meaty part.
The recipe
Ingredients
oil (I used sunflower seed)
1/4 cup of water
2 medium sized kohlrabi or 4 smaller ones, shaved with a cheese grader
1 medium sized carrot cut into long or circular pieces
1 tsp Hungarian sweet paprika powder (make sure it is authentic)
6 cup chicken or vegetable stock
1/4 cup of millet or rice
croutons or twice baked bread pieces
parsley
salt to taste
Directions
Make the stock. Omit if you already have the stock.
Peel the kohlrabi and shave it on a grader, – this is my mom’s secret. She claims that the shaved pieces make this soup pleasant instead of cutting them into chunks. You can keep the leaves from the top and put them in the soup as well.
Peel the carrots and cut them into small pieces.
Satué the kohlrabi in a little oil for 5-10 minutes. Add the curry and the paprika in for about 20 seconds, stir and add a little cold water, stir. If you don’t use curry, you can add caraway seeds, thyme and marjoram here.
Add the carrots and the millet and cover well with the stock. Bring to a boil and cook on low heat for 20 minutes. (The millet needs 20 minutes to cook).
Serve hot with the croutons, parsley and hot pepper.
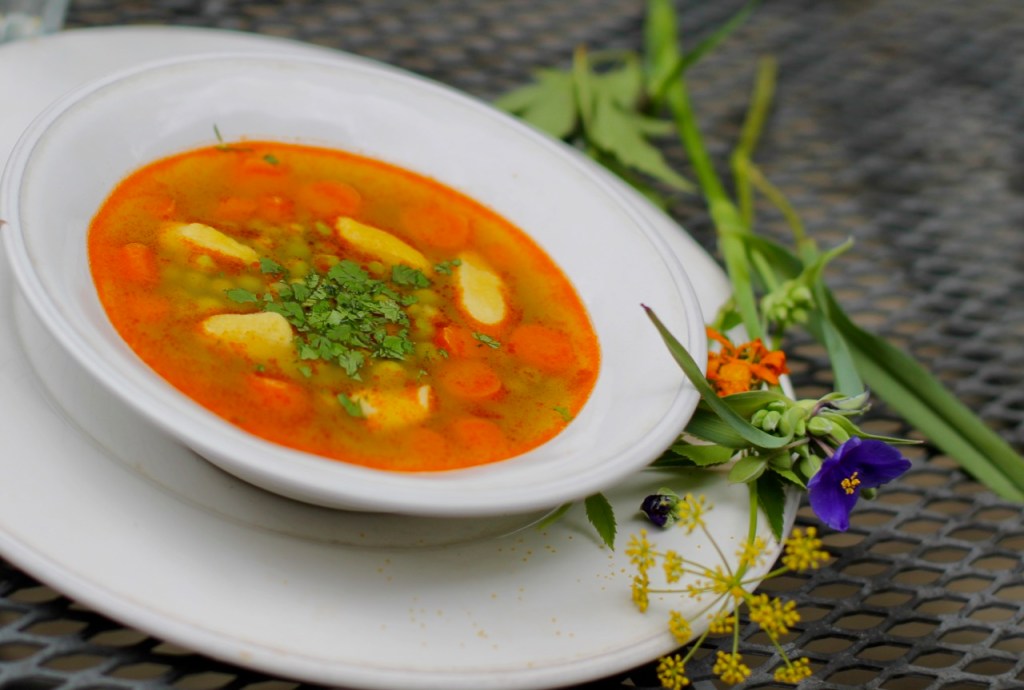
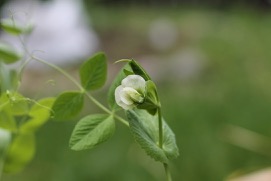
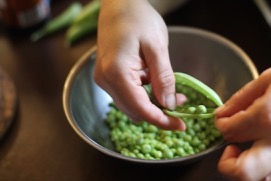
We just celebrated the Summer Solstice and suitably sugar peas are ready! When I can make pea soup, I know summer is here. So why is pea soup so special? We can buy frozen peas all year long. Yes, it is true but we cannot make Hungarian pea soup with frozen peas alone, we need the fresh shells as well.
This soup brings back some very nice memories. My mother and my paternal grandmother also made it. We had it regularly in the summer. It is such a tasty soup, it became a big favorite in my family now too. This nourishing soup is mildly sweet, filling and refreshing.
Unfortunately, these vegetables are becoming harder and harder to find. You will not be able to find them at supermarkets easily. However, they should be readily available at farmers’ markets and health food stores. Or just simply grow them in your garden. Again, the tastier your vegis are, the better your soup will be!
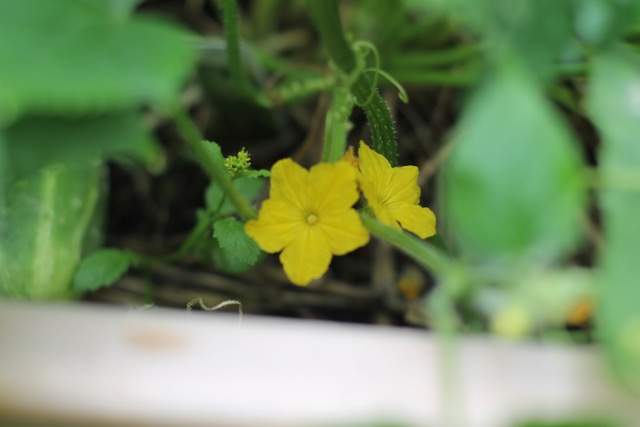
pea flower
RECIPE
Ingredients for the soup
2 lbs sugar snap peas with the shells, divided
oil (I like sunflower)
1 tsp sweet Hungarian paprika (make sure it is authentic)
6 fresh carrots, sliced
1 kohlrabi
1 tsp salt or to taste
parsley for serving
red hot pepper to taste (optional)
soup stockdumplings
Ingredients for the dumplings (csipetke)
1 large egg
1/2 tsp of salt
1/2 cup semolina or white wheat flour – possible a bit more
1 tsp of oil
Directions
Start shelling the peas. Put the shells and the peas in separate bowls.
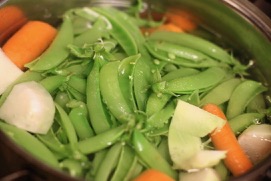
Wash the shells and put them into a larger pot. Add 3 stalks of carrots and 1 kohlrabi and enough water to cover all vegetables. Bring to a boil and cook on medium low heat for about 20 minutes.
Meanwhile, prepare the dumplings (csipetke). This can be a little tricky. Lightly whisk the egg, add the salt and the oil. Start slowly adding the flour, enough so a ball is formed. You don’t want it to fall apart in the soup but you also don’t want it to be hard as rock either. Try to find something in-between. The amount of flour really depends on how much the egg takes up. Once you find the right consistency, keep kneading it for about 5 minutes. Let the dough rise for 1 hour if possible. Set aside.
Have 1/4 cup of cold water ready for the soup.
Start preparing the soup. Heat the oil in a medium sized pot with a thicker bottom. When ready, put in the peas and stir. Sauté the peas for 5- 10 minutes (the younger ones for less, the older ones longer). Make sure there is enough oil for the flour. Add 1 Tbsp flour and stir. This thickens the soup. Then in 5 minute you can add the paprika and stir. (This activates the paprika). In 1 minute add the cold water and stir making sure there are no lumps in the soup.
Add the pea shell stock made earlier. Make sure the solids are strained from the liquid.
Wash and scrape the outside of 3 carrots. Cut them up into bite sizes.
Peel the kohlrabi and cut it into small, bite sizes (optional).
Put the carrots and the kohlrabi in the soup.
Bring to a boil and cook on medium low heat for about 20 -30 minutes.
While the soup is cooking, we will make the dumplings. Cut the dough (made earlier), into 6 long pieces and roll each to finger thickness. Each will make about a 6 inch long dough. With your thumb and index finger you can pinch a little piece off the dough or you can use a knife for this too. ‘Csipet’ means ‘pinch of’ in Hungarian hence where the name csipetke for this dumpling came from. When the soup is done, you can put the little dumpling pieces in the soup. They should be ready in a few minutes when they come up to the surface of the water.
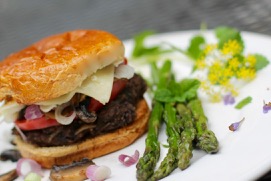
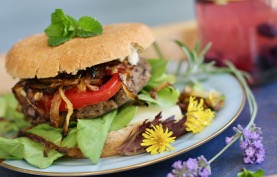
Summer is here and burgers are great for summer grilling! The combination of black beans, wild rice and quinoa make a tasty American burger. Each one is native to the Americas and has a rich history. Usually I am not a big fan of food substitutes but I think this is very tasty. It seems like this burger even tricks my feisty, meat lover corgi too. Seriously, he just sits and stares at me, hoping to get a little.
The moist burgers are highly nutritious and easy to take on trips. Oh and those mushrooms are mouthwatering … Just remember, the beans and the quinoa need to be soaked ahead before you cook them.
There is always a pot of beans soaking in traditional Latin American homes, a pot waiting to be cooked for the next meal. As soon as a meal is finished, the preparation for the next one starts. And they eat beans for almost every meal.
Why should the beans be soaked? Wouldn’t cooking them for a longer time be enough? Beans and quinoa are nutritious but they also contain particles that actually can cause problems if not removed. These anti-nutrient particles such as phytic acid, enzyme inhibitors can be only removed by soaking. In addition, to cost, this is also a good reason to make your own beans :). Remember to pour off the soaking liquid and add fresh cold water for cooking.
Black Bean Burger Recipe
Makes 8- 10 burgers
The inspiration for this recipe came from Heid E. Erdrich’s Original Local cookbook.
Ingredients
1 cup of dried black beans (heirloom is the best if you can get it) or 1 can (14oz), rinsed and drained well.
1/2 cup of uncooked wild rice (preferably the hand harvested )
¼ cup of quinoa (or replace with 1/4 cup of wild rice)
1 tsp cumin
1 tsp coriander
1 egg, lightly beaten
1 tsp paprika
½ tsp salt
1/8 tsp ground black pepper or to taste
1 tbsp oil (olive, sunflower)
2 cloves garlic
½ cup bread crumbs
1/4 tsp dried hot pepper (optional)
oil for cooking the patties (sunflower, grape seed)
To garnish
1 onion thinly sliced and sautéed or raw
8 – 10 heads of portobello mushrooms grilled or cooked
lettuce, arugula
mustard
ketchup
8- 10 buns
cheese
tomato slices
mayonnaise
pickles
sheeps’ milk cheese
Directions
Soak beans and quinoa (if used) overnight or at least for 8 hours.
After 8 hours, rinse water off of the beans. Place them in a bigger pot, cover well with water, bring to a boil and turn down the heat. Cook for 2 hours covered on low heat. You can also use a pressure cooker to cook the beans (check pressure cooker manual for cooking time).
Rinse the quinoa. In a small pot add the rinsed quinoa and 1/2 cup of water. Bring it to a boil, turn down and cook on low heat covered until the liquid is absorbed, for 12-15 minutes. (omit if using wild rice instead).
Cook wild rice in 1 cups of water. Bring it to a boil and then turn the heat down and cook for 20 minutes half way covering the pot. Do not cover the pot completely. (Use 1.5 cup of water for 3/4 cup of wild rice).
In a large bowl, mash the cooked beans leaving it a bit chunky. This is a quick and easy process, I would not use a machine to do this step.
Add the cooked quinoa, cooked 3/4 cup of wild rice and the rest of the ingredients. Mix thoroughly.
With your hand, form 4 patties.
Heat a pan with some oil over medium heat.
Place the patties in the pan and cook them for 5 minutes on each side. Use a wide spatula for turning and taking the patties out.
Slice the onions. Sauté the onions for about 10-15 minutes over high medium heat or until they turn slightly brown. (If using).
Sauté the portobello mushroom heads in a little oil for 10-15 minutes or until mushrooms are soft. (If using).
Serve patties warm and garnish with condiments, vegetables of your choice. See earlier suggestions.
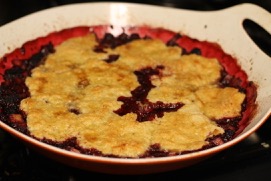
Enjoy this true American deliciousness! The juicy base is both sweet and sour. These flavors nicely complement each other. It is covered with the perfectly crumpling, soft topping … Oh and it is begging for a bit of vanilla ice cream!
Cobbler is an American deep-dish fruit dessert. It became a favorite right after I took my first bite. Cobbler is simple yet it is bursting with rich flavor; there is something about it that surely grabs everyone’s attention. You can make it with whatever fruit is available in the season. My mother-in-law made it with rhubarb and berries and that is how I keep making it. Foreigners often complain that Americans don’t have a cuisine of their own. Well this one is an American specialty for sure.
I looked up the history of cobbler so I will try to summarize what I read. Well, one is certain that it is a North American dessert. It seems like it was invented by the settlers from the Old World when they tried to make one of their amazing pies but they did not have all the tools and ingredients that was available back at home. As an immigrant, I can relate to this experience.
The word cobbler might come from the word ‘cobeler’ that meant wooden bowl. They might have attempted to make a more simple version of a traditional pie recipe in a small wooden bowl by the fire. Also, another meaning could come from the word cobbler, the person who mends shoes; kind of like how the dough is mended together like a patchwork. However, none of these speculations of the word’s origin is official.
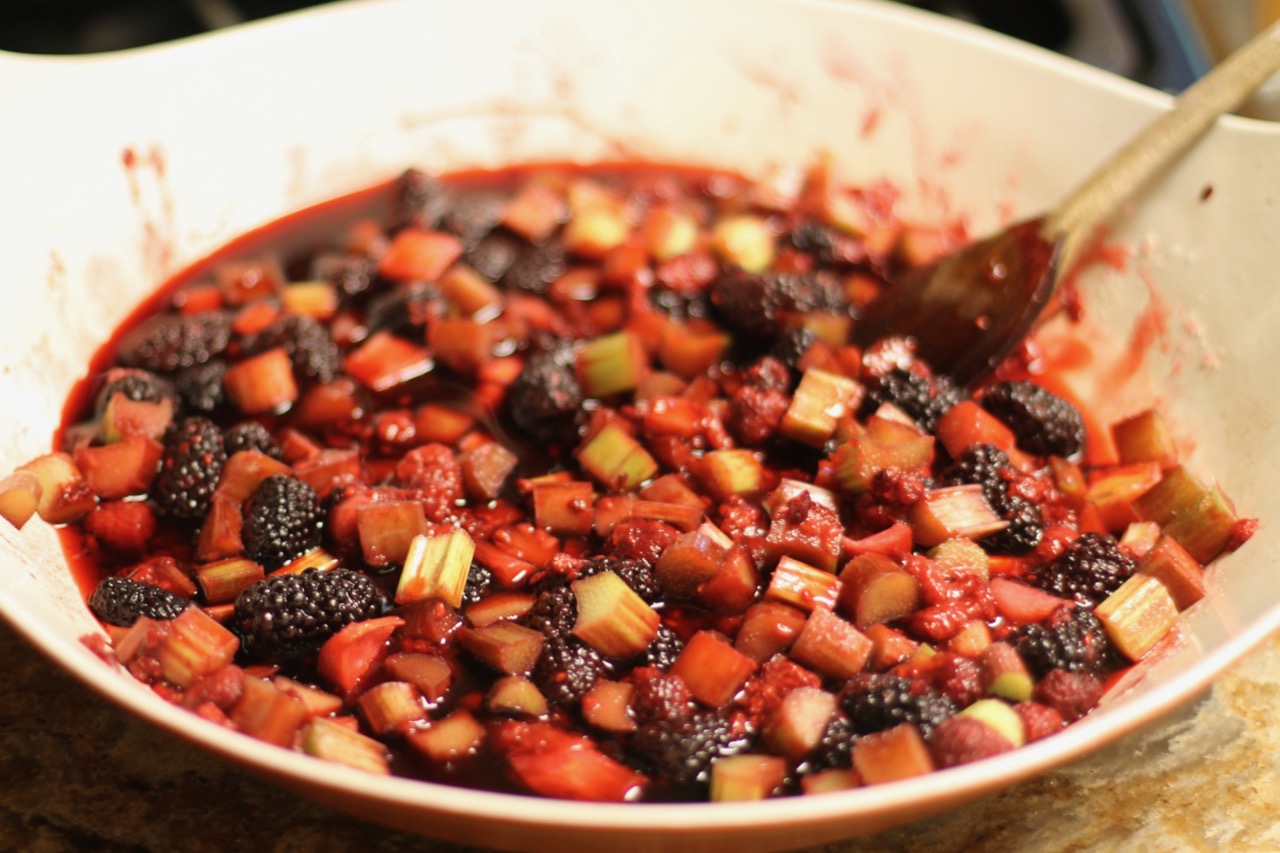
As I mentioned earlier, I like to make the cobbler with rhubarb, especially in the spring. It is the first fruit, oops I meant to say vegetable here. Yes people often think it is a fruit because of its fruity, sour taste but it is in fact a vegetable. I can’t believe I get excited about rhubarb but it is really the first new plant that shows up at the farmers market in the Midwest … and there is nothing else here for weeks. While it is not a fruit, it can be prepared with sugar to –kind of ‘cheating’- to pretend that it is a fruit. I also like to add rhubarb because the sour flavor nicely offsets the sweetness of the berries.
Rhubarb is native to Siberia and has been around for thousands of years. It has been grown in Asia for its medicinal properties. With the big migration, it was adopted in Europe as well. The settlers brought it over to the United States in the 1700’s and was known as the pie plant. The whole plant except for the leaves are used. The stalks are used as food. The leaves contain oxalic acid and can be poisonous in larger quantities and are therefore not used.
Besides its fame in the culinary world, rhubarb has favorable health benefits too. It is cooling and detoxifying to the liver which makes it an ideal spring vegetable. Berries are also healthy. Particularly, raspberries and blackberries have a sweet and sour flavor and neutral thermal nature. These qualities make the berries ideal for baking. They nourish the kidneys and the liver and also build and cleanse the blood of toxins.
This is a crowd pleaser! The only complaint I have ever heard was why I didn’t make more! I bring this dessert often to potlucks so I know a lot of people have eaten it. I really think cobbler is as good as pie is or even better. The trick is to get the best rhubarb and the sweetest berries you can find. You can grow them yourself or get them at the farmers’ market. This is really important as the main part of the cobbler is the fruits! Also, make sure you use the exact measurements! Remember, it is still kind of a pie recipe. Can’t just say I take a little bit of this and a little of that …
RECIPE
12 servings
This recipe is straight out of the cookbook Joy of Cooking.
Serving size: 8 people
INGREDIENTS
1 lb rhubarb cut into 1/2 inch pieces (in the store get the thinner stalks)
1 lb berries – I used blackberries and raspberries
½ cup sugar or more only if your fruits are not sweet enough. Only use more if your berries are not sweet. 1/2 cup is plenty otherwise, trust me!
salt
2 Tbsp flour or 1 Tbsp of corn starch
1 1/3 cup all purpose white flour
1 tsp baking powder
2 Tbsp sugar
5 Tbsp cold unsalted butter
2/3 cup cream or 1/2 cup milk (honestly milk is fine too)
1 lightly beaten egg for the top
extra sugar for the top
vanilla ice cream for serving
DIRECTIONS
Preheat the oven to 375 F.
Have all the ingredients at room temperature except for the butter.
Have ready an oven proof baking dish that is about 2 quarts large in volume and 2 inches deep (ex 11 x 4 x 2 inch).
Take fruits and the rhubarb out of the freezer if they are frozen, let them defrost. Wash rhubarb stalks and cut them into 1/2-1 inch long. If they are wide, you will have to cut them in half as well. Place the rhubarb and the berries in the dish. Add pinch of salt, flour or cornstarch and sugar. Mix. Set aside and wait for at least 15 minutes or at least until rhubarb exudes some juice.
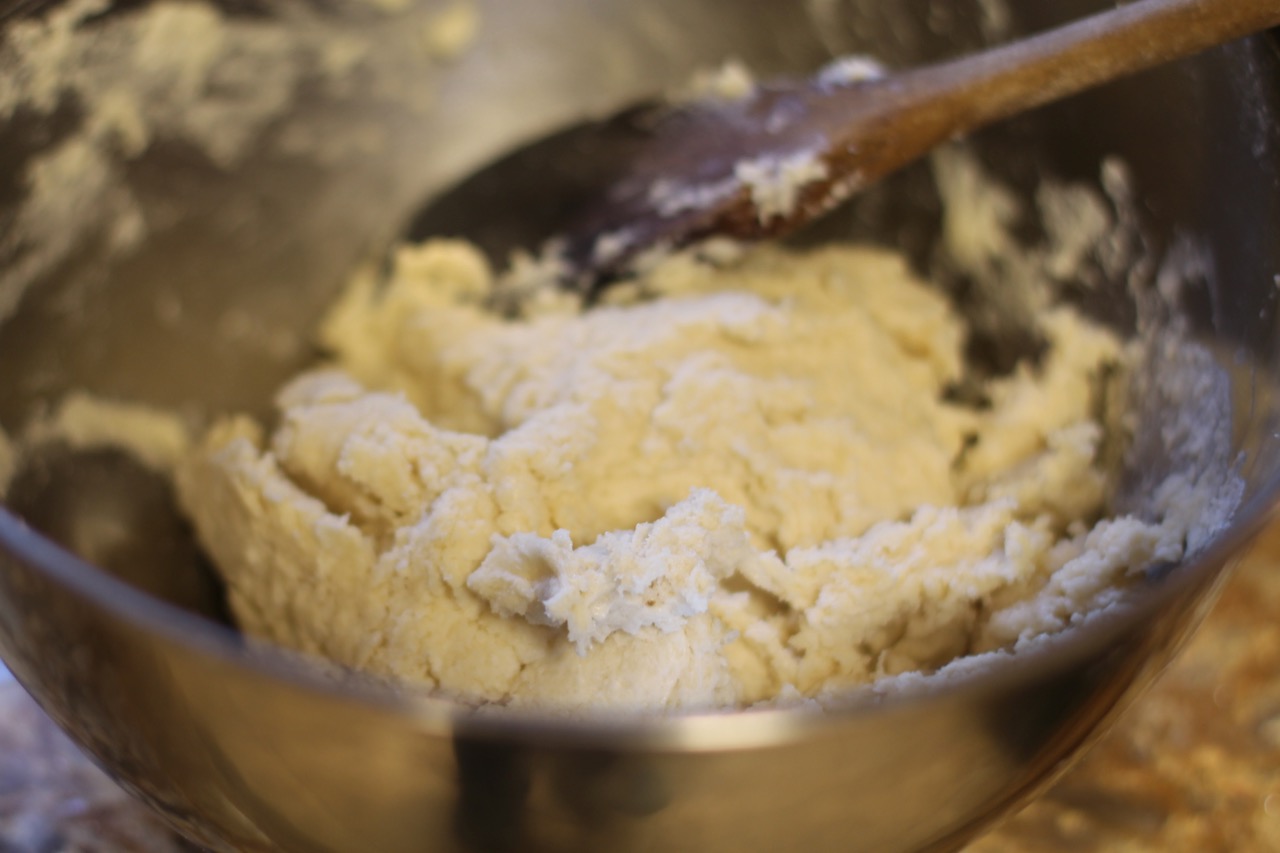
In a large bowl, combine the flour with the baking powder, pinch of salt and sugar. Add the butter with the flour mixture. This is such a satisfying experience for me to do by hand but if you prefer you can use your food processor for this step. Add the cream or milk stirring with a wooden spoon until the dough comes together. Gently need the dough in the bowl 5-10 times if needed, turning and pressing any loose pieces into the dough.
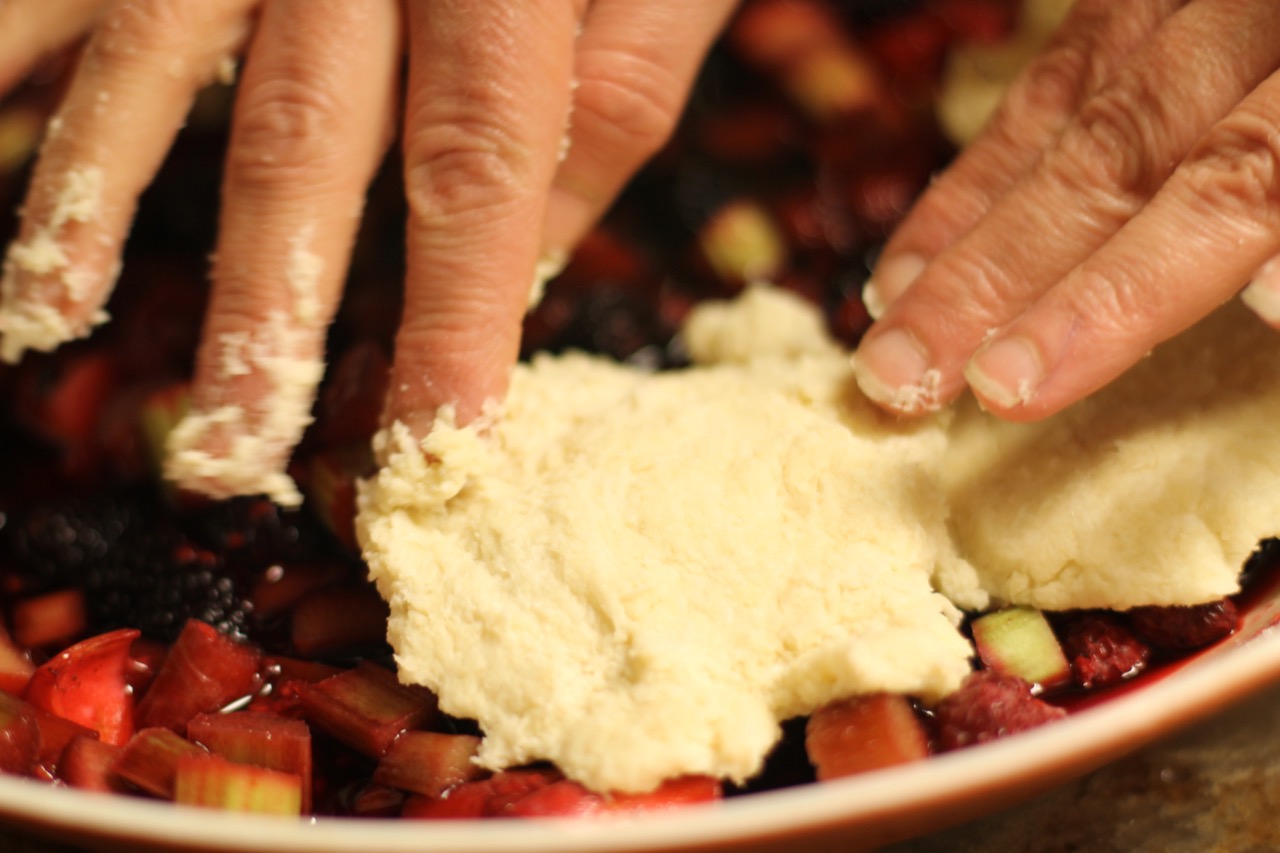
Now we will make a patchwork. Divide the dough into 8 parts and flatten each piece between your two hands about 1/4 inch thick. Place this piece on top of the fruit mix. Keep doing this until you have used up all the dough and the fruits are completely covered. The dough should be workable but not sticky. If the dough becomes too sticky and hard to work with, put it into the fridge for about 10 minutes to become the proper consistency. This can happen in the summer when it is warm outside.
Lightly brush the top of the dough with the lightly beaten eggs and sprinkle with a little sugar.
Put the cobbler in the oven and bake for about 35 – 40 minutes or until the top is golden brown and the berries are bubbling.
Let stand at room temperature for at least 15 minutes before serving.
You can serve the cobbler with vanilla ice cream if you wish.