Eating with the summer season

SUMMER

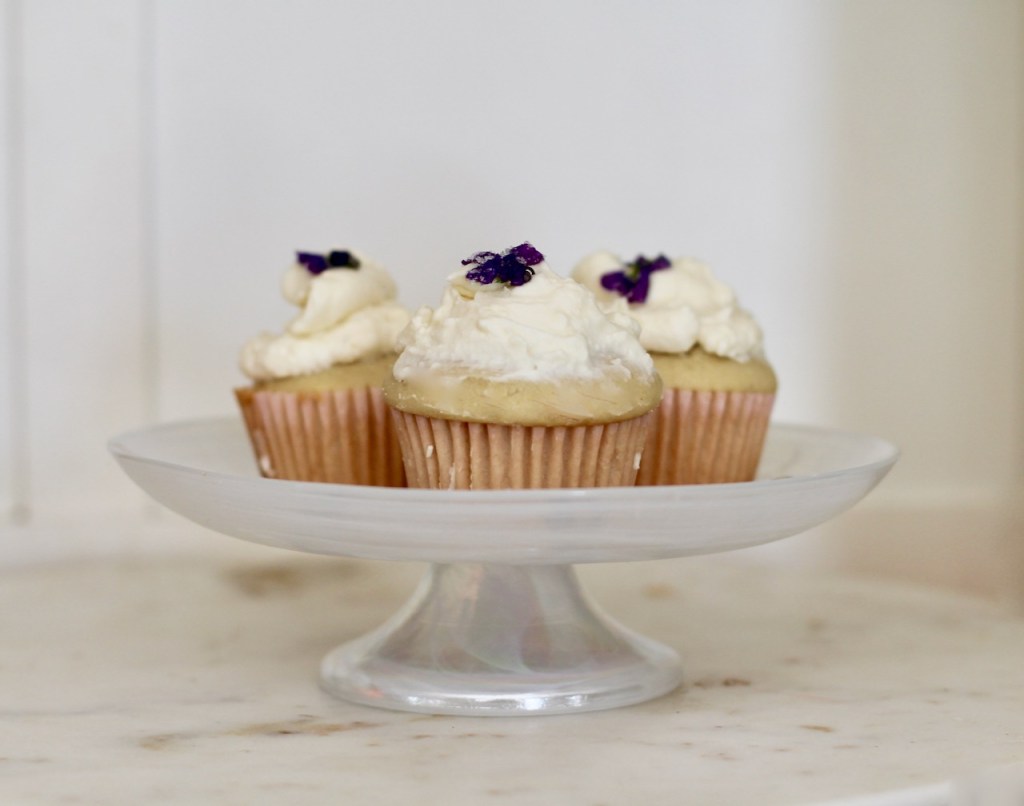
Here is the season that we have been waiting for since the winter solstice! In the spring, we witnessed the buds emerging on the plants and maturing into full grown plants … oh and the days getting longer and warmer. Now finally we can appreciate what nature can give: warmth, light and food. This is a great time to get outside and socialize. You can travel and eat the abundant fruits and vegetables or just have fun. Also, we can take an advantage of all the gorgeous flowers blooming outside.

In Chinese Medicine, each season is associated with a natural element so summer’s element is Fire. Also, each element has corresponding Western organs. The Western organs of the Fire element are the Heart and the Small Intestines and in addition, the Pericardium and the Triple Warmer are included. Also, this element contains the Mind that might be a rather difficult concept for Westerners. (I capitalized the organs because in Chinese Medicine, it is more like an organ is considered to be the organ itself and its energetic functions).

One of the elements in nature is Fire, in fact, it is probably the most important one for our survival. Fire or warmth is essential to keep the body going, our metabolism and our whole body depends on it. According to Karl Jung, Fire is needed to have clear perception. Also, “psychotherapists believe that ‘cooking’ is important for meaningful changes to occur in their patients”. In fact, “throughout the history of humankind, the symbol of Fire has always been synonymous with life”.

Element: Fire

Organs: Heart-Mind, Small Intestines

Sense:

Color: red

Taste: bitter

Supporting flavors: salt, cooling pungent

Emotion: joy

Evil: Heat

In Chinese Medicine, the Heart, the Emperor of our body, is not necessarily treated directly as it depends on the other organs for its nourishment. Basically, you are to take care of your body in order to keep the heart healthy. For prevention, we are supposed to attend to all the other organs all year around to help the Heart function properly.

It is believed that if the Heart is not happy, nobody is happy. So let’s see what would be ideal for a happy heart. The heart needs to be warm, neither cold or hot. The biggest issue during the summer months is the heat so avoid getting overheated during the summer and avoid weakening the digestive Fire. In general, we should be eating cooling foods like all the summer fruits and vegetables but paying attention to our digestion too. For instance, the Chinese eat mung beans to keep the body cool but these beans are also cooked.

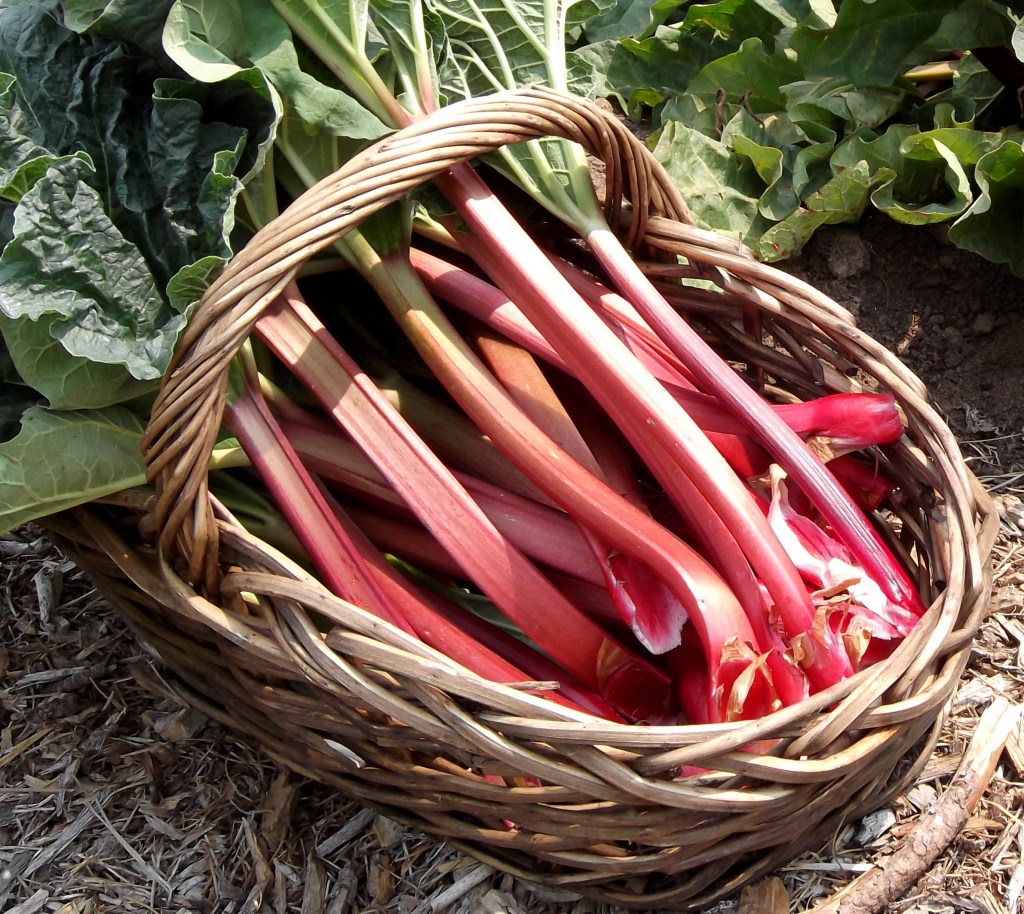
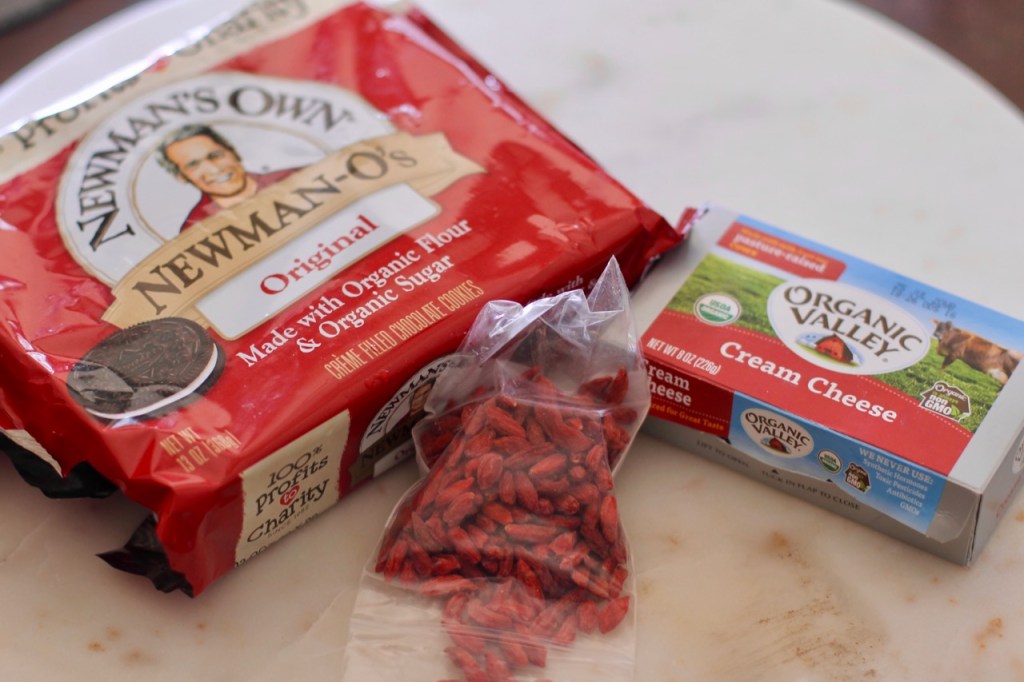
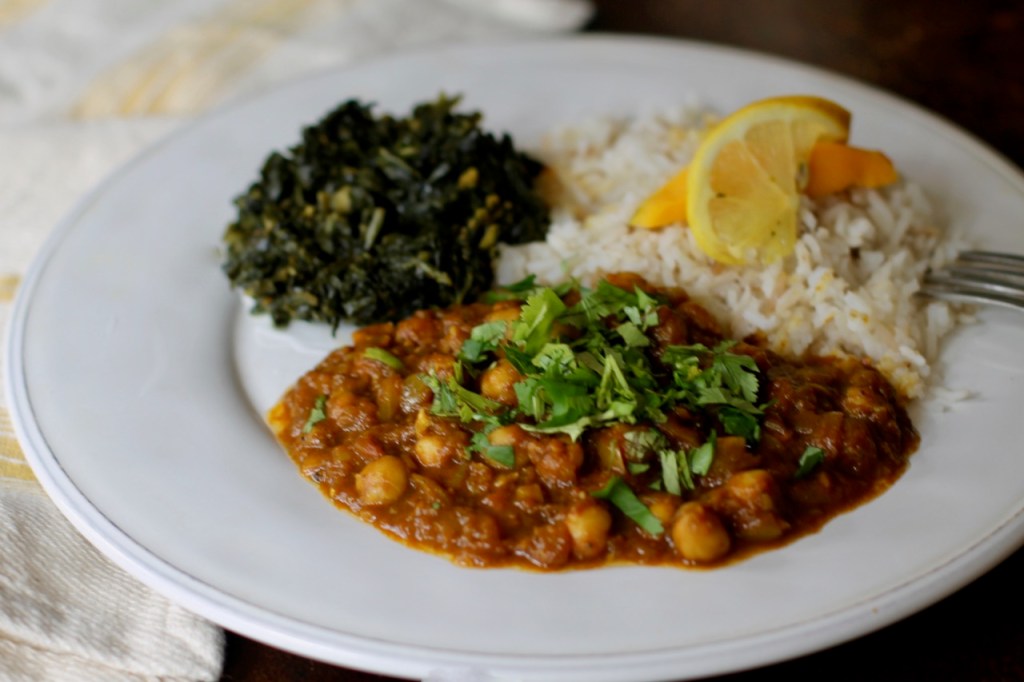
Let’s look at how we can nourish the Heart. All cooling foods especially the brightly colored fruits and vegetables are great. In Chinese Medicine, the red color is associated with the Fire element. It is believed that consuming foods that are red (watermelon, strawberries, red beans, goji berries, red peppers, chili peppers, hibiscus flower) and heart shaped foods (chickpeas) are beneficial for the heart.

Another factor that can influence our Heart is our emotions. Emotions out of balance can negatively effect the Heart. Furthermore, the Heart’s energy tends to move downward from the Mind that the bitter flavored foods support. However, avoid eating too much bitter foods in the summer as this flavor tends to be drying. Moderation is the best! (Summer bitter foods include all whole grains, bamboo shoots, celery, dill, lettuce).

The Small Intestine helps the body sort through important information and toxic information. So the healthy Small Intestine helps us in letting go of unneeded things in our life and by the same token an unhealthy Small Intestine will accumulate toxins leading to the pollution of our body, mind and spirit.

We can certainly nourish the small intestines with food. It is part of the elimination system so food would be important. Fiber rich foods will make the intestines work more efficiently and hence result in a more efficient absorption of nutrients. Foods like nuts and seeds can supply this necessary protein and fiber. Of course, any kind of whole grain is helpful as well in providing fiber.

In addition, it is summer, so we can take an advantage of all the fruits and vegetables, they are an excellent source of fiber. Probiotics such Lactobacillus and bifidobacterium can be beneficial for the small intestines as well which can be found in yogurt, kefir and fermented foods.

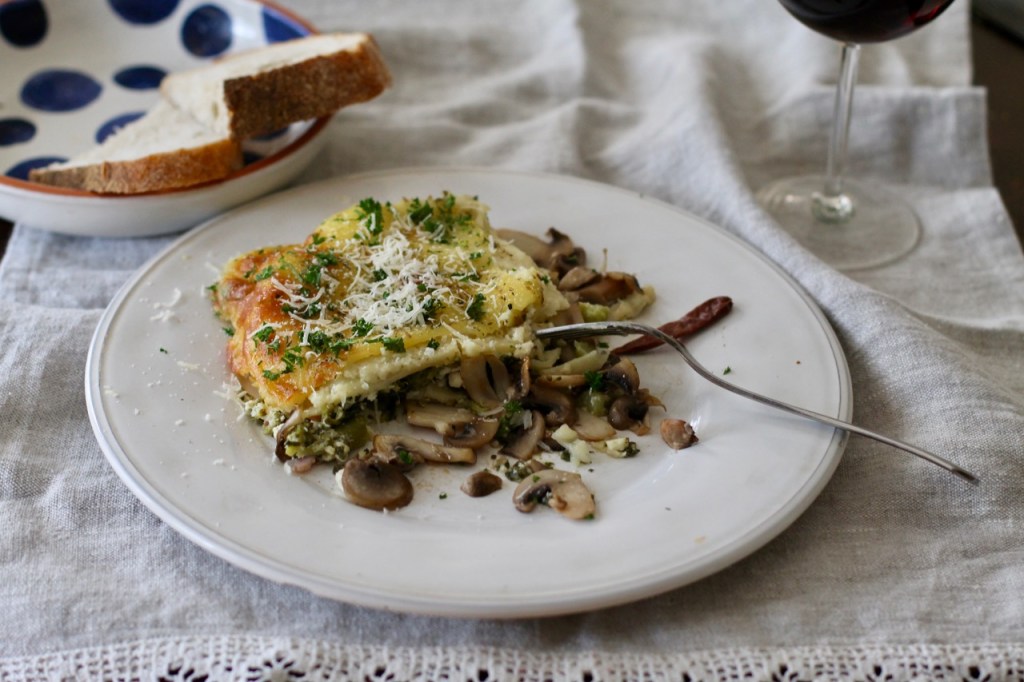
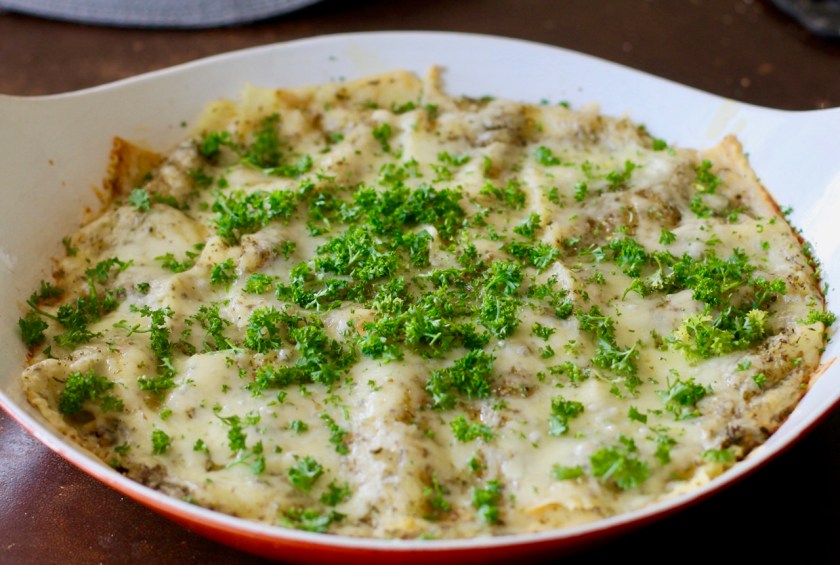
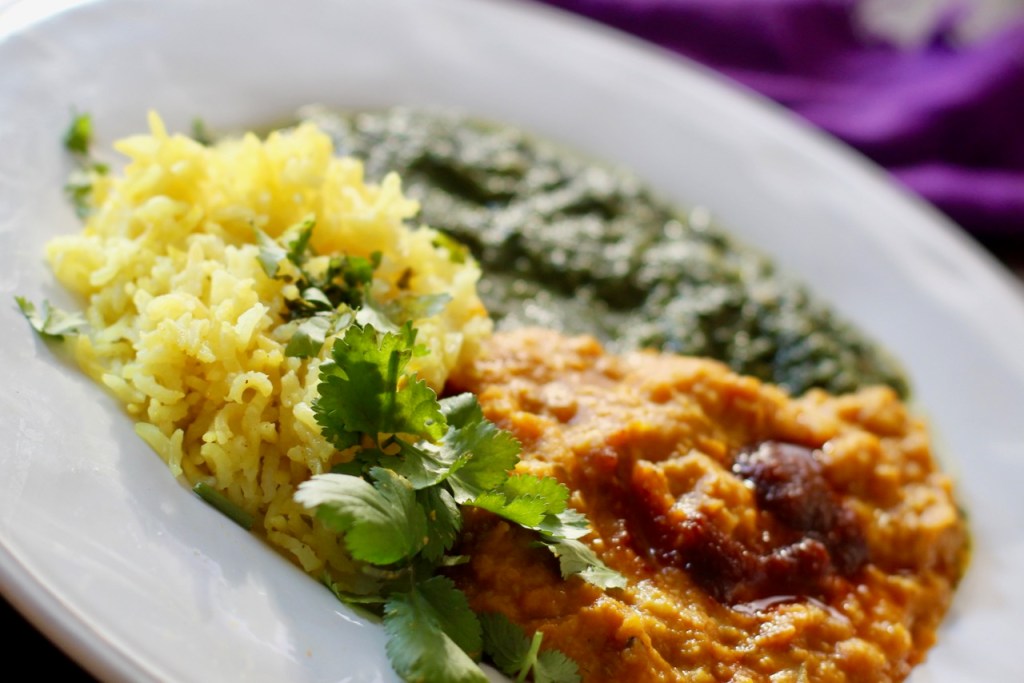
Also, to help calm the mind and deal with the heat of the summer, it is recommended to eat a more simple diet with light foods and avoiding complicated dishes. Oyster shells, whole grains, mushrooms, barley, oats, cucumber, basil, mulberries, lemon, ghee are especially useful.

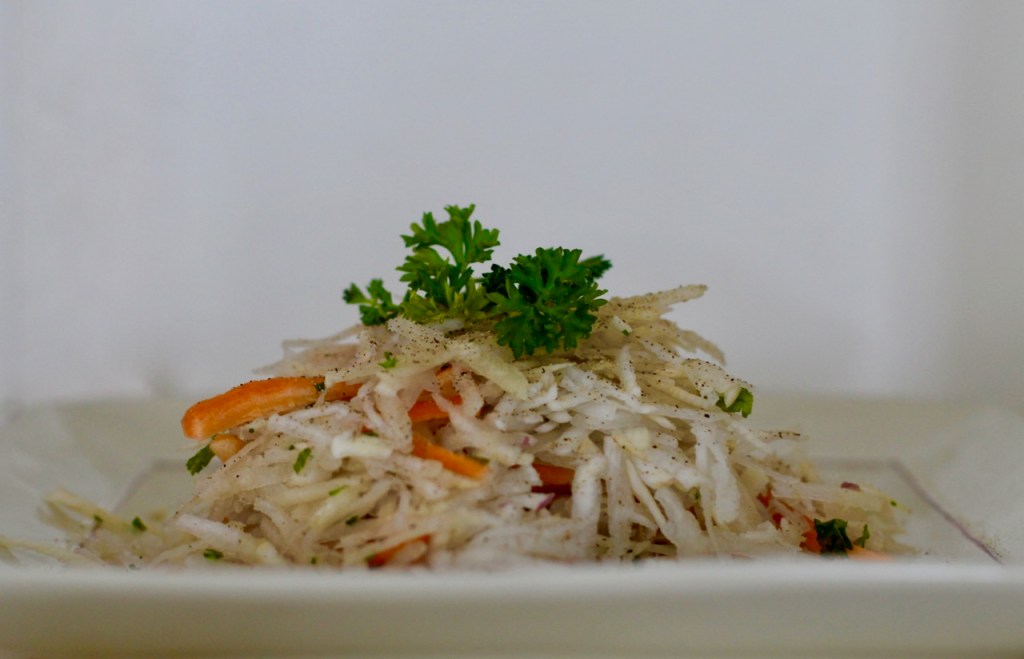
The flavor of the summer is bitter and it is recommended to eat bitter foods because it brings energy from the brain, the mind down to the lower part of the body. (Summer bitter foods include all whole grains, bamboo shoots, celery, dill, lettuce).

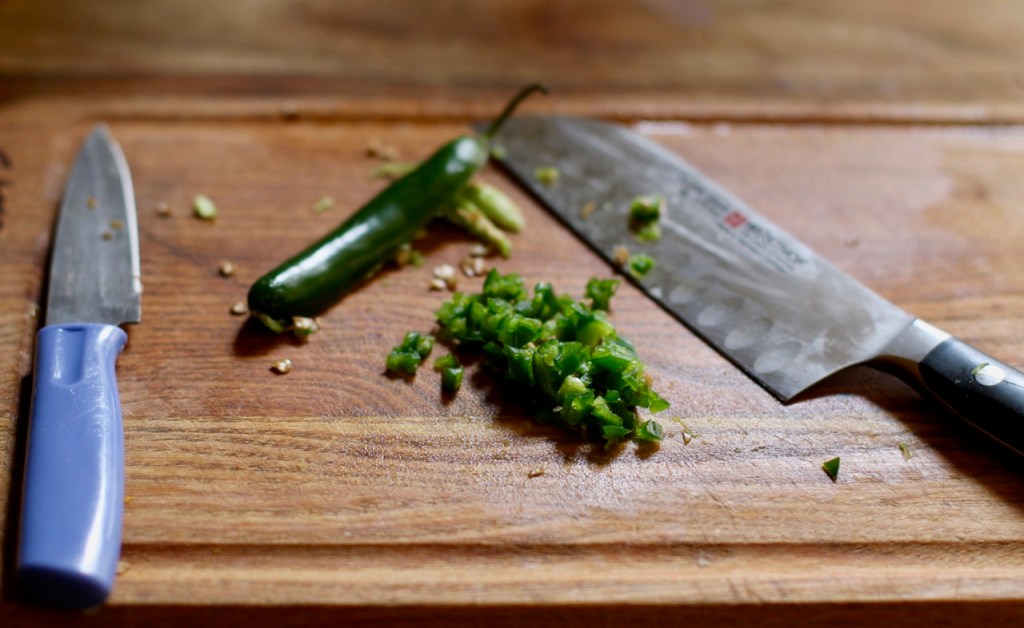
To work with the summer season, mainly its heat, we need to make some changes to our cooking methods. Of course, eating some raw foods is great; however, cooking some food is still recommended supplementing the raw foods. Cooking should be quick on high heat. Add hot, pungent foods to your meals. In hot climates, it is customary to add lots of hot peppers to open up the pores and release the excess heat from the body. (Of course, this should be done with some caution as too much hot pepper can injure the stomach). Also, try to minimize heavy foods to avoid sluggishness.

This is a great time to be active, spend time outside and socialize. The biggest issue during the summer is heat. Our diet and life style should support the body so we can stay cool, while paying attention to our digestion. We naturally want to eat raw fruits and vegetables but in addition consider including some simple, cooked foods during the summer to keep the digestive Fire going. Eating bitter, salty and pungent foods can facilitate the energy of the summer. Also, paying attention to our emotions can be helpful too.

SOURCES

Paul Pitchford: Healing with Whole Foods

Gary Dolowich: Archetypal Acupuncture

Art: Unknown

Written by twincitiesherbs.

Hot and sour tofu with rhubarb

In the United States and Europe, rhubarb is known as the pie plant and in fact we tend to use it in sweet dishes. However, in Asia, it is more used in savory dishes. Today, I’m presenting a savory dish that was inspired by the following blogs: ( blog 1 and blog 2). The rhubarb gives the sour taste that is balanced out nicely with the sweet and hot Chinese sauce and the bitter bamboo shoots. I chose broccoli as the main vegetable for the dish. Traditionally, pork is used but is replaced here with the tofu. In the original recipe, the raw rhubarb is blended in the sauce but I made it more traditionally sautéed like the rest of the vegetables.

For the meat version of this dish, please, see this recipe.

Recipe


Serves: 4 people  

Ingredients

  • 500 g tofu
  • 2 tsp + 3 Tbsp honey (or replace with agaste sauce for a vegan option)
  • 1/4 tsp five spice
  • chili flakes to taste
  • Sesame oil
  • 3 Tbsp sake
  • 3 Tbsp rice wine
  • 3 Tbsp graded ginger
  • 3 Tbsp soy sauce
  • 5 large cloves garlic
  • 200 g of rhubarb stalks (about 3 smaller or 2 bigger stalks)
  • 2 large heads of broccoli
  • 1 large onion, thinly sliced
  • 1 can (8 oz / 225 g) of bamboo shoots, drained
  • handful of peanuts, chopped
  • 4 scallions, chopped
  • lime
  • cilantro
  • rice or rice noodles

Ingredients listed as used in groups

Rice or rice noodles

Marinade/tofu: 2 tsp honey, 1/4 tsp five spice powder, 1/4 tsp red chili pepper flakes (optional), 1 Tbsp sesame oil, 3 Tbsp rice vinegar, 3 Tbsp sake, 1 Tbsp soy sauce, 500 g tofu.

The sauce: 5 cloves garlic, 3 Tbsp honey, 3 Tbsp soy sauce, 1 Tbsp ginger, 1/2 tsp red chili flakes (or to taste).

Vegetables: 200 g (3 medium sized) rhubarb stalks, 1 large onion, 2 heads of broccoli, 1 can of bamboo shoots.

Toppings: handful of chopped peanuts, 4 scallions, small handful coriander, soy sauce and limes.


Directions

  • The rice.  Make the rice of your choice. I used sushi rice.
  • Cut up the tofu so it is about 1 cm / 1/2 inch thick. I made triangular shapes but rectangular or square shapes are fine too.
  • Mix the ingredients of the marinade in a small bowl and pour it all over the tofu. Cover and put it in the fridge for at least 1 hour.
  • Make the sauce. Put all the ingredients in a blender and mix to get a nice sauce. Set aside.
  • Take tofu/marinade out of the fridge and strain off marinade. Pat dry tofu with a towel. Sauté tofu slices in small amount of oil for about 5 minutes on each side. Cover and set aside.
  • Cut up the vegetables. Thinly slice the onions, cut up the broccoli flowers. Cut rhubarb diagonally in 2-3 inches length. If stalks are bigger, cut them in half first.
  • In a larger pan or wok, heat sesame oil, add rhubarb batons in a single layer and cook for about 1-2 minutes while stirring to make sure all sides cook well. Make sure you don’t over cook rhubarb, they should be firm and not mushy. Add 1 Tbsp sugar and cook for 1 minute. Take off heat and set aside.
  • On medium high heat, sauté the sliced onion for about 10 minutes until translucent. Add the broccoli and continue sautéing on medium high heat for about 5 minutes or until it is soft but still crunchy. Add the sauce made earlier. (Quickly whisk, then pour it into the pan). Add the rhubarb (that was set aside from earlier step) and the bamboo shoots and bring to a boil, reduce the heat and simmer for three or four minutes. Add the tofu and toss and coat well and cook until the tofu is warm.
  • Serve on rice with chopped cashew nuts, chopped scallions, cilantro, lime wedges and soy sauce.

enjoy!

Sources

http://www.mostlyeating.com/ tofu with hot and sour sauce

https://wordpress.com/read/blogs/35104325/posts/55143

Photo, recipe and text by twincitiesherbs.com.

Cupcakes with candied violets

The beautiful violets are springing up everywhere in the Midwest, in the meadows, on the forest floor and if you are lucky in your back yard. They are not just beautiful but are edible too. Violets are a great source of food for butterflies and people as well. There are so many things you can make with these flowers. Today, I will make crystallized violets that can be used to decorate our cupcakes.

You will need violet flowers for this recipe. Violets can be found in many places. If you can’t find them outside, you can get potted ones at stores, just make sure they had not been sprayed. You can make about 80 flowers with the one egg white. I picked about 15 – 20 violets at a time because it is better to work with the freshly picked plant material. The flowers do not need to be washed, just make sure you pick them from a clean place free of pesticides. When I pick the flowers, I like to leave a 1″ green stem so I can handle the flowers easier while working with them. You can remove the stems at the end.

If you plan on eating the candid violets, you have to use fresh eggs. You can do the fresh egg test to see if your egg is fresh. Immerse the egg in a pot of cold water and see if it stays flat on the bottom of the pot. It any of the sides move up or the egg moves to the surface of the water, the egg will not be suitable for eating. You can still use that egg just don’t eat it. Only use fresh eggs that will stay flat on the bottom of a pot when immersed in water if you plan on eating the violets.

Recipe for the candied violets

INGREDIENTS

  • about 80 organic violet flowers with 1″ stem if possible
  • 1 egg white
  • 1-2 tsp water
  • about 1 cup of fine white sugar (you can use regular white sugar and grind it quickly in a blender. Just a few pulses before it becomes powder).

DIRECTION

  • Separate the egg white and put it into a small bowl. Add the water to make it more workable. Lightly beat.
  • Measure out the sugar. 1/4 cup is enough for the first round. Use more for the additional violets.
  • Go and pick the violet flowers, about 15-20 at a time. I like to leave a 1″ stems on so the flowers can be handled easily later.
  • Using a paint brush, ‘paint’ the egg whites on the flowers. I like to put the egg white on the back first and sprinkle with sugar and do the same on the front side. Just make sure you cover the flower material well with the egg white and the sugar on both sides.
  • Place the prepared flowers on a sheet of wax paper and let it dry for about 6 hours. I like to occasionally move the flowers to prevent them from sticking.
  • You can cut off or just pinch the stems off the flowers any time.
  • After they are dry, put them in the fridge in an air-tight container. Refrigerated flowers are edible for 1 week and can be stored for 1 month.

Recipe for the cupcakes

Source for cup cakes: Natasha’s Kitchen, Source for frosting: Natasha’s Kitchen

Ingredients for the cupcakes

  • 1 1/4 cup of cake flour or check out source on how to make cake flour (how to make cake flour)
  • 1 1/4 tsp baking powder
  • 1/2 baking soda
  • 1/2 tsp salt
  • 2 large eggs
  • 1/2-3/4 cup of sugar
  • 1 1/2 tsp vanilla
  • 1/2 cup of vegetable oil
  • 1/2 cup of buttermilk or plain kefir at room temperature

Ingredients for the icing

  • 8 oz cream cheese at room temperature
  • 1-1 1/2 cup of cold heavy whipping cream
  • 1-1 1/2 cups powdered sugar
  • 1 Tbsp vanilla extract

Directions for making the cupcakes

  • Preheat oven to 350 F.
  • Butter a cupcake/muffin pan or line with cupcake liners.
  • In a medium sized bowl, whisk together the flour, baking powder, baking soda and salt. Set aside.
  • In a bowl, beat the eggs for 15-20 minutes. You can use an electrical mixer on medium high speed.
  • Add the sugar slowly and continue to beat for another 30 minutes on medium high speed.
  • Add the vanilla and the oil and beat for 1 minute on medium speed.
  • Add half the flour mixture from the earlier step and beat on slow medium speed until incorporated. Add half of the buttermilk and mix until incorporated. Repeat with the remaining flour and buttermilk. Beat shortly until just combined and smooth, scraping down the sides of the mixing bowl as needed. The batter should be thin.
  • Pour batter into muffin pan. Divide evenly.
  • Bake for 12-14 minutes in the pre-heated oven.
  • When cooled and are at room temperature, you can pipe on the frosting. See the frosting recipe below, please.

Directions for making the frosting

  • Whip the cream on high speed until thick, fluffy and spreadable (1-2 minutes).
  • In a different bowl, beat the cream cheese and the powdered sugar together starting at a low speed. When mix together, add the vanilla extract.
  • Fold the whipped cream gently into this mixture. Store in the refrigerator if not ready to use.

Text, photo and recipe for candied violets by twincitiesherbs.com

Source for the cupcake recipe

http://www.natashaskitchen.com/perfect-vanilla-cupcake recipe/

Italian spinach/mushroom lasagna (vegetarian)

I have been making lasagna recently quite a bit. It is not too hot outside yet so I can turn the oven on but we want something on the lighter side too … so this dish seems to fit the bill. Of course, you can make it any time of the year. Lasagna is an Italian specialty. Traditionally, it is made with layers of tomato sauce based ragu, cheese and béchamel sauce. In this dish, I replaced the meat with spinach, mushrooms and cheese. I served it with red wine that seemed to compliment it very nicely.

Spinach is a great vegetable for the spring, it is hardy and nourishing for the liver.

Of course, an important part of the lasagna is the pasta. The best is if it is home made but good, high quality packaged pasta will do too.

Also, the cheese is also important. Try to get the best quality you can afford. Honestly, when I was in Italy, the first thing that I noticed was how tasty the cheese was in their dishes. I like to use a mixture of cheeses, here I used fresh mozzarella cheese balls, feta cheese and Parmesan cheese.

I make my own Italian seasoning but of course any store bought mix would work too. I think this is a nicely balanced mixture of spices grown in Italy. They are carefully selected herbs so one herb will not overpower the other. Also, they all are carminative therefore will help with digestion. Historically, we can thank the ancient Greek doctors who added these herbs to dishes so people can get their benefits all year along.

The warming, aromatic oregano is the key ingredient in pasta dishes. I like to use it because it gives a nice, distinctive flavor to Italian dishes. The sweet fennel seeds are acrid and compliment the strong aromatic oregano in the dish. The delicate basil is probably the most loved and popular spice used in Italian cooking. If you can, try to use the fresh plant instead of the dried. Its aromatic flavor is a nice addition to any Italian dish. The pungent chili pepper is not a big part of the Italian cuisine but Italians enjoy adding a little to their pasta dishes. The oregano and the fennel seeds both can offset the heat of some stronger spices.

Italian seasoning

2 TBSP (6 tsp) dried oregano

1 tsp dried basil or handful of fresh basil

2 tsp ground fennel seeds

1/8 tsp black pepper

1/4-1/2 tsp hot red pepper or to taste (optional)

RECIPE

Serves 6-8 people

Ingredients

  • lasagna pasta (I used 10 strips)
  • 10 oz spinach (frozen is fine too)
  • 4 oz chopped up mushrooms
  • olive oil
  • 2 slices of bacon, sautéed (optional)
  • 1 cup of tomato sauce – divided
  • 8 oz of Parmesan cheese, divided
  • 16 oz fresh mozzarella balls
  • 8 oz (200 g) of feta cheese
  • 1 Tbsp of Italian seasoning plus more for the top
  • handful of fresh basil leaves (if you have them)
  • 3 cloves of garlic
  • 1 egg, lightly beaten

Bachamel sauce ingredients

  • 5 Tbsp of butter
  • 1/2 cup of flour
  • 2 cups of milk
  • salt and pepper to taste
  • 1/8 tsp freshly grated nutmeg
  • 1 egg

  • Rosso Piceno wine. Bottled by Saladini Pilastri 2018 (optional) It is the best and not expensive!
  • parsley leaves (chopped)

Directions

Start boiling the water for the pasta (omit if your pasta does not need to be boiled).

Preheat the oven to 400 F and have the rack in the middle of the oven.

Start boiling the water for the pasta. Prepare according to instructions.

Making the filling: In a pan, sauté bacon (optional) and mushrooms in a little oil for 5- 10 minutes. Transfer into a larger bowl. Meanwhile wash and take stems off the spinach. (If using frozen spinach of course no need to do it). Sauté in a little oil and water. Remove and try to drain off water. Chop spinach well and transfer into the bowl. Add mashed feta cheese, mushrooms, 1 egg, garlic, 1 Tbsp of the Italian seasoning (see recipe above). Add sautéd bacon if used. Mix. set aside.

Preparing the béchamel sauce. It is not too hard, just follow these steps. I used a whisk. Use a double boiler. In the top pot, warm up 5 Tbsp of butter on low heat, when melted increase the heat to medium high and add the flour slowly, stirring continuously. Then start adding the milk very slowly, stirring after each addition and wait for a minute to let the flour mixture soak up the milk. When you start seeing bubbles, it is done. Remove it from the heat. Grate some nutmeg, add 1/2 cup of Parmesan cheese and 1 egg. Mix well.

Assembling the lasagna: Put half the tomato sauce on the bottom of a 3 Qt size baking dish. Place 1 layer of the pasta strips on the bottom of the pan. Put the filling on top of the pasta, followed by the fresh mozzarella balls (cut up if using the larger balls), pour the béchamel sauce and top it all with another layer of the pasta. Spread some pasta sauce and the shredded Parmesan cheese on the top.

Turn the oven heat down to 375 F and put the dish in the oven. Bake for 30 – 35 minutes or until the top is nice and golden brown.

Serve hot with a little grated Parmesan cheese and fresh parsley on the top. I really enjoyed a glass of red wine with the dish. It felt like I was in Italy! I would recommend a bottle of red wine if you are looking for one to try (please see details above in Ingredients).

enjoy!

Source

  • Matthew Wood: Earthwise
  • Paul Pitchford: Healing with Whole Foods

Photo, recipe, text by twincitiesherbs.com.

Turnip salad

In the Mid-West of the US, early April is the time when it gets really hard to eat local vegetables. There is nothing out there growing yet. But wait there are some crops from last fall like turnips … in fact raw turnips make a great spring salad. Past few weeks, I have been adding grated raw turnips to all my dishes. I have to admit it felt great to eat something raw. Try this simple salad, you can add a little olive oil, black pepper and carrots but honestly I often eat it just as it is, nothing added.

Turnip (Brassica rapa var) is a member of the mustard family that grows in temperate climate around the world. It has a neutral thermal energy and is slightly sweet, bitter and pungent … just what we need right now in the spring. It is especially high in fiber, nourishes digestive tracts and helps detoxify the body. It is considered to be high in many essential nutrients and minerals. Sounds like a super food to me …

RECIPE

Ingredients

  • 1 lb of turnips, medium or larger size
  • carrots, strips (optional)
  • 1 Tbsp olive oil (optional)
  • freshly ground black pepper (optional)
  • 1 Tbsp of lemon juice (optional)

Directions

  • Clean, peel and grade the turnips. For grating, I use the largest hole of my cheese grater.
  • Cut up carrots into thin trips.
  • Add into a bowl. Serve with olive oil and black pepper if you wish.

enjoy!

Text, photo and recipe by twincitiesherbs.com.

Source

Paul Pitchford: Healing with Whole Foods

Coronavirus truffles

Honestly, this is just too cute to pass … It is not a cure for the corona virus but might help your kids, the young ones and the older ones alike, get through the quarantine time. Oh and the oreo cookies should be still available in the grocery stores. Recipe is from Rozina’s kitchen.

RECIPE

makes 11 truffles

INGREDIENTS

  • 24 Oreo cookies
  • 113 gram cream cheese
  • handful of goji berries or cranberries

METHODS

  • Have cream cheese at room temperature.
  • Grind the Oreo cookies into a fine powder consistency. You can use a food processor or a rolling pin.
  • Work the cream cheese in with the Oreos.
  • Form smaller, 2″ balls with your hands.
  • Stick goji berries into the truffles.
  • We refrigerated the balls for a half hour before serving.

Enjoy and stay well!

Source

https://wordpress.com/read/blogs/136488425/posts/31232

Nourishing the immune system during the pandemic (no recipes)

First, I would like to express my heartfelt condolences to all the people whose loved ones have been effected by this virus. May God be with them.

People react to crisis differently. Some people start to hide, others worry about the stock market and then there are those who want to help others. So I’m in the third group and have been thinking to write about what to do during this pandemic. I’ve been contemplating to write this blog for at least a month so here I go finally. I know my blog is all about food in general but after all I don’t have a boss who tells me what I can do. I really would not want to offend anybody or push ideas on others but I’m hoping my writing will help someone.

We are experiencing something new, a game changer for sure these days. I feel it is quite uplifting that we are all doing the same thing. It is hard to believe that we are dealing with the same issues on the entire Earth but at the same time it is a bit eery that the whole world is in a lock down …

There has been an interesting phenomena since people have heard about the pandemic … the toilet paper shortage…  What is the deal with toilet paper especially that the virus does not necessary cause diarrhea? … and it is not just the Virgos who are doing it. This got the attention of many psychologists too. Here is my take on it …. People got so scared and wanted to do something, just anything to protect themselves. In fear, people started running to the stores buying toilet papers.

So I would like to write a blog on what people could do in addition to buying toilet papers and now this leads me back to the original mission of my blog …  using natural foods to stay well and be happy. I would like to take the opportunity to do a blog on what to do for the immune system at an energetic level. It is not an easy concept though in our culture. 

But before I do that, let’s talk about the nature of this virus quickly. From an energetic perspective, it is a cold virus that is capable of causing dampness that can lead to toxicity. So what does this mean? Natural Medicine differentiates conditions based on their nature: cold, hot, damp, dry. This is a cold disease that is capable of injuring the warm loving organs the lungs and the spleen. If they don’t work properly, fluids can accumulate so there can be wheezing, shortness of breath, digestion problems, loose stools, vomiting etc. In the third stage, accumulated fluids can start becoming toxic. So keeping the lungs and the digestion healthy would be crucial for a strong immune system. This is based on the reports of Chinese doctors who had treated people with the virus.

So let’s get back to the topic of this post, the immune system. What is the immune system? We can all agree that it is the body’s mechanism to defend against foreign bodies. But what do you do to keep it healthy? Just for the records, currently, modern medicine does not understand how to keep the immune system healthy. So let’s turn to ancient medicine to find out what we can do at the energetic level. According to Ancient Chinese Medicine, the defense system comprise of the lungs and the skin. They are the organs of first line defense that are in contact with the outside world.

In Natural Medicine everything is connected in our body. The lungs further work with the spleen to make this defensive energy so the food we eat is crucial. Of course, healthy kidneys support the lungs and are important to move energy. Then the healthy liver removes the toxins from the body. Of course, if our qi, the life force is not moving efficiently, things can stagnate. Our mental state can influence this entire process, too. A healthy body with a strong immune system is more capable to deal with foreign bodies.

So what can we do?

  1. Relax! Honestly the best thing to do is to stay calm. Try not to panic. If you are stressed, the body cannot work properly. Do things that you enjoy, reading, hiking, dancing etc. Of course, meditation is always great. Fear may effect our kidneys negatively. A fear ridden kidney will not be able to support the rest of the body and we will not be able to war off pathogens as well as a healthy body should. Not to mention that we do things that we later will regret.
  2. Exercise! Exercise makes your lungs work harder. The fresh oxygen is the greatest for the lungs. Try to go outside as much as you can. I see so many more people walking outside than before.
  3. Eat with the seasons! It seems like this virus has made a lot of people start cooking and eating healthy. Try to eat with the seasons and your constitution. Please, check my blogs on the lungs (Metal element) and the spleen (Earth element). Avoid greasy, toxic and over-processed foods. Limit dairy and sweets if you tend to have dampness issues like shortness of breath, cough with sputum, edema, gain weight easily. Remember we are in the spring season (wood element) and are trying to nourish our lungs and digestion. All the carminative kitchen spices for digestion (ginger, caraway seeds, rosemary, thyme, lovage, cumin, fennel) and pungent spices (horse radish, raw turnips, cinnamon, garlic, onions) are great. Foods that help drain, transport dampness are moong beans, asparagus and cranberry juice. Don’t forget the fermented foods to keep the digestive tracts healthy. All my recipes are supposed to nourish the immune system but the best foods for now would be the ones that I have posted in the past 6 weeks.
  4. Stay hydrated! Drink lots of water.
  5. Sleep! Make sure you get as much sleep as your body needs.
  6. Just like with any upper respiratory problem, nourishing the immune system is important. Taking immune system remedies is great but it is also important to deal with individual issues.
  7. Help people in need. This will give an immense boost to our hearts, like I said before, everything is connected in our body.

Of course, none of these recommendations will kill the virus but that is not the goal of Natural Medicine anyway. According to Chinese Medicine, nourishing the immune system in general is important for staying healthy. The ancient Chinese work called Shang Han Lun (around 200 AD) is of significant interest. It discusses cold diseases and is one of the greatest contributions to the world of Natural Medicine. It was composed by Zhang Zhong Jing (142-220 AD). He lost many members of his family during the great epidemics of the time. It was the first clinical manual to systematically describe the pathology of diseases. It also detailed the treatment of diseases caused by invasion of exterior pathogenic factors. In addition, the theories and the formulas extend beyond exterior invasions. They are applied every day for cases without an exterior invasion. Historically, Shang Han Lun’s principles resemble the work of the famous Greek physician, Hippocrates. I wanted to make this connection known.

Hippocrates (460-370 BC) is known today as the Father of Medicine. He lived through one of the worst epidemics of our humanity, the Plague of Athens (430-426 BC). He contributed a great deal to Natural Medicine as well. He observed how diseases progressed in different people. He concluded, “It is far more important to know what person has the disease than what disease the person has.” He recognized the crucial role the immune system played in recovery. People’s constitution was also vital during the epidemics. His great contribution to everyday diet was the addition of the valuable carminative (digestive) herbs that are today known as kitchen spices (garlic, onions, hot peppers, cinnamon, ginger, caraway seeds, oregano, rosemary, thyme, lovage, cumin, fennel). He saw that digestion is crucial for good health and wanted to make sure people would incorporate these herbs on a daily basis. 

DISCLAIMER. Please, note that these are recommendations for nourishing the immune system on an energetic level and are not a replacement for medical care from a physician. Also these recommendations are no way a guarantee so you can avoid getting the virus.

Stay healthy!

Sources:

Text, pictures by twincitiesherbs.com.

Hungarian egg-drop soup (tojásleves)

Hello, I’m writing this post from voluntary quarantine. My recipe may be helpful for getting through these difficult times although I normally make it quite often. It is very simple, tasty and nourishing as the main ingredients are eggs, caraway seeds and broth. It is the Hungarian version of the hot and sour soup. It can be served with semolina croutons or any bread croutons that you can buy in stores.

RECIPE

INGREDIENTS

  • 4 cup broth (vegetarian or chicken) or water
  • oil (vegetable or lard)
  • 1 smaller onion, finally chopped
  • 1 tsp Hungarian sweet paprika
  • 1 bay leaf
  • 1 Tbsp caraway seeds
  • 2 egg yolks
  • 1 Tbsp vinegar
  • about 1 cup of semolina flour + 2 eggs or bread croutons
  • dehydrated vegetable seasoning (optional)
  • parsley, chopped
  • Hot pepper to taste

DIRECTIONS FOR THE SOUP

  • Have 1/4 cup of cold water ready
  • Sauté the onion in a medium sized pot until translucent.
  • Add 1 Tbsp flour to make the roux. Stir for 3 minute or until it turns a beautiful orange color.
  • Add 1 tsp paprika and stir for 1 minute.
  • Add the water that was set aside from the first step, stir well.
  • Add stock, bay leaves, and caraway seeds. Bring to a boil and cook for 20 minutes covered.
  • Turn off the heat.
  • Separate 2 eggs. In a small bowl, lightly beat the yolks. Add a small amount of liquid from the soup, mix. Slowly add to the soup while stirring the soup in a circular motion. You can use the egg white for something else.
  • Add vinegar and dehydrated vegetable seasoning (optional)
  • Season with salt, black pepper and hot red pepper to taste.
  • Serve hot with semolina croutons or bread croutons.

DIRECTIONS FOR THE SEMOLINA CROUTONS (optional)

  • Lightly beat 2 eggs. Add 1/2 tsp salt, 1 Tbsp oil.
  • Add about 1 cup of semolina flour or as much what the eggs takes up. You should get a dough that is dry enough so you can pick it it up and make it into a circular shape. Make sure you don’t add too much because it will be too dry.
  • If possible let it sit for 1 hour.
  • Pan fry this dough in a lightly oiled frying pan on both sides until golden brown.
  • Take out of frying pan and cut up into small squares.

Enjoy!

SOURCE

Recipe, text and photo by twincitiesherbs.com.

Chana masala (Indian chickpea dish)

Chana masala is a delicious Indian dish that would be great for the spring. I still vividly remember the first time I had chana masala at a friend’s house. He had us over for dinner when his parents came to visit from India like 25 years ago. I did not even recognize the chickpeas … I actually thought they were chestnuts. I never got the recipe but his mother gave me some tips. (Thanks to the internet I found this recipe on line and I think it is very close to what we had that night).

Chana means garbanzo beans and is the main ingredient in the dish. The secrete to this dish is to prepare these beans properly. I remember our friend’s mother told me to cook the beans for a long time. They should be cooked for 3 hours or you can use a pressure cooker according to its instructions, of course. Cooking for this long will soften the beans and let the flavors come out. So if time is not an issue, I would recommend home cooked chickpeas instead of using the canned ones. The canned beans will not have the same results for sure.

Garam masala is the main spice in the dish. It is not just one spice but is actually a cleverly chosen mixture of a few spices: fennel seeds, star anise, mace, black cardamom. It is nicely balanced so one flavor will not overwhelm the dish. You can blend it yourself or you can just buy it. (I ended up buying it at the store).

This is a common dish that people in India make on a regular basis for lunch or dinner. It has an interesting flavor, taste and texture. It can be made less spicy, if you don’t like spicy dishes, just leave out the green chili. So chana masala is basically a chickpea curry cooked in an onion tomato sauce with the spices. I always wonder how poor people in India get by on very little money and still eat well. This dish might be one of their secrets …

RECIPE

-I doubled the recipe

serves 3-4 people

  • 1 cup of dried chickpeas or 1 (15oz) can
  • 3 cups of water

Ingredients for the tomato sauce

  • 2 Tbsp vegetable oil/ghee
  • 2 large onions, finally chopped
  • 2 garlic cloves, minced
  • 1 inch ginger piece, finally chopped
  • 2 medium tomatoes, chopped
  • 1/2-3/4 TBSP of red chili powder (adjust to taste)
  • 1/4 tsp turmeric powder
  • salt to taste

Ingredients for the chana masala gravy

  • 1 bay leaf
  • 1 inch cinnamon stick (If you double up the recipe, you will not need to add another cinnamon stick)
  • 2-3 clove pieces
  • 3 green cardamom pods without the shells.
  • 1 green chili pepper, chopped (optional)
  • 1-1 1/2 tsp garam masala
  • 1 1/2 tsp coriander powder
  • 2 pinch mango powder (amchur) (optional)
  • fenugreek leaves (optional)
  • coriander leaves

Directions

Clean and soak the chickpeas for at least 8 hours. Pour off soaking liquid. Add fresh cold water and cook for 3 hours. Less for pressure cooker. Save cooking liquid. Omit if using canned beans.

Directions for the tomato sauce

  • Sauté the onions in oil or ghee until golden. Add the chopped ginger for 1 minute, stir.
  • Add red chili powder and turmeric. Stir for 1 minute. Add garlic quickly, stir.
  • Quickly add chopped tomatoes and little salt, stir. Cook for 15-20 minutes or until there is a nice sauce. The onions should not taste raw.
  • Let this mixture cool. Add 1 tbsp liquid from the beans. Make a thick gravy with a blender. Set aside.

Directions for the Chana masala gravy

  • Dry heat the spices (cinnamon stick, bay leaf, cardamom, clove) in a pot for 1 minute until you can smell the aroma of the spices. Stir. I grind the cardamom as some people don’t like them in their foods whole.
  • Pour the blended tomato sauce mixture from the previous step back into the pot, the chopped green chili pepper, coriander and garam masala powders and the spices.
  • Mix and cook for a few minutes until ingredients are mixed nicely.
  • Add the cooked chickpeas and the cooking water. You might have to add more water.
  • Bring to a boil and simmer for 5-6 minutes.
  • Taste the mixture and see if you need more garam masala. Boil and simmer for 2 more minutes if spices were added.
  • Take out the larger spices like bay leaves, cinnamon, cloves.
  • I also added salt here.
  • Keep it covered until served.
  • Serve hot with cilantro, yogurt, lemon, rice, vegetables and roti.

enjoy!

Source

https://www.indianhealthyrecipes.com/chana-masala/

Tiramisu

If you love coffee and desserts, you are going to love Tiramisu! It is an Italian coffee flavored dessert made with layers of lady fingers dipped in coffee and the egg/mascarpone mixture topped with chocolate. This is a simple dessert that you can whip up easily. Really wow your family, guests and they will think you are the most amazing chef…

You will need Italian lady fingers. I believe it is a must and you can buy it fairly easily. I got mine at Whole Foods but you can even get it on Amazon or make it yourself.

Traditionally, raw eggs are used to make tiramisu. I use fresh, local eggs but you can use heavy whipping cream as a substitute so you do not need to worry about raw egg issue. Of course, the cream will make it heavier and richer. In Europe, eggs are not a problem but in the US, eggs are processed differently and might not be fresh.

If you decide to use eggs, here is the egg test. When you immerse your egg in a pot of cold water, it should lie flat on the bottom. If it goes to the top or even one side starts moving up, do not use the egg. You can only use eggs that are fresh here. I will have instructions for both versions, the raw egg version and the alternative version using cream and cooked egg yolk.

What kitchen equipment do you need?

  • Medium sized dish for whipping the whites or the cream
  • larger, medium sized dish for the egg yolk/mascarpone
  • 2 Qt sized deep dish for the tiramisu
  • Double boiler if cooking the egg yolk. If you don’t have a double boiler, you can use a metal bowl that fits on the top of the bottom pot securely but does not touch the bottom of the pot.
  • whisk
  • plastic scraper
  • sieve

Optional but nice if you already have them:

  • coffee maker
  • handheld mixer or food processor
  • Plastic wrap for refrigeration

Eggs. Eggs are easier to separate when cold but once they’re separated they need to be at room temperature. Separating the egg white from the yolk can be a bit tricky if you are new to baking. When cracking the egg, tap the egg on a flat surface. Also, I like to put the egg white individually into a separate smaller bowl first to make sure the egg is not addled and no yolk is mixed in. Then you can pour it into a bigger dish that is suitable for whipping the whites and collect the rest of the eggs whites. Of course, the egg yolk can go into a medium sized bowl that will be used to mix egg yolk and mascarpone.

Another key ingredient is mascarpone. It should be cold but make sure you can mix it with the rest of the ingredients. Yes it is expensive! … but it is the main ingredient and is worth it! So what is mascarpone anyway? It is like cream cheese but is creamier and has a higher fat content as it is obtained from cream and not from milk; cream cheese has 35% while mascarpone has 70% fat.

The recipe uses alcohol. I used dark rum. In my opinion, it suits this rich dessert better but the light rum is fine as well. Amaretto works well too. If you don’t want to use alcohol, simply use vanilla or almond extract instead.

Coffee gives tiramisu the distinctive, interesting flavor, so yes you will need a good strong Italian espresso. The lady fingers are dipped in the espresso so make sure you make a good strong brew. 1 1/2 cup of espresso should be enough for dipping. (If you have left overs, you can drink it or pour it on your plants). For 1 1/2 cups of water, I used 1/3 cup of coffee beans that is 2 1/2 Tbsp ground coffee. If you don’t have a coffee grinder, purchase the coffee already ground. If you have an espresso machine, great! If you don’t, no worries! We have a simple Italian Moka pot (Bialetti). Also, another tip is you can get your espresso coffee at Star bucks. My daughter works at Star Bucks and she told us one time a customer got her espresso for tiramisu.

You can use different size dishes to assemble the tiramisu. If you want to put it all in one big dish, you can use a deeper dish that is 2 Qt in size (I used a rectangular dish that is 11.5 x 8 x 2 inches). But you can use anything even circular dishes. Sometimes I use ice cream serving dishes and make tiramisu individually. Just make sure that lady fingers are tightly laid down.

This dish is definitely a make ahead dessert. It needs to be refrigerated for at least 24 hours … but honestly, I think it tastes the best after 2 days … although that might be too long to wait … Otherwise, it should be consumed within a week.

RECIPE

Please read the above text before making the recipe.

INGREDIENTS

  • 1.5 cups of strong espresso at room temperature (1/3 cup of ground coffee or 2 1/2 Tbsp coffee beans)
  • 28 lady fingers, maybe need more
  • 3 Tbsp of coffee liquor/amoretto, 1 tbsp vanilla extract
  • 6 eggs (separated)
  • 16 oz mascarpone
  • pinch of salt
  • 1/2 cup sugar
  • shaved chocolate for decoration
  • 2 cups cold heavy whipping cream (if not using egg whites)

METHODS

Directions for the raw eggs version (If you can’t use raw eggs please use directions below).

  • Take the eggs out of the refrigerator. Separate the yolk from the whites while they are cold. Once you separate the eggs, just leave them on the counter. They need to be at room temperature when you start working with them.
  • Make the espresso. Pour it into a shallow dish with a flat bottom. Coffee needs to be at room temperature.
  • Immerse the lady fingers in the coffee quickly one at a time for one second. Lay the dipped lady finger in a dish nice and snug. You do this quickly so the lady fingers don’t get soggy.

Making the tiramisu sauce.

  • In a double boiler, add 1/2 cup of sugar to the yolk with a pinch of salt and cook for 6-10 minute while stirring or until you get a nice creamy consistency. Keep checking, do not over-beat. You want to get a nice creamy, pudding like consistency. Here we are adding air to the yolks to increase volume. Take off heat and let cool to room temperature.

  • Add the 3 Tbsp of coffee liquor and mascarpone to the egg yolk. Beat until just combined and smooth.
  • Whip up the egg whites until the whites are solid for about 2-3 minutes. When you turn the bowl upside down, it should not fall out of the bowl. Do not over beat. Keep checking.
  • Add the egg whites to the egg/mascarpone mixture. Don’t mix but gently fold it in. You just need to incorporate it into the yolk mixture keeping its fluffiness.
  • Pour half of this mixture on the lady fingers that are already in the dish.
  • Put another layer of the coffee dipped lady fingers on top of this mixture.
  • Pour the other half of the tiramisu mixture on the lady fingers.
  • Gently sprinkle some shaved chocolate on the top through a sieve.
  • Cover the dish with a plastic wrap and refrigerate for at least 6 hours or 2 full days.
  • Serve in small serving bowls.

Direction for the cream and cooked egg yolks version

  • Take the eggs out of the refrigerator. They need to be at room temperature.
  • Mascarpone and cream need to be cold. Keep them in the fridge until you are ready to use them.
  • Make the coffee. Pour it into a shallow dish with a flat bottom along with 3 Tbsp of rum. Coffee needs to be at room temperature.
  • Dip the lady fingers in the coffee quickly one at a time for a few seconds. Lay the dipped lady finger in a dish nice and snug.
  • Making the tiramisu sauce. Separate the eggs.
  • Prepare the double boiler by bringing some water to a simmer in the bottom pot.
  • Add 1/2 cup of sugar to the yolk with a pinch of salt in a pot or metal bowl. Ensure the pot fits the bottom pot. Mix with a whisker over low heat for 8-10 minutes. Continue until you get a nice creamy custard consistency. Keep stirring continuously. Here we are adding air to the yolks to increase volume.
  • Add the 3 Tbsp of rum and the mascarpone to the egg yolks. Beat until just combined and smooth.
  • Whip the chilled cream for about 2-3 minutes or until it is solid. When you turn the bowl upside down, it should not fall out of the bowl. You can use a food processor, electric mixer or you can do it by hand. Do not over-beat.
  • Add the cream to the egg/mascarpone mixture. Don’t mix but gently fold it in with a plastic spatula.
  • Pour half of this mixture on the lady fingers that are already in the dish.
  • Put another layer of the coffee dipped lady fingers on top of this mixture.
  • Pour the other half of the tiramisu mixture on the lady fingers.
  • Gently sprinkle some coco powder through a sieve on the top.
  • Cover the dish with a plastic wrap and refrigerate for at least 6 hours or 2 days.
  • Serve with shaved chocolate, optional.

enjoy!

Text and photos by twincitiesherbs.