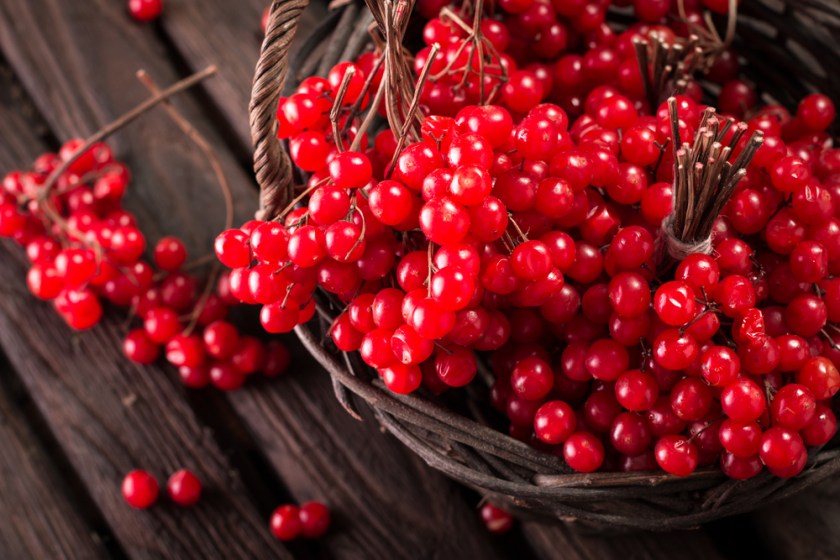
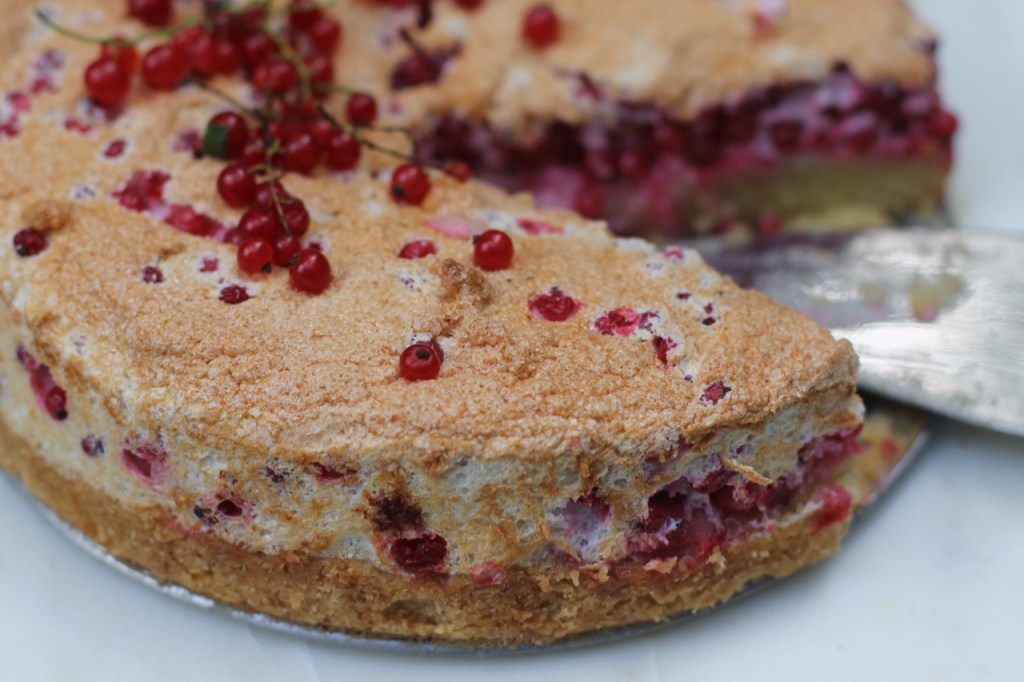
This delicious German dessert quickly became a favorite in my family. The tasty base is topped with the delicate meringue mixed with the red currants. The tangy red currants are available right now and are bursting with flavor. Of course, you can add as much sugar as you like or as little as you like … that is the beauty of making your own cake. Please feel free to experiment.
RECIPE
Ingredients
base
2 cup (30 dkg) flour
2 tsp baking powder
2 sticks (25 dkg) butter
1 tsp vanilla extract
1/4- 1 cup sugar (I used 1/4 cup)
5 egg yolks
1/4 cup almond flour, optional
pinch of salt
topping
2 1/4 cup red currants without stems
5 egg whites
1/4-1 cup sugar ( I used 1/2 cup)
handful of breadcrumbs
pinch of salt
twincitiesherbs.com
Directions
Preheat oven to 350 F. Butter a 9″ round dish (2 1/2″ deep). Sprinkle some flour on the bottom.
In a medium sized bowl, sift baking soda into the flour. Cut the butter into the flour.
Add the yolks one by one. Mix well.
Add the sugar and vanilla extract, almond flour, mix.
Spread the dough evenly on the bottom of the pre- buttered form.
Let it rest for 1 hour if you can.
Bake for 30 minutes.
Turn the oven down to 340 F.
Beat the egg whites until hard. Mix in the sugar and salt. Gently mix in the currants and the breadcrumbs.
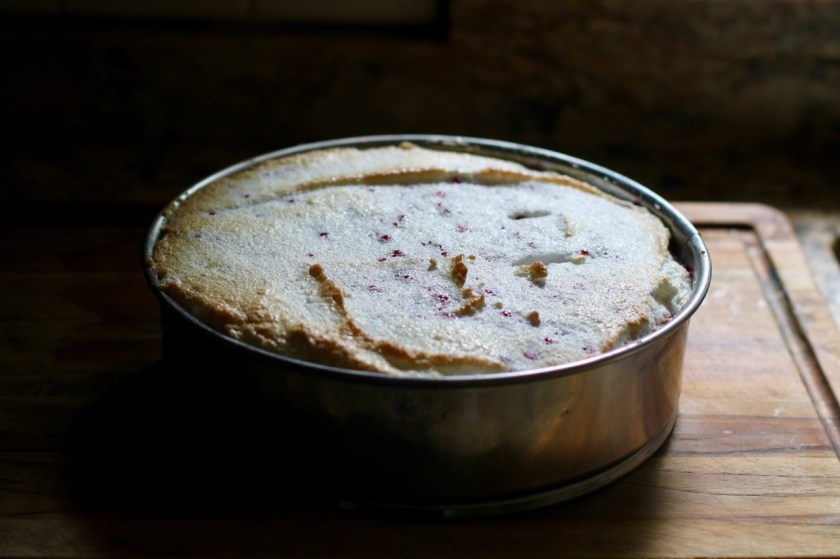
Pour on top of the baked cake base.
Bake for 15 more minutes at 340 F and then turn heat down to 300 F. Bake for 15 more minutes.
Let the cake sit for a few hours before serving.
Decorate the top with fresh currants, optional.
Serve at room temperature maybe with a little vanilla ice cream.
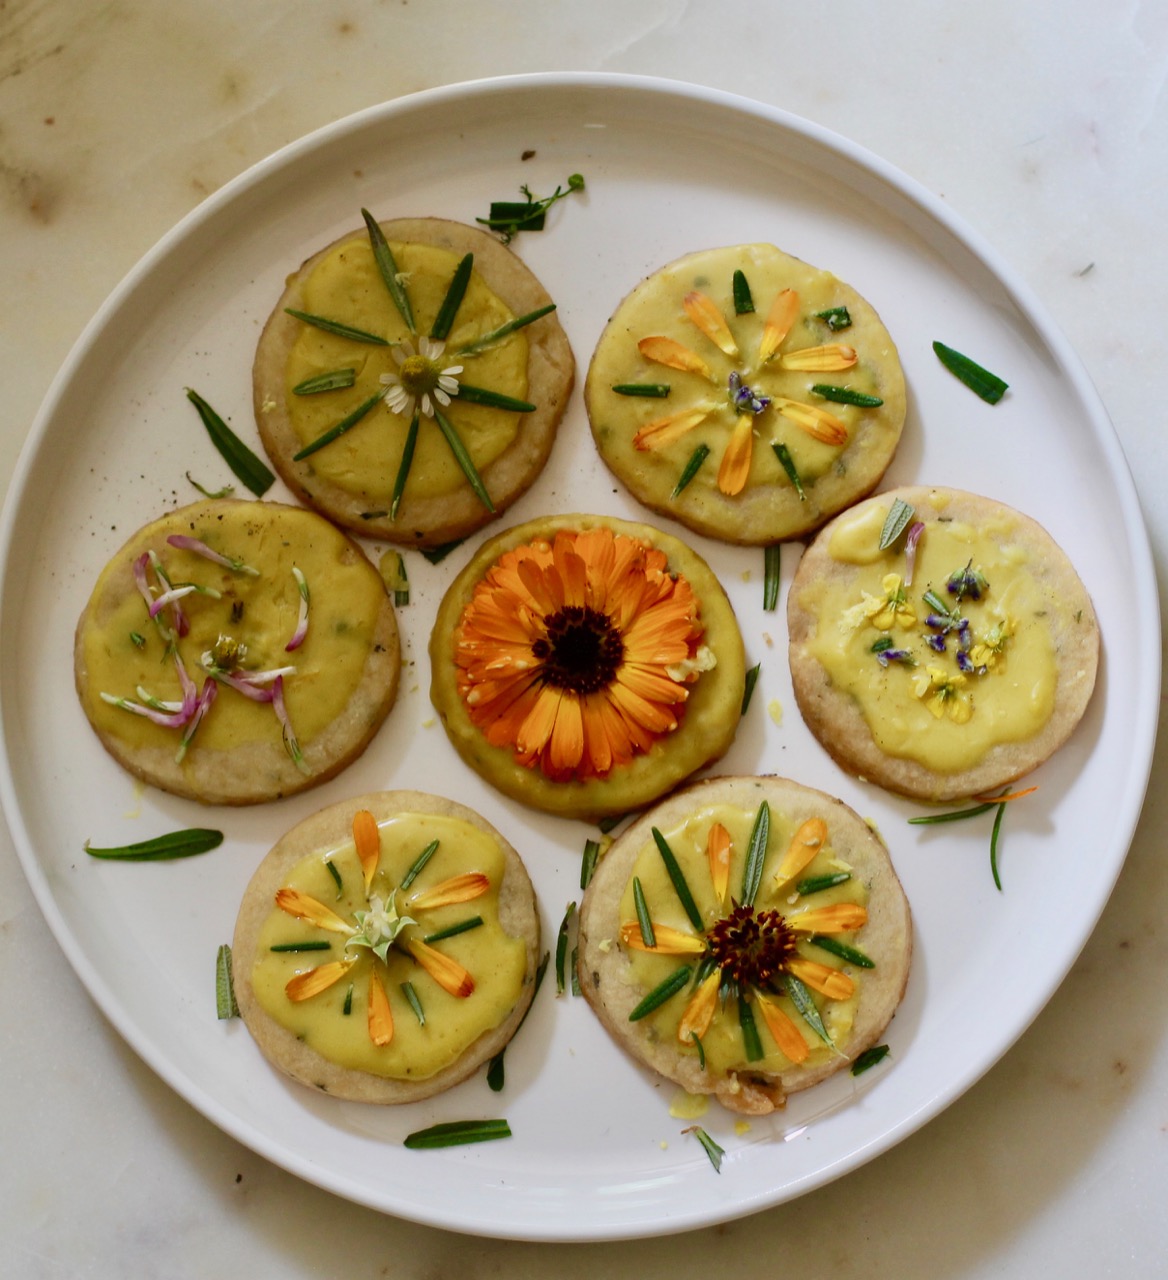
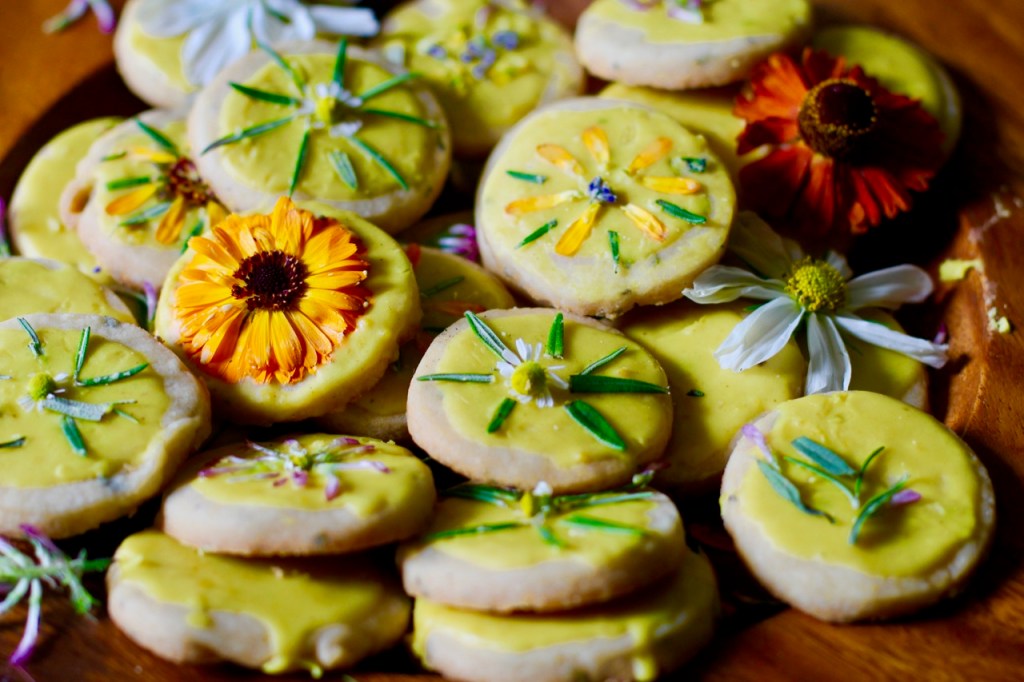
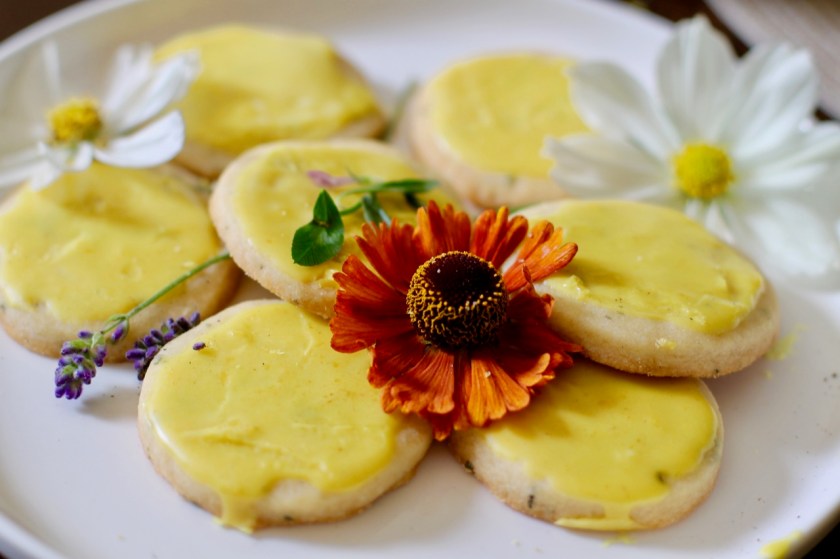
These cookies are made to honor the Summer Solstice. Summer Solstice is the celebration of the longest day of the year, really the celebration of the Sun. It is a ceremony done especially in places that have long days of darkness and cold. It is surely a huge event in the Northern European countries but you can enjoy it in your own backyard wherever you live. Gather some edible flowers and make these delicious cookies to celebrate this beautiful time of the year!
IMPORTANT! You can use any flowers that your heart desires just make sure they are edible. Many of the flowers sold in stores are cultivated versions of wild plants and might not be suitable for eating but even in the wild, not every plant is edible. Of course, do not pick from areas that have been sprayed. If you don’t have edible flowers, no worries. You can still make the cookies with the icing and just use the flowers for decorations on the side.
Having said this here is a list of flowers that might be helpful for deciding which ones to use: calendula, chamomile, clovers, native echinacea, wild iris, wild daisies, dandelions, lavender, wild roses, St John’s wort, rosemary, thyme, sage. I ended up using flowers that are growing in my garden right now. These were petals of chamomile, calendula, clovers, lavender and leaves of rosemary.
These are tasty sugar cookies and the icing works well with the cookies as well … it will harden in about an hour or so after you put it on. Also, the icing recipe uses some milk. I don’t think the milk is a big issue if you have the cookies out for a couple of hours but they should be refrigerated otherwise for storage. Of course, you can make these cookies without the flowers for a fun summer dessert, too.
RECIPE
Ingredients
Cookies:
1 & 3/4 cups of all purpose flour
12 Tbsp softened butter at room temperature
¼ cup honey
¼ cup brown or cane sugar
1-3 teaspoon minced organic thyme
1-3 teaspoon minced organic lavender buds
1-3 teaspoon minced organic rosemary
1-3 teaspoon minced organic sage
a few crushed cardamom seeds
pinch of salt
edible flowers (please see note above)
Icing:
3 teaspoons milk
1 cup of powdered sugar
grated rind of 1 lemon.
For coloring, I used store-bought natural food yellow dye or you can use turmeric or St John’s wort tincture too.
Combine your milk and icing sugar. Slowly add in your coloring and mix until you find the desired color/consistency.
Directions:
Preheat oven to 300 F.
Cream sugar and butter. Add flour and herbs (lavender, thyme, sage, rosemary, crushed cardamom seeds) and mix until creamy. I did it by hand easily but you can use a food processor.
Slowly drizzle in honey while beating until mixture pulls together. I did this part by hand, it was very easy. The dough should make a ball.
Divide into four smaller balls and chill for an hour or so.
Roll out on a floured surface and cut into round shapes. Add flour as needed.
Bake for 10-15 minutes. I baked the cookies for 12 minutes until the bottoms were nice and golden brown. The cookies will harden after you take them out.
Let cool.
Spread a small amount of the icing (recipe above) on the top of the cookies evenly. Do them in batches of 10 as the icing can harden.
Decorate using the flowers and herbs of the sun: Please note above on how to choose flowers.
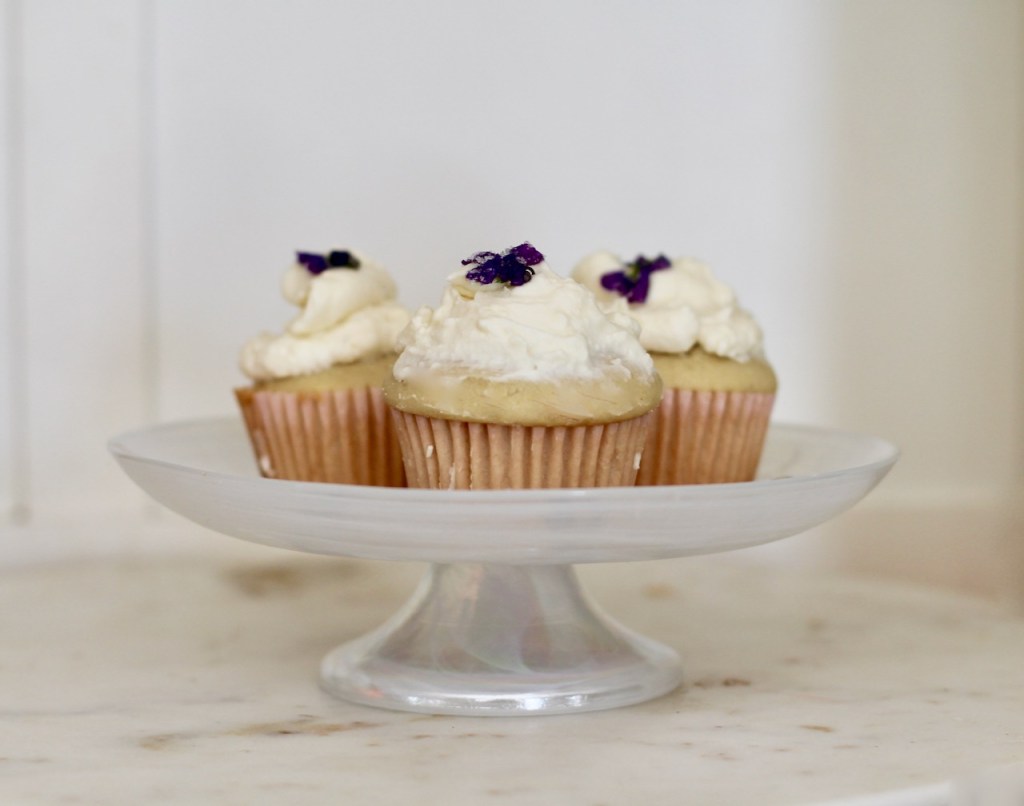
The beautiful violets are springing up everywhere in the Midwest, in the meadows, on the forest floor and if you are lucky in your back yard. They are not just beautiful but are edible too. Violets are a great source of food for butterflies and people as well. There are so many things you can make with these flowers. Today, I will make crystallized violets that can be used to decorate our cupcakes.
You will need violet flowers for this recipe. Violets can be found in many places. If you can’t find them outside, you can get potted ones at stores, just make sure they had not been sprayed. You can make about 80 flowers with the one egg white. I picked about 15 – 20 violets at a time because it is better to work with the freshly picked plant material. The flowers do not need to be washed, just make sure you pick them from a clean place free of pesticides. When I pick the flowers, I like to leave a 1″ green stem so I can handle the flowers easier while working with them. You can remove the stems at the end.
If you plan on eating the candid violets, you have to use fresh eggs. You can do the fresh egg test to see if your egg is fresh. Immerse the egg in a pot of cold water and see if it stays flat on the bottom of the pot. It any of the sides move up or the egg moves to the surface of the water, the egg will not be suitable for eating. You can still use that egg just don’t eat it. Only use fresh eggs that will stay flat on the bottom of a pot when immersed in water if you plan on eating the violets.
Recipe for the candied violets
INGREDIENTS
about 80 organic violet flowers with 1″ stem if possible
1 egg white
1-2 tsp water
about 1 cup of fine white sugar (you can use regular white sugar and grind it quickly in a blender. Just a few pulses before it becomes powder).
DIRECTION
Separate the egg white and put it into a small bowl. Add the water to make it more workable. Lightly beat.
Measure out the sugar. 1/4 cup is enough for the first round. Use more for the additional violets.
Go and pick the violet flowers, about 15-20 at a time. I like to leave a 1″ stems on so the flowers can be handled easily later.
Using a paint brush, ‘paint’ the egg whites on the flowers. I like to put the egg white on the back first and sprinkle with sugar and do the same on the front side. Just make sure you cover the flower material well with the egg white and the sugar on both sides.
Place the prepared flowers on a sheet of wax paper and let it dry for about 6 hours. I like to occasionally move the flowers to prevent them from sticking.
You can cut off or just pinch the stems off the flowers any time.
After they are dry, put them in the fridge in an air-tight container. Refrigerated flowers are edible for 1 week and can be stored for 1 month.
1 1/4 cup of cake flour or check out source on how to make cake flour (how to make cake flour)
1 1/4 tsp baking powder
1/2 baking soda
1/2 tsp salt
2 large eggs
1/2-3/4 cup of sugar
1 1/2 tsp vanilla
1/2 cup of vegetable oil
1/2 cup of buttermilk or plain kefir at room temperature
Ingredients for the icing
8 oz cream cheese at room temperature
1-1 1/2 cup of cold heavy whipping cream
1-1 1/2 cups powdered sugar
1 Tbsp vanilla extract
Directions for making the cupcakes
Preheat oven to 350 F.
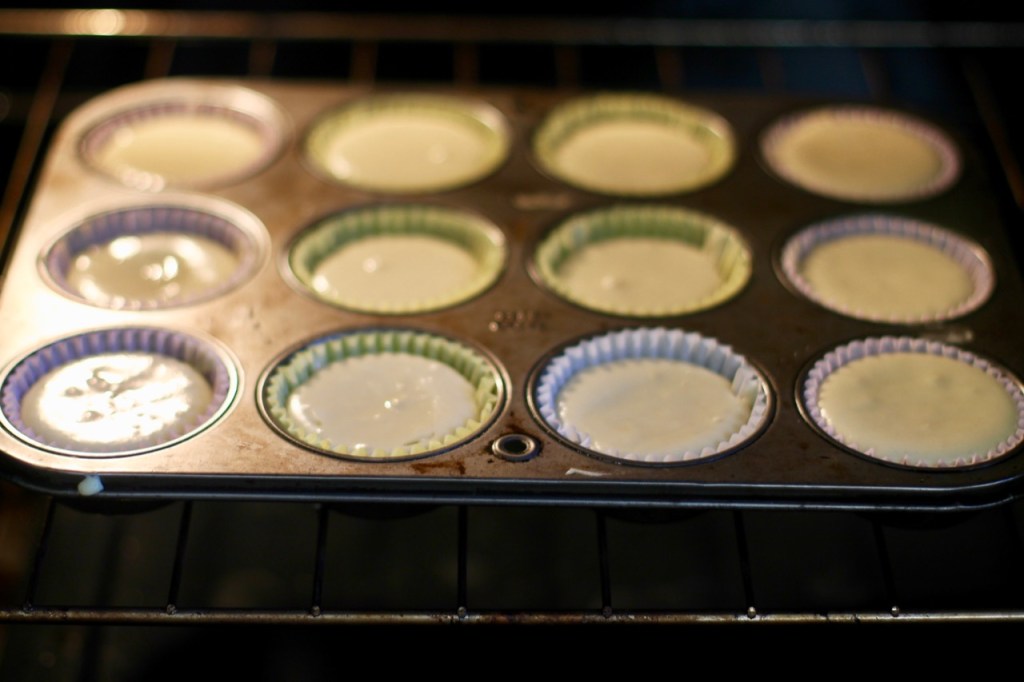
Butter a cupcake/muffin pan or line with cupcake liners.
In a medium sized bowl, whisk together the flour, baking powder, baking soda and salt. Set aside.
In a bowl, beat the eggs for 15-20 minutes. You can use an electrical mixer on medium high speed.
Add the sugar slowly and continue to beat for another 30 minutes on medium high speed.
Add the vanilla and the oil and beat for 1 minute on medium speed.
Add half the flour mixture from the earlier step and beat on slow medium speed until incorporated. Add half of the buttermilk and mix until incorporated. Repeat with the remaining flour and buttermilk. Beat shortly until just combined and smooth, scraping down the sides of the mixing bowl as needed. The batter should be thin.
Pour batter into muffin pan. Divide evenly.
Bake for 12-14 minutes in the pre-heated oven.
When cooled and are at room temperature, you can pipe on the frosting. See the frosting recipe below, please.
Directions for making the frosting
Whip the cream on high speed until thick, fluffy and spreadable (1-2 minutes).
In a different bowl, beat the cream cheese and the powdered sugar together starting at a low speed. When mix together, add the vanilla extract.
Fold the whipped cream gently into this mixture. Store in the refrigerator if not ready to use.
Text, photo and recipe for candied violets by twincitiesherbs.com
Honestly, this is just too cute to pass … It is not a cure for the corona virus but might help your kids, the young ones and the older ones alike, get through the quarantine time. Oh and the oreo cookies should be still available in the grocery stores. Recipe is from Rozina’s kitchen.
RECIPE
makes 11 truffles
INGREDIENTS
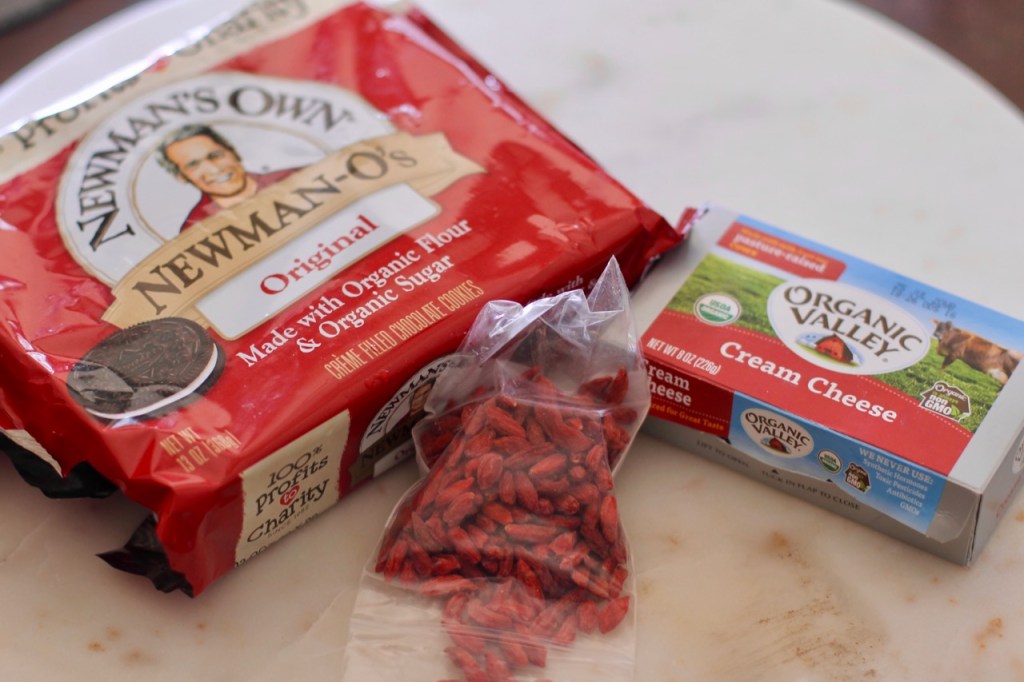
24 Oreo cookies
113 gram cream cheese
handful of goji berries or cranberries
METHODS
Have cream cheese at room temperature.
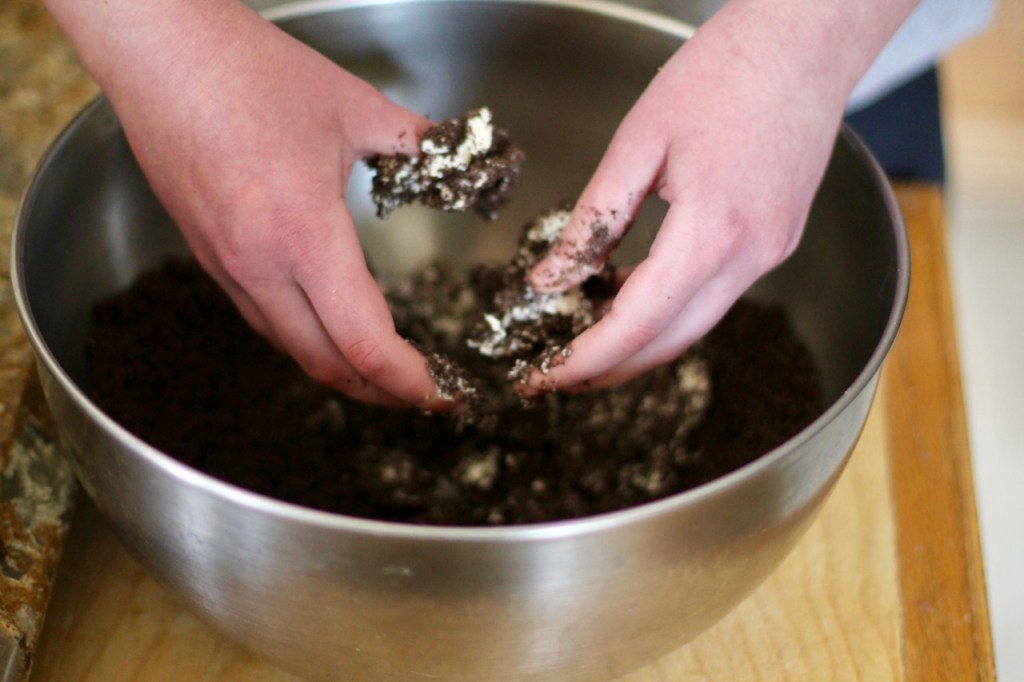
Grind the Oreo cookies into a fine powder consistency. You can use a food processor or a rolling pin.
Work the cream cheese in with the Oreos.
Form smaller, 2″ balls with your hands.
Stick goji berries into the truffles.
We refrigerated the balls for a half hour before serving.
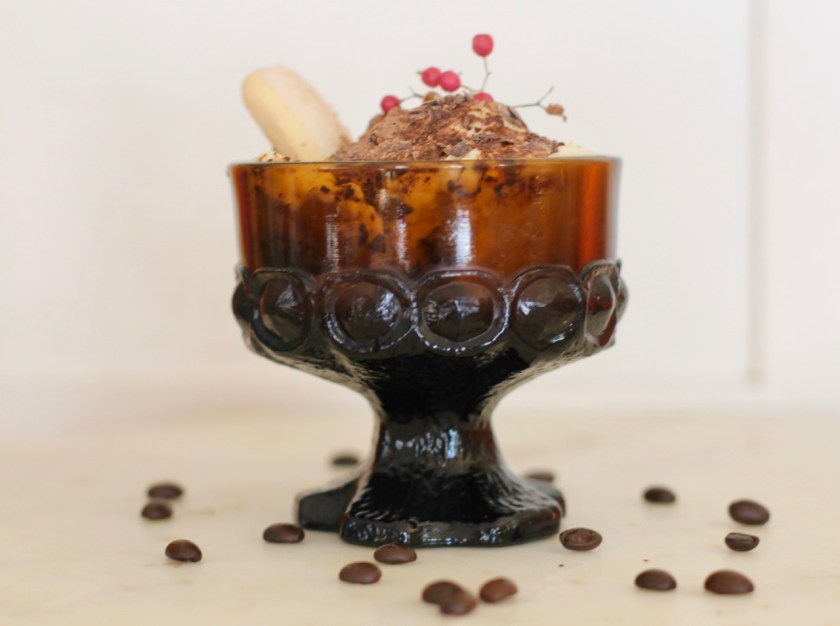
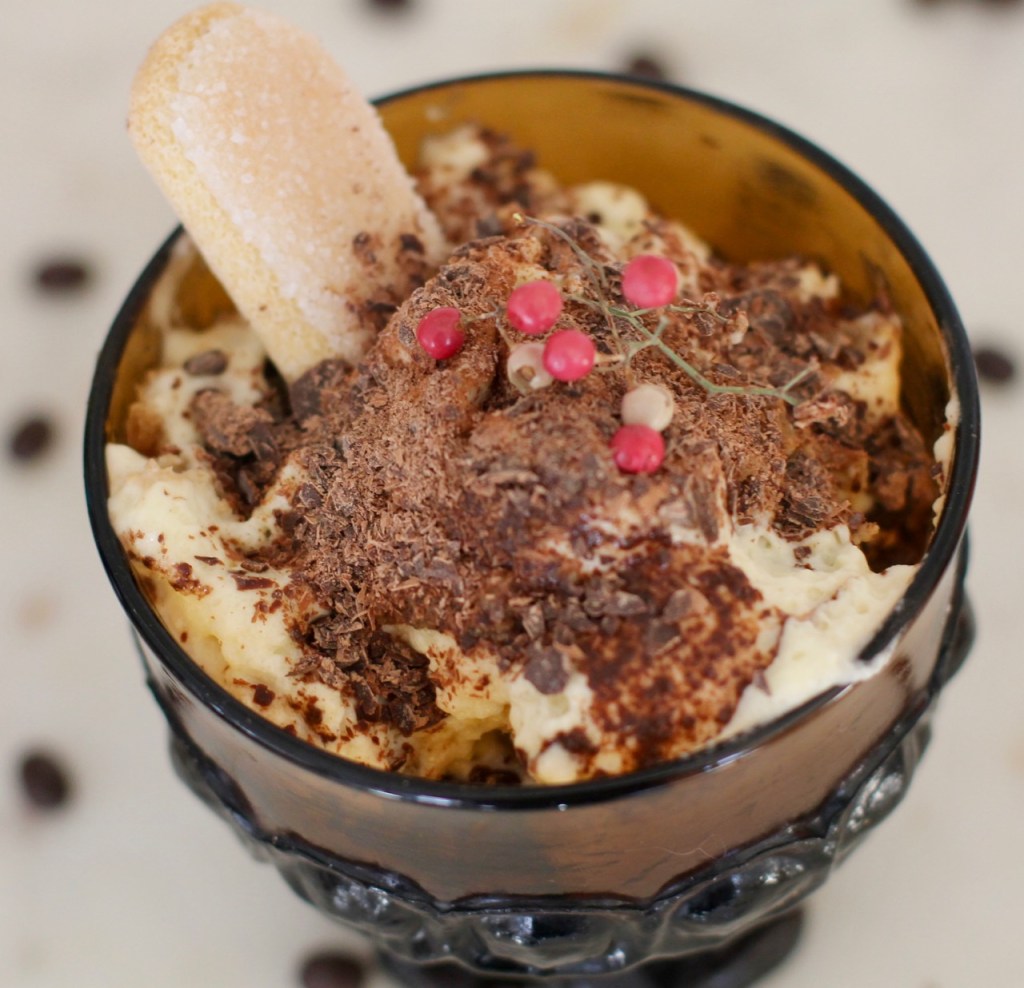
If you love coffee and desserts, you are going to love Tiramisu! It is an Italian coffee flavored dessert made with layers of lady fingers dipped in coffee and the egg/mascarpone mixture topped with chocolate. This is a simple dessert that you can whip up easily. Really wow your family, guests and they will think you are the most amazing chef…
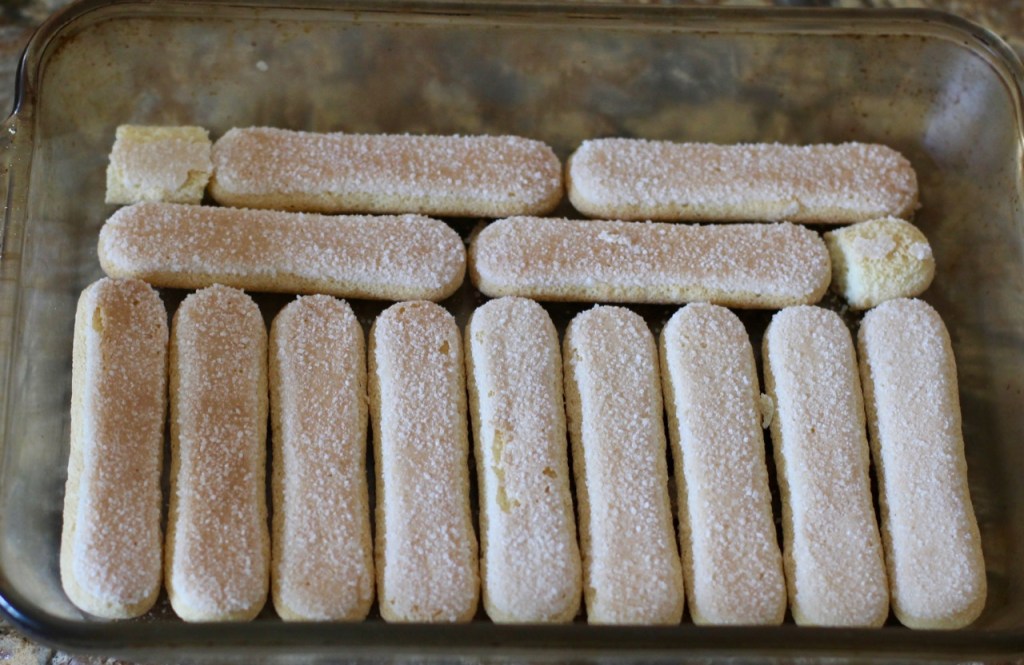
You will need Italian lady fingers. I believe it is a must and you can buy it fairly easily. I got mine at Whole Foods but you can even get it on Amazon or make it yourself.
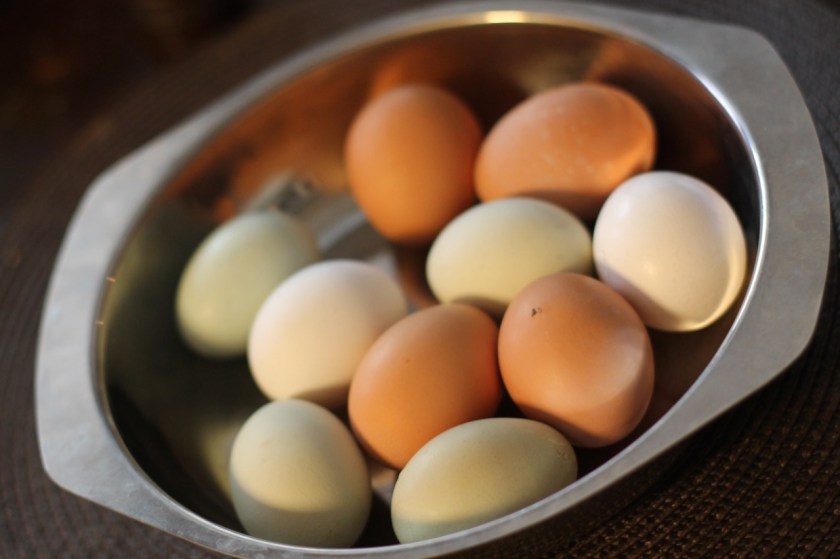
Traditionally, raw eggs are used to make tiramisu. I use fresh, local eggs but you can use heavy whipping cream as a substitute so you do not need to worry about raw egg issue. Of course, the cream will make it heavier and richer. In Europe, eggs are not a problem but in the US, eggs are processed differently and might not be fresh.
If you decide to use eggs, here is the egg test. When you immerse your egg in a pot of cold water, it should lie flat on the bottom. If it goes to the top or even one side starts moving up, do not use the egg. You can only use eggs that are fresh here. I will have instructions for both versions, the raw egg version and the alternative version using cream and cooked egg yolk.
What kitchen equipment do you need?
Medium sized dish for whipping the whites or the cream
larger, medium sized dish for the egg yolk/mascarpone
2 Qt sized deep dish for the tiramisu
Double boiler if cooking the egg yolk. If you don’t have a double boiler, you can use a metal bowl that fits on the top of the bottom pot securely but does not touch the bottom of the pot.
whisk
plastic scraper
sieve
Optional but nice if you already have them:
coffee maker
handheld mixer or food processor
Plastic wrap for refrigeration
Eggs. Eggs are easier to separate when cold but once they’re separated they need to be at room temperature. Separating the egg white from the yolk can be a bit tricky if you are new to baking. When cracking the egg, tap the egg on a flat surface. Also, I like to put the egg white individually into a separate smaller bowl first to make sure the egg is not addled and no yolk is mixed in. Then you can pour it into a bigger dish that is suitable for whipping the whites and collect the rest of the eggs whites. Of course, the egg yolk can go into a medium sized bowl that will be used to mix egg yolk and mascarpone.
Another key ingredient is mascarpone. It should be cold but make sure you can mix it with the rest of the ingredients. Yes it is expensive! … but it is the main ingredient and is worth it! So what is mascarpone anyway? It is like cream cheese but is creamier and has a higher fat content as it is obtained from cream and not from milk; cream cheese has 35% while mascarpone has 70% fat.
The recipe uses alcohol. I used dark rum. In my opinion, it suits this rich dessert better but the light rum is fine as well. Amaretto works well too. If you don’t want to use alcohol, simply use vanilla or almond extract instead.
Coffee gives tiramisu the distinctive, interesting flavor, so yes you will need a good strong Italian espresso. The lady fingers are dipped in the espresso so make sure you make a good strong brew. 1 1/2 cup of espresso should be enough for dipping. (If you have left overs, you can drink it or pour it on your plants). For 1 1/2 cups of water, I used 1/3 cup of coffee beans that is 2 1/2 Tbsp ground coffee. If you don’t have a coffee grinder, purchase the coffee already ground. If you have an espresso machine, great! If you don’t, no worries! We have a simple Italian Moka pot (Bialetti). Also, another tip is you can get your espresso coffee at Star bucks. My daughter works at Star Bucks and she told us one time a customer got her espresso for tiramisu.
You can use different size dishes to assemble the tiramisu. If you want to put it all in one big dish, you can use a deeper dish that is 2 Qt in size (I used a rectangular dish that is 11.5 x 8 x 2 inches). But you can use anything even circular dishes. Sometimes I use ice cream serving dishes and make tiramisu individually. Just make sure that lady fingers are tightly laid down.
This dish is definitely a make ahead dessert. It needs to be refrigerated for at least 24 hours … but honestly, I think it tastes the best after 2 days … although that might be too long to wait … Otherwise, it should be consumed within a week.
RECIPE
Please read the above text before making the recipe.
INGREDIENTS
1.5 cups of strong espresso at room temperature (1/3 cup of coffee beans or 2 1/2 Tbsp ground coffee)
28 lady fingers, maybe need more
3 Tbsp of rum/amoretto/vanilla extract
6 eggs (separated)
16 oz cold mascarpone
pinch of salt
1/2 cup sugar
coco powder
shaved chocolate for decoration, optional
2 cups cold heavy whipping cream (if not using egg whites)
METHODS
Directions for the raw eggs version (If you can’t use raw eggs please use directions below).
Take the eggs out of the refrigerator. Separate the yolk from the whites while they are cold. Once you separate the eggs, just leave them on the counter. They need to be at room temperature when you start working with them.
Make the espresso. Pour it into a shallow dish with a flat bottom. Coffee needs to be at room temperature.
Immerse the lady fingers in the coffee quickly one at a time for one second. Lay the dipped lady finger in a dish nice and snug. You do this quickly so the lady fingers don’t get soggy.
Making the tiramisu sauce.
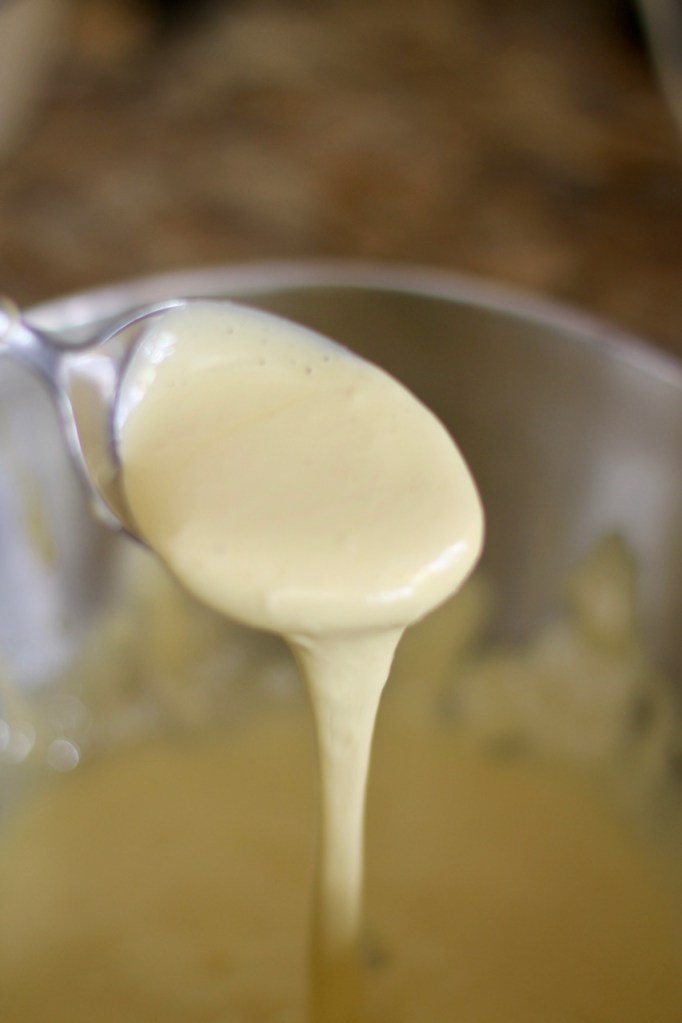
In a double boiler, add 1/2 cup of sugar to the yolk with a pinch of salt and cook for 6-10 minute while stirring or until you get a nice creamy consistency. Keep checking, do not over-beat. You want to get a nice creamy, pudding like consistency. Here we are adding air to the yolks to increase volume. Take off heat and let cool to room temperature.
Add the 3 Tbsp of rum and mascarpone to the egg yolk. Beat until just combined and smooth.
Whip up the egg whites until the whites are solid for about 2-3 minutes. When you turn the bowl upside down, it should not fall out of the bowl. Do not over beat. Keep checking.
Add the egg whites to the egg/mascarpone mixture. Don’t mix but gently fold it in. You just need to incorporate it into the yolk mixture keeping its fluffiness.
Pour half of this mixture on the lady fingers that are already in the dish.
Put another layer of the coffee dipped lady fingers on top of this mixture.
Pour the other half of the tiramisu mixture on the lady fingers.
Gently sprinkle some coco powder on the top through a sieve.
Cover the dish with a plastic wrap and refrigerate for at least 6 hours or 2 full days.
Serve with shaved chocolate, or coco (optional).
Direction for the cream and cooked egg yolks version
Take the eggs out of the refrigerator. They need to be at room temperature.
Mascarpone and cream need to be cold. Keep them in the fridge until you are ready to use them.
Make the coffee. Pour it into a shallow dish with a flat bottom along with 3 Tbsp of rum. Coffee needs to be at room temperature.
Dip the lady fingers in the coffee quickly one at a time for a few seconds. Lay the dipped lady finger in a dish nice and snug.
Making the tiramisu sauce. Separate the eggs.
Prepare the double boiler by bringing some water to a simmer in the bottom pot.
Add 1/2 cup of sugar to the yolk with a pinch of salt in a pot or metal bowl. Ensure the pot fits the bottom pot. Mix with a whisker over low heat for 8-10 minutes. Continue until you get a nice creamy custard consistency. Keep stirring continuously. Here we are adding air to the yolks to increase volume.
Add the 3 Tbsp of rum and the mascarpone to the egg yolks. Beat until just combined and smooth.
Whip the chilled cream for about 2-3 minutes or until it is solid. When you turn the bowl upside down, it should not fall out of the bowl. You can use a food processor, electric mixer or you can do it by hand. Do not over-beat.
Add the cream to the egg/mascarpone mixture. Don’t mix but gently fold it in with a plastic spatula.
Pour half of this mixture on the lady fingers that are already in the dish.
Put another layer of the coffee dipped lady fingers on top of this mixture.
Pour the other half of the tiramisu mixture on the lady fingers.
Gently sprinkle some coco powder through a sieve on the top.
Cover the dish with a plastic wrap and refrigerate for at least 6 hours or 2 days.
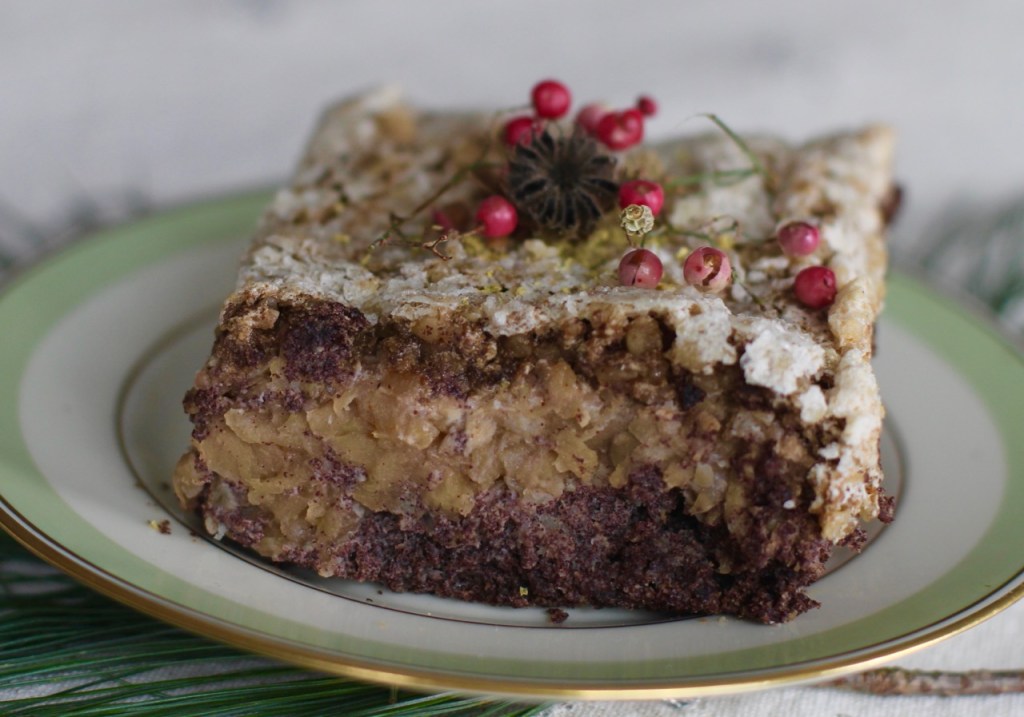
Flódni is a unique traditional Jewish Hungarian dessert. The original recipe uses apples, poppy seeds, walnuts, plum jam and all these ingredients are baked into a flour crust. This recipe uses the three main ingredients: apples, poppy seeds and walnuts plus the plums but has no crust. It is a gluten free recipe, in fact it is a very clever gluten free twist to the original recipe as the carbohydrates come from the poppy seeds. Its sour, bitter and sweet flavors come together to give a distinct culinary experience.
Traditionally, it is made at the end of the year for Christmas and Hanukkah but can be eaten any time during the year. It is filled with symbolic meanings for the end of the year. Each layer is rich and decadent and according to folk traditions can supposedly bring prosperity, health and protection for the entire family.
I was inspired by the recipe that came from a website – credited at the end. I have been making this delicious alternative at Christmas time for years. I made some changes to the original recipe. I moved some sugar from the nut filling into the poppy seed filling. I also added plums to the poppy seed mixture and some alcohol to the apples. Oh and honestly adding a little ginger to the walnuts did wonders.
The poppy seeds need to be soaked for 1 hour. I think if you follow my recipe, the poppy seeds should have enough time to soak. While the poppy seeds are soaking, make the apple mixture. By the time you place the dish in the oven, the poppy seeds should have had enough time to soak if not feel free to wait longer before putting the dish in the oven.
RECIPE
INGREDIENTs
Ingredients for the poppy seed layer
200 g (about 1 cup) poppy seeds
1 Tbsp melted butter (coconut oil for dairy free version)
3 eggs, divided
1/2 cup sugar
handful of raisins
prunes, chopped (I used 3 prunes but feel free to experiment)
1 orange or 1/3 cup orange juice + 1 Tbsp dried orange peel
Ingredients for the apple layer
1 kg (about 7 larger) tasty cooking apples
1 Tbsp fresh chopped ginger or 1.5 tsp dried ginger ( cut and sifted)
4 Tbsp sugar or honey
1 tsp ground apple pie spice or cinnamon
pinch of salt
2 Tbsp rum (optional)
Ingredients for the top egg-white layer
150 grams (5 oz) ground walnuts
4 egg whites
1/4 – 1/2 cup sugar
1 tsp fresh ginger or 1/2 tsp dried cut and sifted ginger
salt
METHODS
Preheat oven to 300 F (150 C). Lightly butter a baking pan (8 x 11.5 x 2″).
Preparing the poppy seeds
Grind the poppy seeds. (Coffee grinder works well).
In a smaller bowl, cream the melted butter, sugar and 3 egg yolks. Add the ground poppy seeds, prunes, raisins, orange juice with the peel and pinch of salt. Mix.
Beat the 3 egg whites until stiff. Gently fold the beaten egg whites into the poppy seed mixture from earlier.
Spread this poppy seed mixture onto a lightly buttered baking pan. Let is rest for 1 hour.
Preparing the apples
Wash, peel and core the apples. Grade them through the large holes of a cheese grader. Put the grated apples in a medium sized pot and cook it in a large pot on high medium heat until the liquid evaporates. When done add rum, ginger, ground apple pie spice, pinch of salt and 4 Tbsp of sugar/honey.
Spread the apple mixture on top of the poppy seed mixture. Place the dish in the preheated oven. Bake for 40 minutes.
Adding the nut mixture
Walnut/egg white topping: Have the ground walnuts ready. By the end of the 40 minutes, beat the 4 egg whites until stiff. Gently fold in the walnuts and the sugar. Spread this mixture on top of the apples and put the dish back into the oven. Decrease the temperature to 250 F (120 C). Bake for another 40 minutes.
Let it cool and settle. Serve at room temperature.
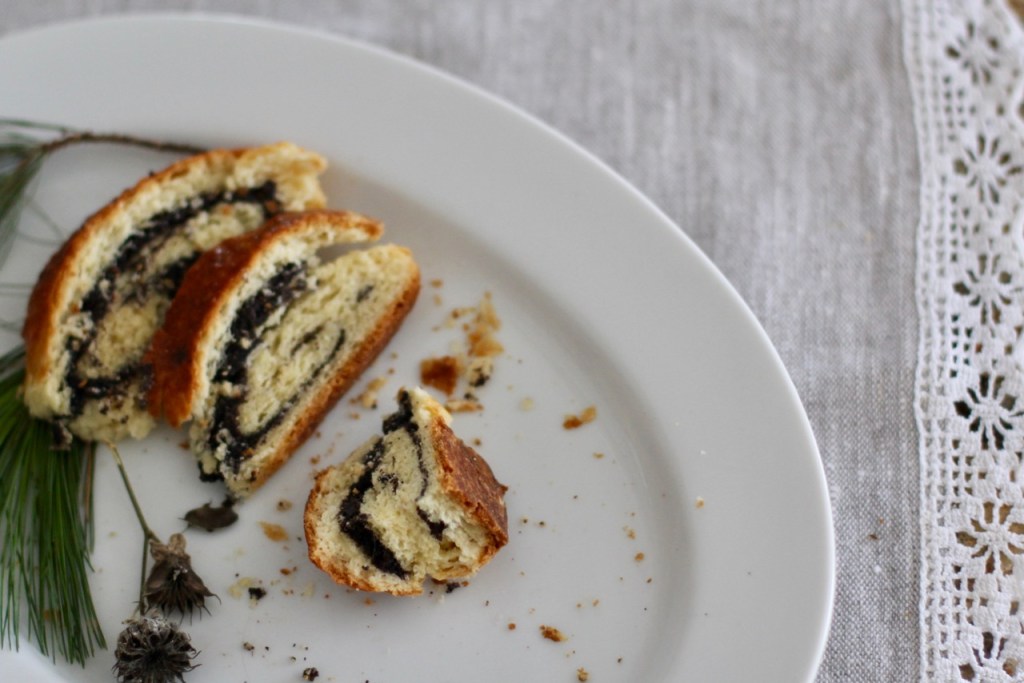
I can’t imagine Christmas without beigli. Beigli is a popular savory pastry in Hungary. It is made of sweet dough and can be filled with a poppy seed or walnut filling. I used poppy seeds in this recipe. The floral, earth flavored poppy seed is a popular winter food. Particularly, poppy seeds symbolize health, fertility and prosperity that are important themes for the Christmas and Winter Solstice celebration.
When I got married there were two desserts that I was able to make. One for the summer and the other for the winter. Of course, beigli was for the winter. Not sure how this worked out but I’m guessing it is because there is no Christmas without beigli … and my husband picked up the tradition very quickly. I have to let you know that it takes 4 hours to make this dessert.
Some facts
Beigli has been around for a while but no one knows the exact story behind it. One possibility is that it had originated in the old Hungarian city of Pozsony, today known as Bratislava that is now in Slovakia. Beigli started appearing on the Christmas tables only about 200 years ago. Hungary was part of the Austro-Hungarian Empire at that time so it makes sense that so many other Central European countries make it for Christmas as well.
Poppy seed is native to Western Asia and has been around for thousands of years… perhaps Hungarians started using it when they lived near Turkey.
It is considered a significant source of food from carbohydrates and is full of vitamins and minerals. It is soothing and calming, boosts the immune system and supports heart health.
Ancient Chinese Medicine considers it to be sour and neutral in energy. The seeds have a kidney shape and is believed that it is beneficial for the kidneys.
Ayurveda, the ancient healing system of India believes it is good for digestion, nourishes body fluids and the nervous system. Maybe a nice remedy to keep you calm during the holidays! Oh and it is also aphrodisiac!
You will need to get a lot of poppy seeds.
The little bottles that they sell at the supermarkets will not be enough as this recipe requires 10 oz. I purchased mine at Penzey’s but you should be able to find it in many smaller grocery stores.
When I got poppy seeds recently at Penzeys’, the clerk checking me out reminded me that poppy seeds needed to be stored in the freezer if not used up immediately. Poppy seeds go rancid easily because of their high fat content. I told her that this will not be a problem because we eat it fast. Her mouth just dropped open … I bought 1 lb. Just warning you, you will need to get a lot of poppy seeds.
The seeds will need to be ground as well. I have a Vitamix that grinds poppy seeds well. If you don’t have one, no worries! You can also use an electric coffee grinder. Supermarkets do sell canned ground poppy seed mixed with the sweeteners, flavorings, preservatives etc. They work pretty well, I have used it before but you will not get the same results.
How can the dough crack?
Hungarians are always worrying about cracks in the crust. If you follow my recipe below, you should be fine. However, the tastiest beigli I have eaten was slightly cracked, like the one on the picture. I chatted with my kids and let the dough rise too long … but everybody commented it was the best I have ever made. They wanted to know what I did differently … My mom will probably comment on the appearance but oh well. So there are some rules on how not to get cracks. For the records here they go …
Crust can crack if
the dough was left to rise too long
too much filling or sugar was used
work area was too warm
dough was not pricked on the sides
RECIPE
Family recipe
INGREDIENTS
Ingredientsfor the dough
500 g (4 cups) organic flour (I used Bob’s Red mill)
25 dkg (18 Tbsp) butter
2 tsp dried yeast
3 large eggs, divided
3-5 Tbsp sugar, regular granulated or powdered
1 dl (1/2 cup) milk
1/8 tsp or pinch of salt
pinch of nutmeg (optional)
Ingredients for the filling
30 dkg (2 1/4 cups) poppy seed
3 dl (1 1/8 cup) milk
200 dkg (1 cup) sugar
peel of 1 orange or lemon or 2-5 Tbsp of dried peel (I used 5 Tbsp)
1 Tbsp of flour
1/2 cup raisins or chunks of plums (you can leave it out if disliked)
1 tsp vanilla extract
pinch of salt
METHODS
Have all ingredients at room temperature.
Preparing the dough: Get the yeast started in warm milk (104 – 108 F). This is a temperature that should feel neither hot or cold on your wrist or when you stick your index finger in the solution. Dissolve the yeast in 1/2 cup of warm milk with 1 tsp of sugar, stir and cover for 5 minutes or until yeast comes up to the top. Meanwhile start sifting pinch of salt and 3 Tbsp sugar into the flour. Then cut butter into the flour mixture until it resembles course crumbs. Add the 2 eggs and the yeast mixture and quickly mix until a ball is formed. Let it rise for 2 hours, cover with a damp cloth at room temperature (65 – 75 F).
Preparing the filling. Start preparing the filling right away because it has to cool. I would not make it ahead of time because it can dry out. If you start it right after you finished the dough, it should be fine. Grind the poppy seeds (see above). Boil 1 1/8 cups of milk, add the ground poppy seeds, orange peel, sugar, flour and raisins. Mix and set it aside to let it cool.
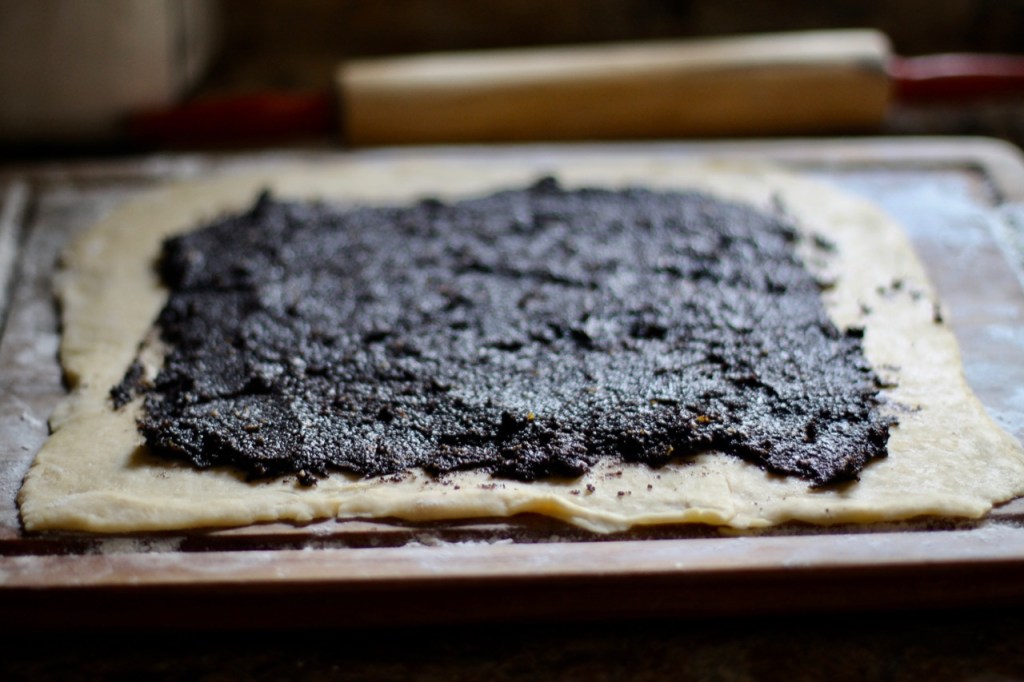
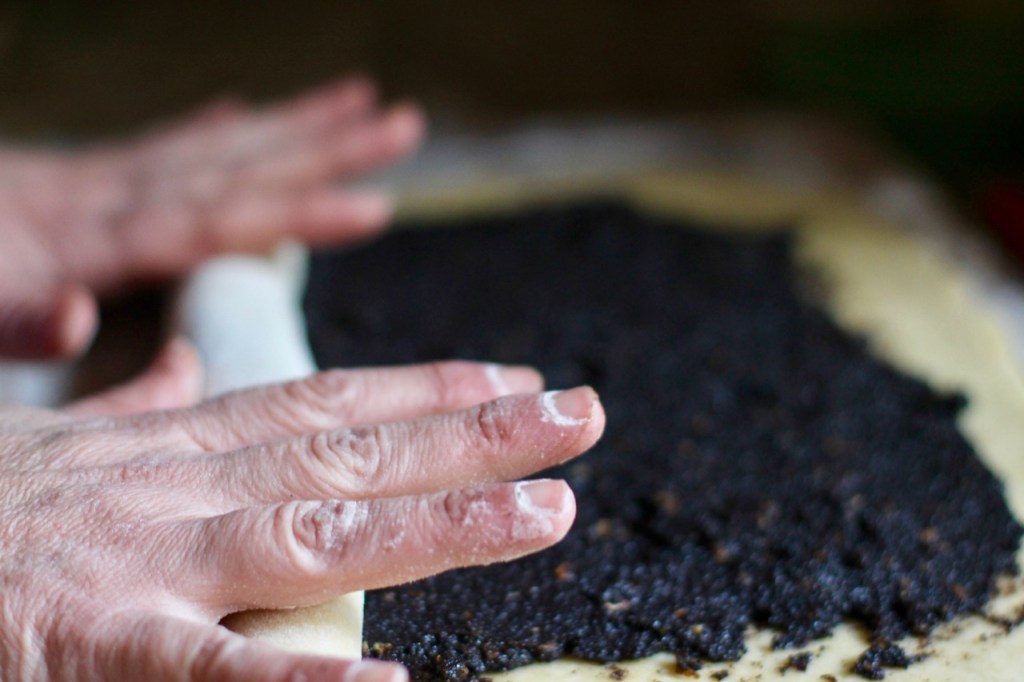
Assembling the rolls. Turn the dough onto a lightly floured work surface and kneed shortly until they are smooth. Divide it into 2 bigger or 4 smaller pieces. For me it is too hard to get 4 equal sized balls so I either do 2 or 3 balls. Roll them out into a rectangular shape and spread half, third or quarter of the filling, respectively in about 0.5 cm thickness on the dough leaving about 1 inch from the edges. Please see picture for clarity. Start rolling the longer side. Pinch the two sides so the filling can’t come out on the sides. Repeat with the others. Put the rolls on a lightly buttered cookie sheet so the rolled up edge is on the bottom of the cookie sheet. Do an egg wash with 1 egg yolk (save the white part for later)and let the rolls rise in a coolish place (60 F) for 1 hour. Note the kitchen might be too hot for this step. Then spread 1 egg white on the rolls and cool in the fridge for a half hour. Preheat oven to 375 F. Before I put the rolls into the oven, I do another layer of egg white wash and prick the side on the sides 6-7 times to prevent cracking.
Baking the rolls. Bake in the preheated oven for 25 – 30 minutes. Take out when done or when the surface has a beautiful golden finish. Try to avoid opening the stove door while baking. Wait a good 20 – 30 minutes before cutting the slices.
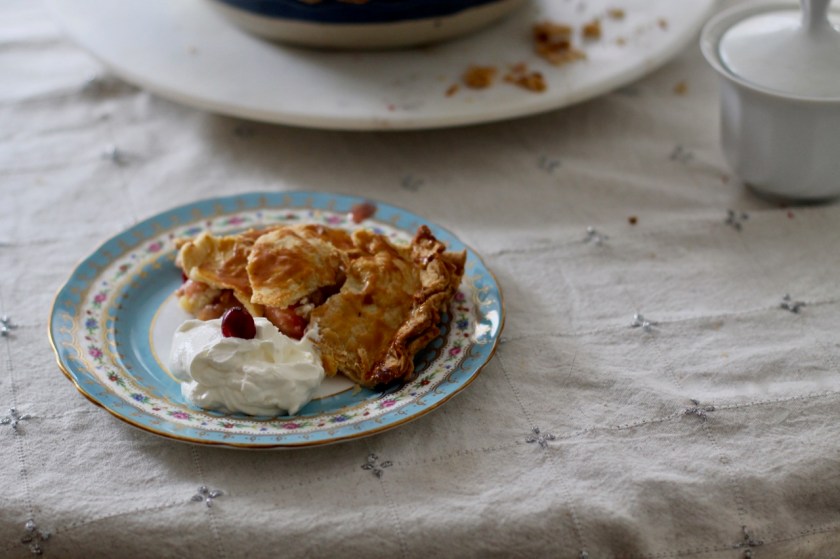
Apple pie is a special American dessert. I have always wanted to make it ever since I took the first bite of my mother-in-laws home-made pie like 25 years ago but I was somehow afraid of making it. I even gifted a pie form for my husband’s birthday 15 years ago to make sure that I make it. Ok so a few years ago I ventured into making one from a recipe I found online. I thought all apple pie recipes were the same … hmmm not true it didn’t turn out good, in fact it was terrible. Then, I found Martha Stewart’s pie recipe … and it was a huge success. I felt such a great accomplishment after I made it. Here I have the full proof Martha’s apple pie recipe so you don’t have to hunt for a good one.
The apple pie is an important part of the Thanksgiving dinner for many people. The delicious savory apple filling is wrapped in a flaky buttery crust and is served with whipped cream. I used Martha Stewart’s basic apple pie recipe and added cranberries. I think the tart and sour cranberries elevate the pie to another level. If you prefer to leave out the cranberries, add an extra apple to the filling so instead of using 6 apples and 1 cup of cranberries, use 7 apples.
According to Martha Steart, there are three basic rules for making a fabulous apple pie: Use the best ingredients, keep the dough cold and when you handle the dough less is more. Have fun making the pie, it is so worth it!
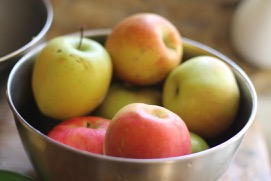
As Martha Stewart says you should get the best ingredients for your pie in other words your pie will be only as tasty as the ingredients are. The most important part of the pie at least as far as taste goes is the apples. When I go to the farmers’ market to get my baking apples, they always give me a mixture of apples. In fact, the lady at my favorite stand always gives 7-8 different apples. So how do you select the right apples?
Basically you want baking apples that are firm and keep their shapes while baking. The best apple for this is the Granny smith. If you like your pie more tart you can just use this variety. OK I know some people want more of a sweet apple pie. There are many other apple varieties that would make the pie sweeter like Cortland, Braeburn, Regent, Harlson. And I always like to add one very sweet one like Fuji, Honey crisp. Once you decide on the type, make sure they are also tasty. It is hard to describe but they should have a zesty flavor. When you try it you know what I mean! Sorry to say but supermarket apples often don’t have this. I personally like to get local apples for this purpose.
The other important part of a good pie is the crust. Of course keeping the surface cold is extremely important … but so is the quality of the flour you use. I would stay away from low quality flours that need to be enriched and have other additives in them. I buy only organic flour that fits this criteria. I used Bob’s Red Mill flour in this recipe but King Arthur’s flour is good too.
The third most important ingredient would be the shortening. The shortening is also crucial for a successful pie crust. Often people use butter flavored sysco shortening because it gives nice results. Well it is a good choice but I am not a fan because it is not that good for health. It is better to get a nice high quality butter or better yet lard if you have access to it. My mother-in-law always made her pies with lard and she honestly made the best pies.
Pie is a cold weather dessert. It is made starting September when the weather gets cold in the Northern hemisphere because it needs to be cold when handling the dough. The work area needs to be cold when you are working the dough to get the scrumptious flaky buttery crust. The pros use special board to work on that keeps the dough cold. If you don’t have these special tools, no worries. I just open the kitchen window and let the kitchen cool off a bit. It seems to be working fine.
Try to become familiar with the recipe. This is more of a challenging recipe as there are are many steps and specific instructions. I think the video (see below) is very helpful to watch for technique although the video is sometimes a little too cautious. For instance, you can handle the dough by hand. The recipe of the video and the one I’m presenting here are not exactly the same. Make sure you follow the recipe here to stay constant. The recipe is from her cook book, Martha Stewart Cooking School.
Ingredients
Crust
2 1/2 cups of unbleached all purpose flour (leveled with a knife)
1 tsp sugar
1 tsp salt
2 sticks of cold unsalted butter in 1/2 inch pieces
5-7 Tbsp of icy cold water
For the filling
6 baking bigger sized apples at room temperature (Granny smith, Cortland, Empire ) (about 2-2.5 pounds) (Martha uses 3 pounds of apples)
1 cup fresh cranberries, optional. Replace with another Granny smith if not used.
juice of 1 lemon or orange (Martha uses lemon juice)
1 Tbsp orange peel (optional)
1 tsp cinnamon or 1 tsp apple pie spice
If you use cranberries, use 3/4-1 cup of sugar. If not using cranberries, use 1/2-3/4 cup sugar. + Little more for the top.
2 Tbsp corn starch or 1/4 cup flour
1/2 tsp dried ginger (ground) or omit is not using cranberries
Put 1/2 cup of water in the freezer or you can use ice cubes in water. This will be used for the dough in the next step.
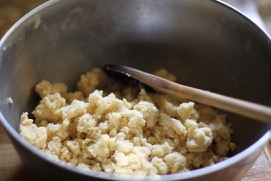
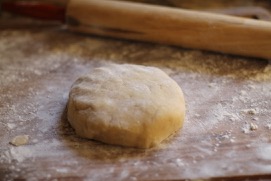
Making the dough. Mix flour with the sugar and the salt. Cut the cold butter into the flour with your finger tips, pastry cutter, knives or a food processor. If you are using a food processor, pulse for 10 seconds at a time, paying special attention not to over-process the dough. Stop when coarse crumbs form. The mixture should have pieces ranging from coarse crumbs to the size of small peas. Take water out of the freezer. Add 5 Tbsp of ice water slowly, 1 Tbsp at a time and mix until dough just holds together when pinched. Add more water only if needed. The mixture should retain a crumbly texture at his point; it should not be sticky. Again do not over-pulse the dough. If you are not using a food processor, you do not have to worry about over-processing that much, you’ll be most likely ready to stop. Do pay a close attention though what the dough should be like.
the crumbly dough
Shaping and chilling the dough. After making the dough, now it will be divided into two parts. Make sure the dough has all the loose pieces incorporated. Wrap each piece tightly with a plastic wrap and refrigerate at least for 1 hour or overnight. You can make this the day before and keep it in the fridge. This will help the crust to be flaky.
the dough wrapped in plastic
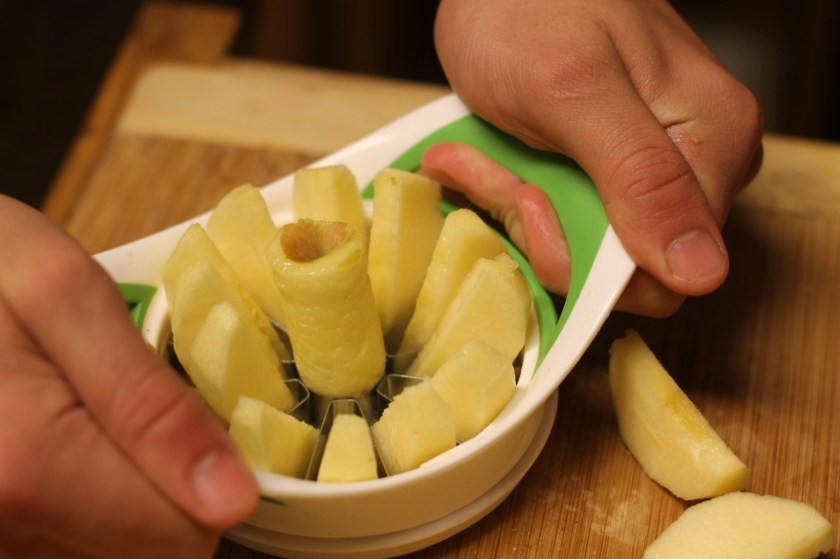
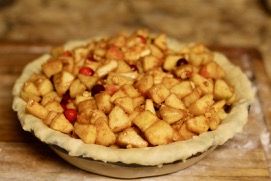
Preparing the filling. Wash, peel, core, and cut apples into 1/2 inch-thick slices. I like to use a mixture of baking apples for a more interesting flavor. I used 4 granny smith, 2 Cortland and 1 sweeter honey crisp apple. Add the orange/lemon juice and coat the apples well. Don’t add anything else to the apples until ready to assemble the pie. When ready add 1 cup of cranberries to get a more interesting flavor or add another apple instead. Then add everything else and mix. I happen to have an apple corer gadget. I have to say it was helpful for coring the apples but if you don’t have one, you don’t need to rush out to get one.
Assembling the pie. Your working area is supposed to be cold for this part. I just open the kitchen window while I’m doing this step and it should be cold enough.
Take the dough out of the fridge. On a lightly floured surface, roll out one disk of dough until 1/8 inch thick. I check the diameter by putting the bowl above the dough. I just eye it to see if the dough is large enough in diameter to cover the bowl. The finished dough should be about 13 inch big in diameter.
The chilled dough
Roll the dough around the rolling pin and unroll it over a 9 inch glass plate, pressing gently to fit into pan. Fill it with the apple mixture from above. Roll the other disk of dough in the same manner.
rolled out dough
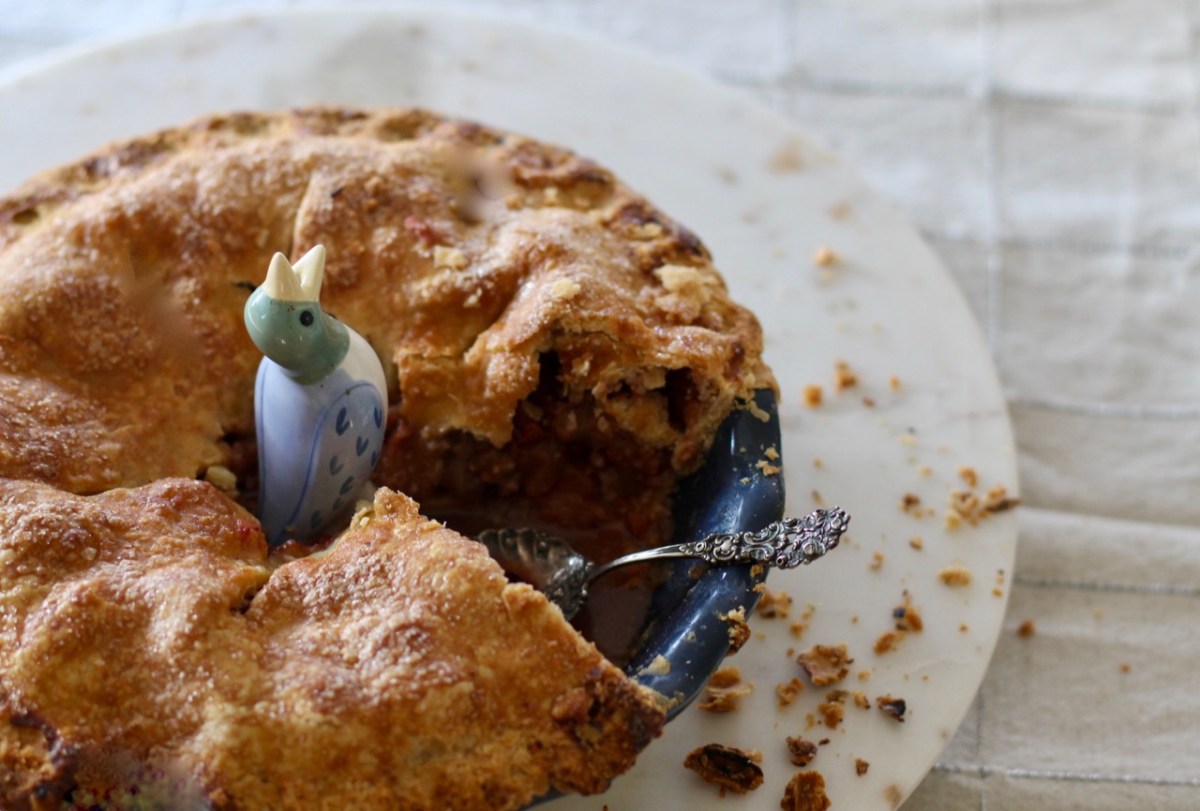
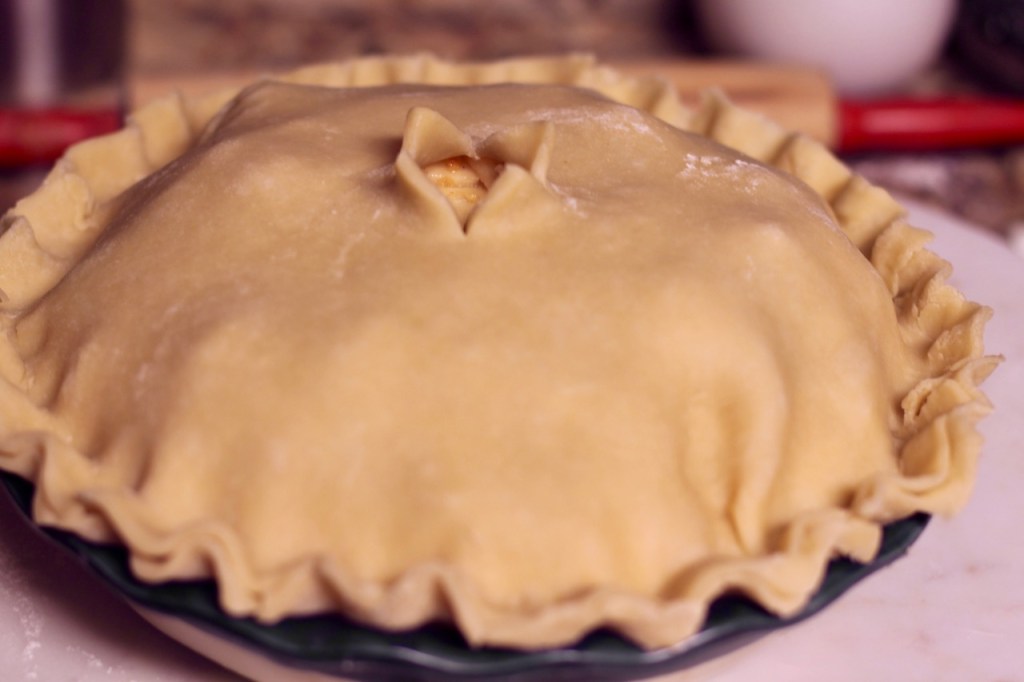
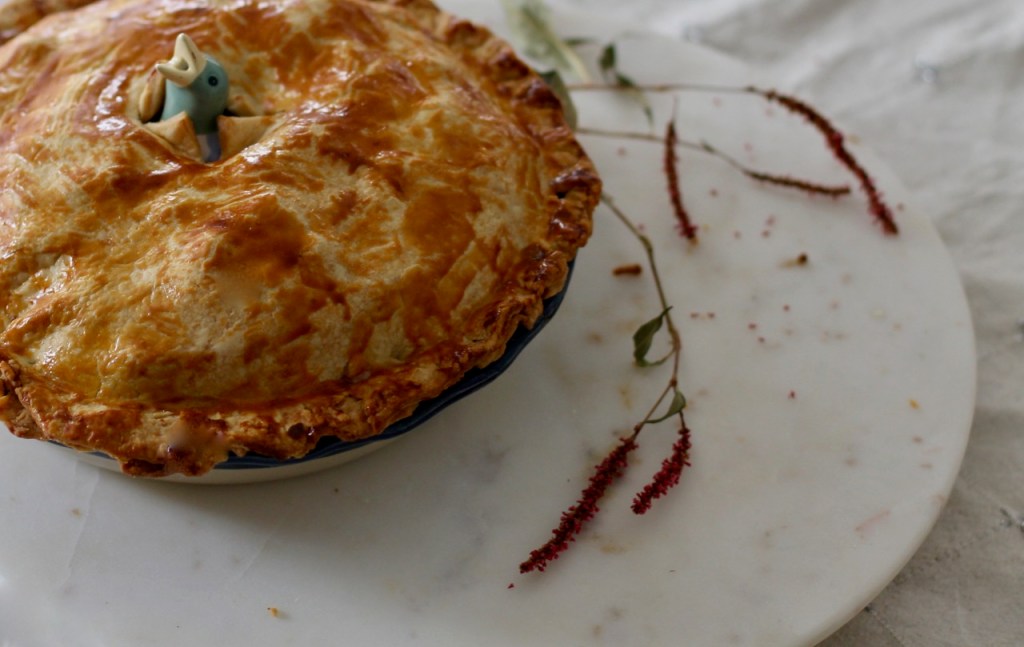
Drape over the bottom part. Use kitchen shears to trim overhang of both crusts to 1 inch. Press edges to seal. Fold overhang under and crimp edges: With thumb and index finger of your other hand, gently press dough against index finger of other hand. Continue around pie. Make several 3 inch slits in the top crust. This will allow the liquid to evaporate. I have a special clay bird that does this job. If you use the clay bird, you will not have to do this. If using the bird, cut 3 small slits in the middle of the pie, making an opening for the bird. Gently place the bird in and try to wiggle it around the apples. You can find these birds (see picture) at Williams Sonoma in the US -if anybody is interested.
Refrigerate the pie for 20 minutes. Preheat oven to 400 F.
Finishing the crust for baking. Whisk egg yolk and cream in a bowl; brush over the top of crust. Sprinkle the top with sugar.
Baking the pie. Place pie in preheated oven. Put a baking pan underneath to catch any liquid that escapes during the baking. Bake for 10 minutes. Reduce heat to 375 F. Continue baking until top and bottom crust are golden brown and juices are bubbling in the center for 70 to 85 minutes. Check on the pie after 1 hr and see if it is getting brown too quickly and needs to be covered with aluminum foil.
When ready, take the pie out and let it cool on a wire rack for at least 4 hours before serving. If you are not eating it all the same day, leave it on the counter loosely covered. Do not store in the refrigerator, the dough will get soggy.
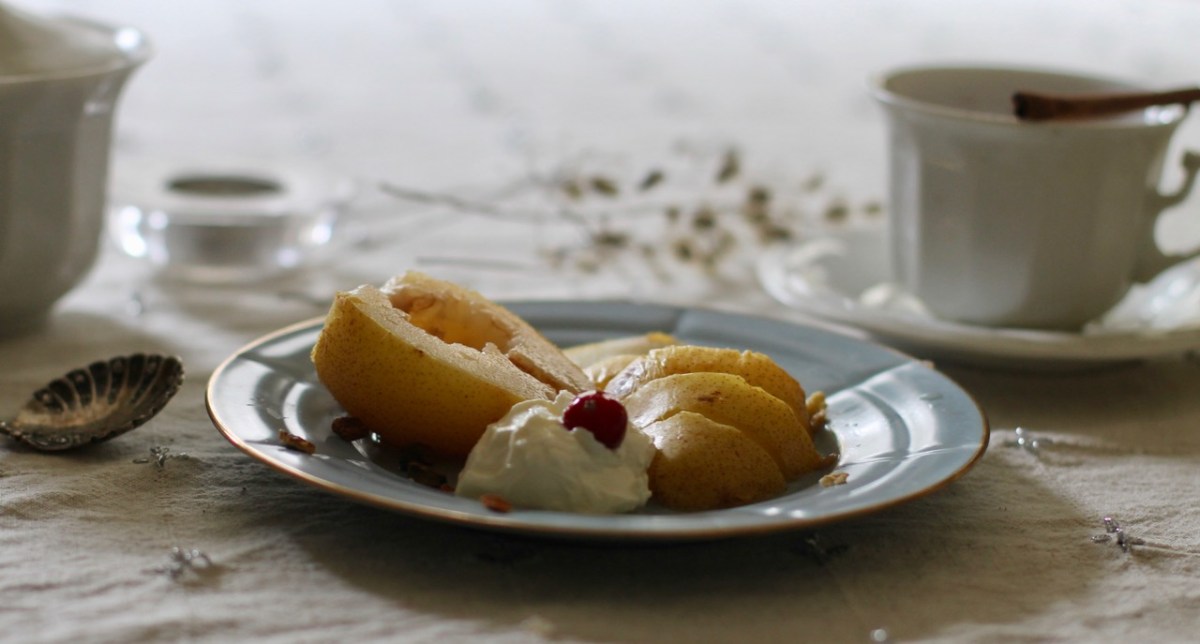
You get two for one with this recipe! There are the fabulous poached pears and also you get to enjoy its delicious liquid as a tea. They can be served for the holidays to delight your guests. You can also serve them any time when you need a little boost in the fall. As a practitioner of Chinese Medicine, I like creating individualized teas for people but it is also gratifying to come up with fun seasonal teas as well. This fall drink is no exception.
The sugar is caramelized, the warming spices are gently infused and the sweet pears are added at the end for poaching. The end products are the firm poached pears that can accompany any fall dish and this wonderful light drink that warms your body and soul. You can surprise your guests for Thanksgiving dinner with these delicious treats!
The sweet and juicy pears are also valuable for health. They are cooling and slightly acidic. They help the lungs by moving stagnation and keeping them moist during the dry season. They are high in fiber that is very much needed in the fall. Pears are also good source of antioxidants, minerals like copper, iron, potassium, manganese, magnesium and vitamins A, B, and C.
Recipe
INGREDIENTS
2 Qt of cold water
3-4 larger firm but ripe pears (Bosc, Bartlett). You can poach more pears in this liquid. You can leave the stems attached if they have stems.
1/8 -1/4 cup of sugar
1 Tbsp Mulling spice (please see below)
zest of lemon peel
3 slices of an orange (optional)
pinch of salt
maple syrup or caramel sauce, optional
Method
Place 2 Qt water along with the sugar in a medium size pot. Bring to a boil, this will caramelize the sugar.
Turn the heat down and simmer the spices for 10 minutes. I chose cinnamon, all spice, orange peel, ginger, cloves, cardamom. It is a good idea to set a timer, time is important here. Please see the recipe below.
Meanwhile wash the pears. You can peel them and cut the bottoms of the pears off or just leave them as they are.
Turn off heat completely and add the pears into the pot. Keep them in the steam for about 5 – 10 minutes. The pears will poach in the steam. You want your pears to be soft but not mushy.
Serve the poached pears with dinner or own its own as a dessert with maple syrup or caramel sauce. Keep the liquid for a delicious warming drink.
Mulling spice
1 tsp cinnamon chips
1 tsp allspice berries
3 pieces of cloves
1 Tbsp dried orange peel
7 cardamom seeds
1/2 tsp of dried ginger root (cut and sifted) or 1 tsp fresh ginger root
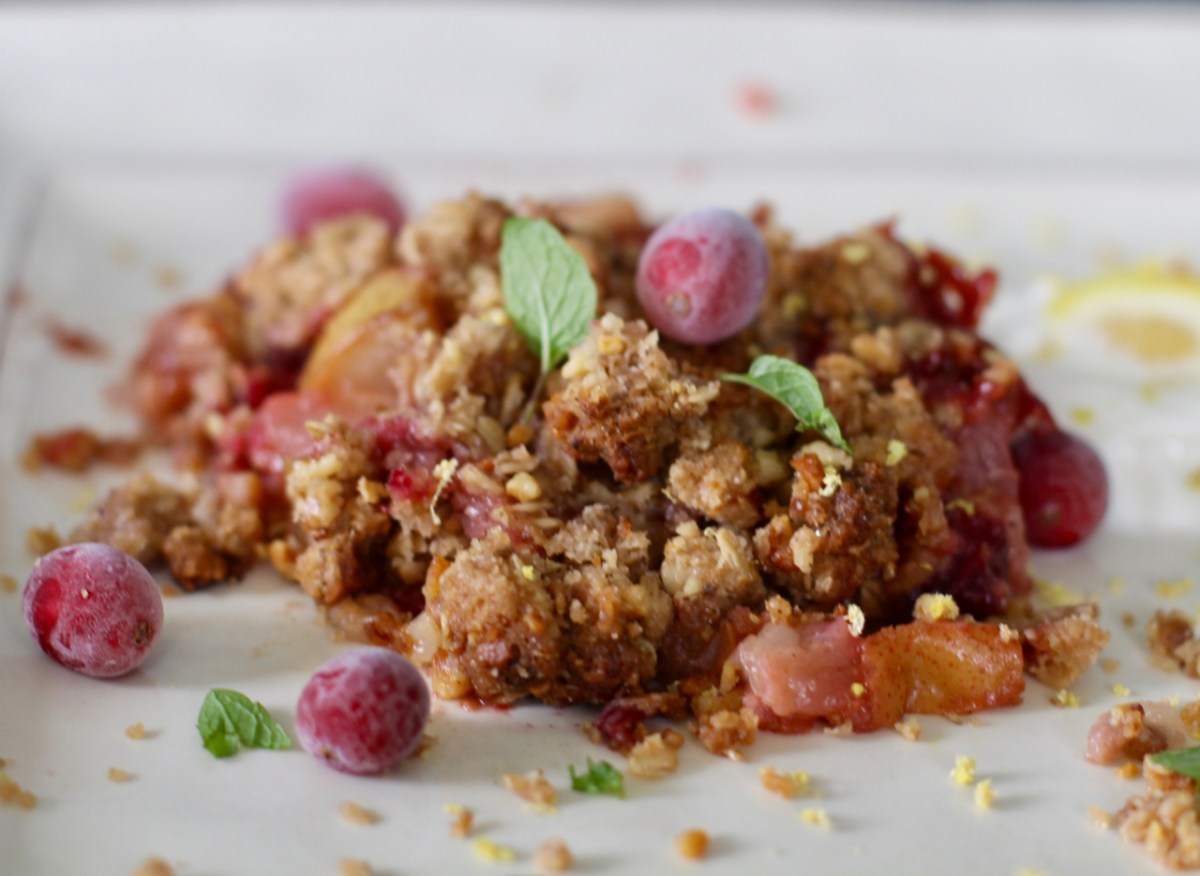
This is such an exciting time for cooking in the Midwest. Fall’s abundance in vegetables and fruits is such a blessing for any cook. All the gorgeous fall colors are just dazzling. I had a hard time deciding what to post, there is so much to choose from. I guess they call this time of year the harvest season for a reason. So I decided to make something fun. How does a cranberry pear crisp sound?
I really like how this recipe turned out. The sweet buttery pears work well with the sourness of the bitter cranberries and all this is topped with the crunchy oatmeal topping. You can serve it with a little heavy cream or ice cream!
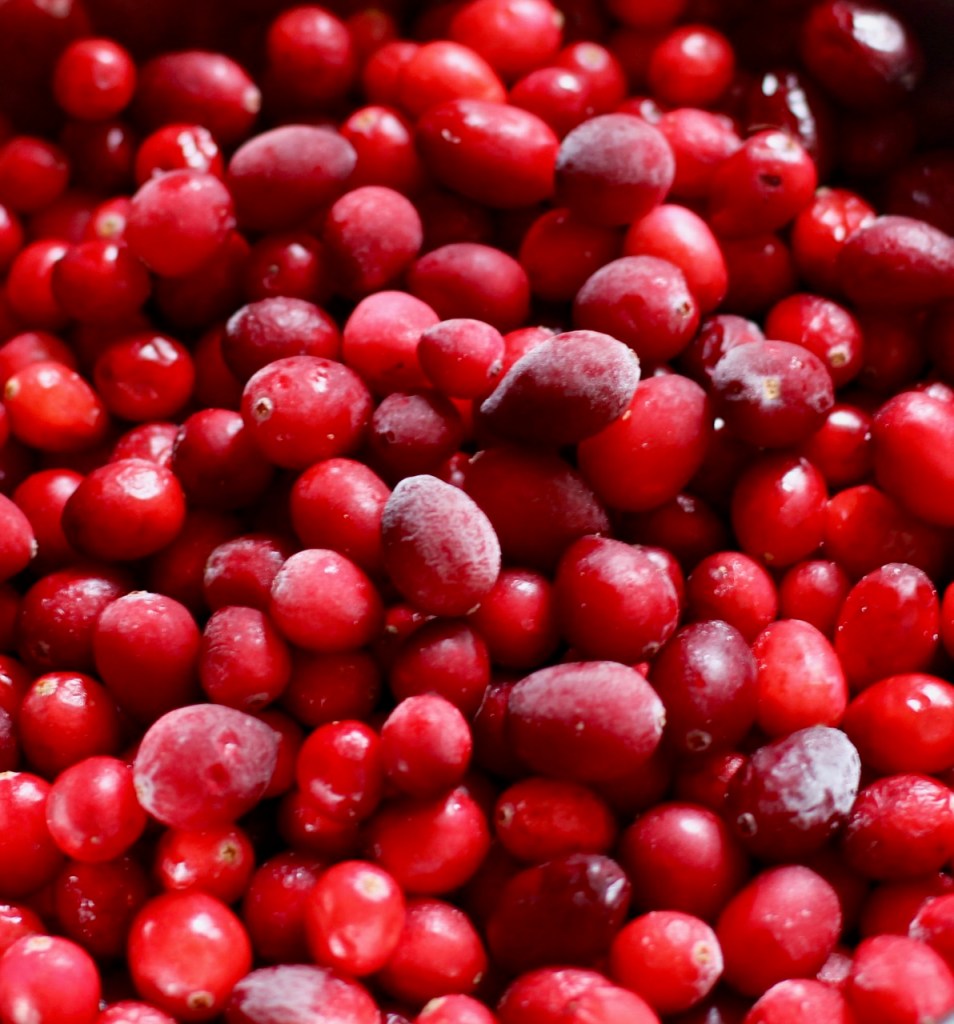
Cranberries are not just for the holidays! Most people associate cranberries with Thanksgiving or maybe Christmas because it is red like Santa’s coat. I have served cranberries after Thanksgiving and I was reminded that it was not Thanksgiving time. However, many creative chefs use cranberries for cooking and baking because they are so unique and healthy. These berries are more sour but are also bitter at the same time. It is usually hard to find fruits with bitter flavor. I personally like to add it to other sweet fruits to make the sweet dishes more exciting.
The refreshing tangy cranberries have been used as food and medicine for a long time. Cranberries are native to North America, the Pequot Indians of Cape Cod called them ibimi, bitter fruit. Native Indians used them for preserving meat. Later, the Natives shared them with the Pilgrims who started making sweet sauces. Cranberries are incredibly valuable for health as they are rich in vitamin C, fiber, flavanoids, phenols and many substances that give protection against tooth decay and infections.
One more interesting fact. Cranberries have an open space inside the middle that allows them to float on top of the water. This interesting adaptation allows them to get away from not being sweet and not having to rely on animals to spread their seeds to survive. In addition, the Native Americans believed the cranberries nourish and protect the kidneys and the bladder.
The sweet and juicy pears are also valuable for health. They are cooling and slightly acidic. They help the lungs by moving stagnation and keeping them moist during the dry season. They are high in fiber that is very much needed in the fall. Pears are also good source of antioxidants, minerals like copper, iron, potassium, manganese, magnesium and vitamins A, B, and C.
RECIPE
INGREDIENTS FOR THE TOPPING
1 cup of old fashioned rolled oats
1/2 cup of white flour
1 stick (8 tbsp) of butter, melted
2 tbsp-1/4 cup of brown sugar + 2 tbsp for the top
1/8 tsp salt
zest of 1 lemon (optional)
1 tsp apple pie spice or 1/2 tsp cinnamon + 1/4 tsp nutmeg + 1/4 cloves+ little mace or 1 tsp cinnamon
1/2 cup of chopped pecans or walnuts + more for serving
heavy cream or ice cream for serving
INGREDIENTS FOR THE FRUITS
5-6 ripe but firm pears (I used Bartlett)
2 cups of fresh organic cranberries
1/4 – 1/2 cup of brown sugar (I think 1/4 cup was plenty but if you have a sweet tooth or the pears are not very sweet, use 1/2 cup of sugar)
2 Tbsp flour or 1 Tbsp corn starch
1 lemon’s juice (use the lemon from earlier)
1/8 tsp salt
2 Tbsp orange peel (optional)
1 tsp apple pie spice or 1/2 tsp cinnamon + 1/4 tsp nutmeg + 1/4 cloves+ little mace or 1 tsp cinnamon
1 Tbsp graded fresh ginger or 1.5 tsp dried ginger (cut and sifted)
2 Tbsp whiskey (optional)
METHOD
Preheat oven to 375 F. Have baking rack in the lower third of the oven.
Take a stick of butter out of the refrigerator.
Wash cranberries. Discard any unripe ones. In a smaller bowl add the cranberries, 1/4- 1/2 cup of sugar, lemon juice, orange peel. Let this mixture sit until cranberries give off some juice. You can add whiskey if you wish. Set aside.
Make topping. Cream the melted butter with the sugar. Add oats, flour, cinnamon, 1/8 tsp nutmeg, salt, lemon zest. Mix well. Fold in the nuts by hand. Let it sit for an hour. Set aside.
Wash, core and cut up pears into small cubes. You can peel them if the skin is tough, otherwise if they are soft no need to peel them. Set aside.
Assemble the fruit base. In a bigger bowl, mix 1 tsp apple spice, salt, flour or cornstarch, orange peel, pears, ginger and cranberry mixture with its juice (prepared earlier) together. Put it into a 2 Qt size baking dish.
Put topping on the top. Sprinkle top with some sugar (optional). I also graded a little nutmeg on the top.
Bake for 30 minutes or until the top has a nice orange color.
Serve with heavy cream or ice cream. Add some extra nuts if you wish.