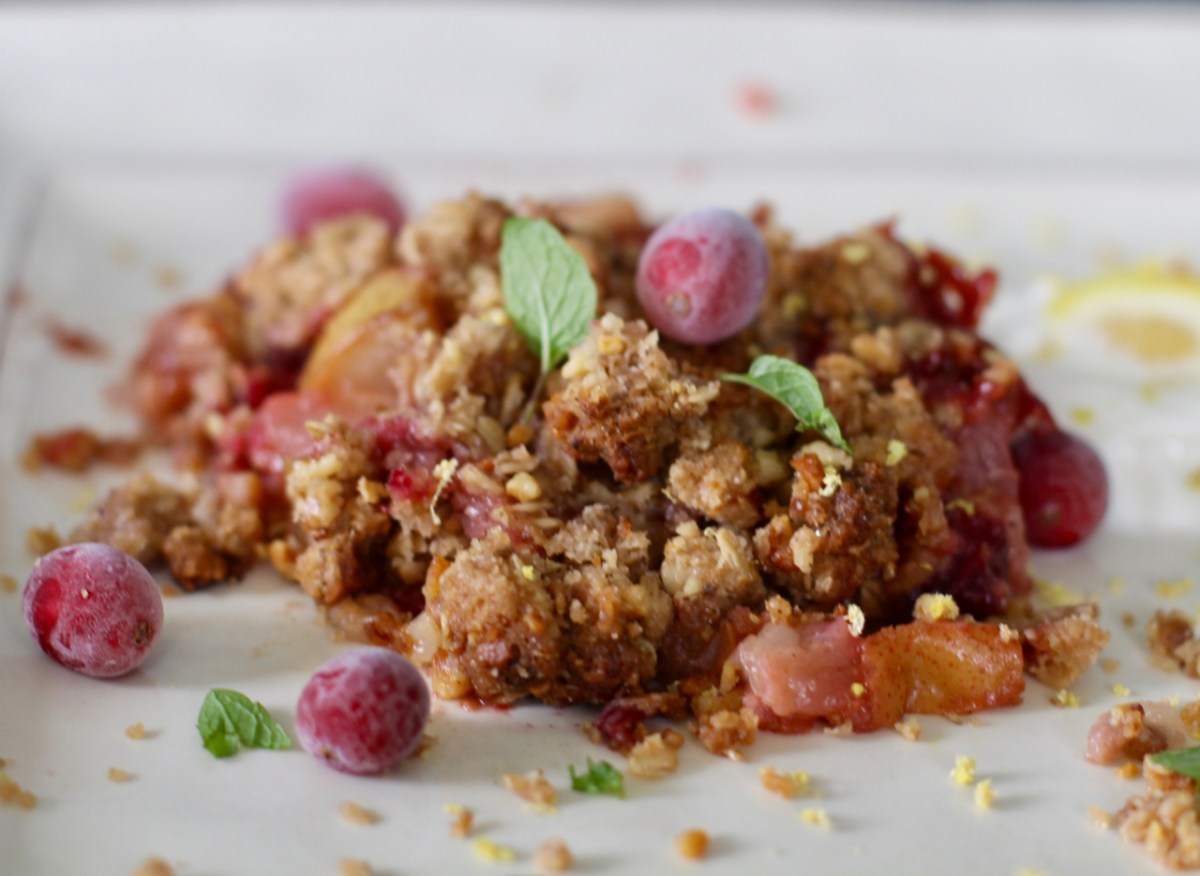
This is such an exciting time for cooking in the Midwest. Fall’s abundance in vegetables and fruits is such a blessing for any cook. All the gorgeous fall colors are just dazzling. I had a hard time deciding what to post, there is so much to choose from. I guess they call this time of year the harvest season for a reason. So I decided to make something fun. How does a cranberry pear crisp sound?
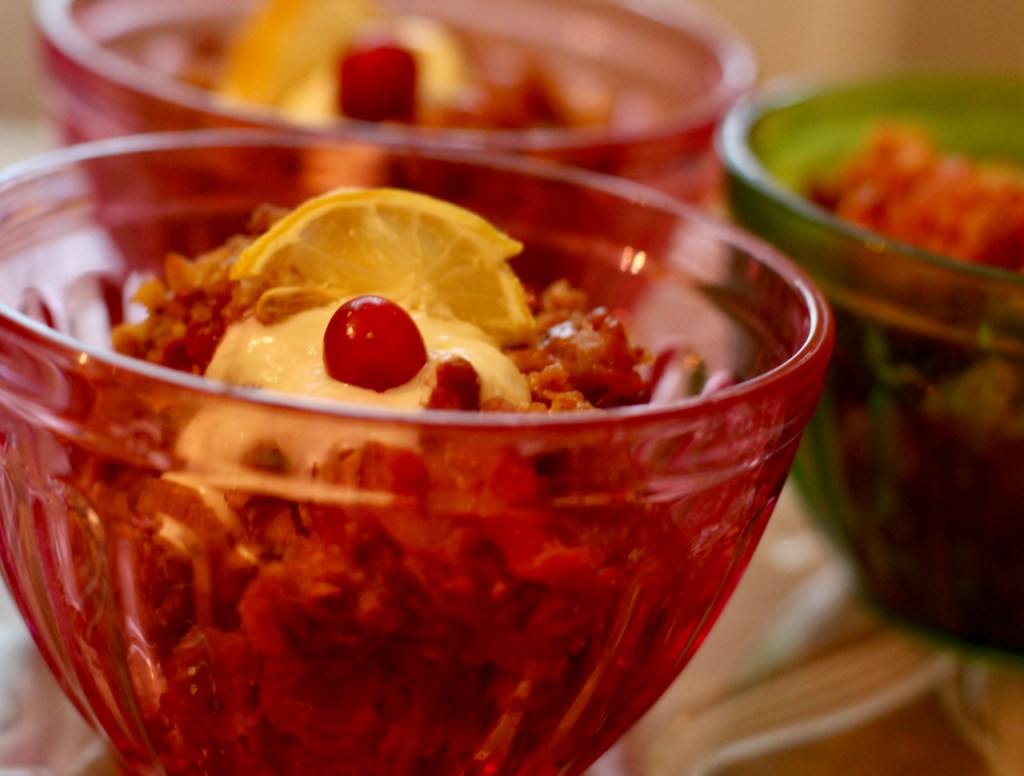
I really like how this recipe turned out. The sweet buttery pears work well with the sourness of the bitter cranberries and all this is topped with the crunchy oatmeal topping. You can serve it with a little heavy cream or ice cream!
Cranberries are not just for the holidays! Most people associate cranberries with Thanksgiving or maybe Christmas because it is red like Santa’s coat. I have served cranberries after Thanksgiving and I was reminded that it was not Thanksgiving time. However, many creative chefs use cranberries for cooking and baking because they are so unique and healthy. These berries are more sour but are also bitter at the same time. It is usually hard to find fruits with bitter flavor. I personally like to add it to other sweet fruits to make the sweet dishes more exciting.
The refreshing tangy cranberries have been used as food and medicine for a long time. Cranberries are native to North America, the Pequot Indians of Cape Cod called them ibimi, bitter fruit. Native Indians used them for preserving meat. Later, the Natives shared them with the Pilgrims who started making sweet sauces. Cranberries are incredibly valuable for health as they are rich in vitamin C, fiber, flavanoids, phenols and many substances that give protection against tooth decay and infections.
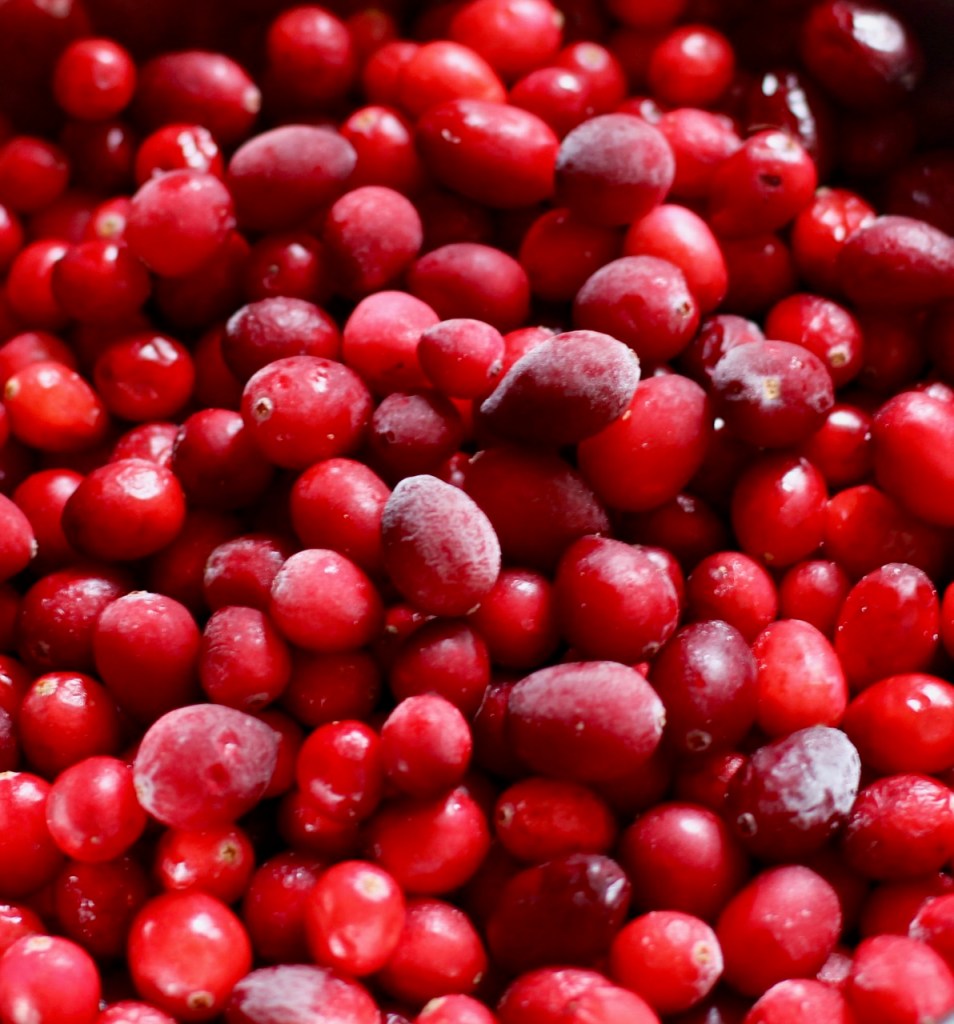
One more interesting fact. Cranberries have an open space inside the middle that allows them to float on top of the water. This interesting adaptation allows them to get away from not being sweet and not having to rely on animals to spread their seeds to survive. In addition, the Native Americans believed the cranberries nourish and protect the kidneys and the bladder.
The sweet and juicy pears are also valuable for health. They are cooling and slightly acidic. They help the lungs by moving stagnation and keeping them moist during the dry season. They are high in fiber that is very much needed in the fall. Pears are also good source of antioxidants, minerals like copper, iron, potassium, manganese, magnesium and vitamins A, B, and C.
RECIPE
INGREDIENTS FOR THE TOPPING
- 1 cup of old fashioned rolled oats
- 1/2 cup of white flour
- 1 stick (8 tbsp) of butter, melted
- 2 tbsp-1/4 cup of brown sugar + 2 tbsp for the top
- 1/8 tsp salt
- zest of 1 lemon (optional)
- 1 tsp apple pie spice or 1/2 tsp cinnamon + 1/4 tsp nutmeg + 1/4 cloves+ little mace or 1 tsp cinnamon
- 1/2 cup of chopped pecans or walnuts + more for serving
- heavy cream or ice cream for serving
INGREDIENTS FOR THE FRUITS
- 5-6 ripe but firm pears (I used Bartlett)
- 2 cups of fresh organic cranberries
- 1/4 – 1/2 cup of brown sugar (I think 1/4 cup was plenty but if you have a sweet tooth or the pears are not very sweet, use 1/2 cup of sugar)
- 2 Tbsp flour or 1 Tbsp corn starch
- 1 lemon’s juice (use the lemon from earlier)
- 1/8 tsp salt
- 2 Tbsp orange peel (optional)
- 1 tsp apple pie spice or 1/2 tsp cinnamon + 1/4 tsp nutmeg + 1/4 cloves+ little mace or 1 tsp cinnamon
- 1 Tbsp graded fresh ginger or 1.5 tsp dried ginger (cut and sifted)
- 2 Tbsp whiskey (optional)
METHOD
- Preheat oven to 375 F. Have baking rack in the lower third of the oven.
- Take a stick of butter out of the refrigerator.
- Wash cranberries. Discard any unripe ones. In a smaller bowl add the cranberries, 1/4- 1/2 cup of sugar, lemon juice, orange peel. Let this mixture sit until cranberries give off some juice. You can add whiskey if you wish. Set aside.
- Make topping. Cream the melted butter with the sugar. Add oats, flour, cinnamon, 1/8 tsp nutmeg, salt, lemon zest. Mix well. Fold in the nuts by hand. Let it sit for an hour. Set aside.
- Wash, core and cut up pears into small cubes. You can peel them if the skin is tough, otherwise if they are soft no need to peel them. Set aside.
- Assemble the fruit base. In a bigger bowl, mix 1 tsp apple spice, salt, flour or cornstarch, orange peel, pears, ginger and cranberry mixture with its juice (prepared earlier) together. Put it into a 2 Qt size baking dish.
- Put topping on the top. Sprinkle top with some sugar (optional). I also graded a little nutmeg on the top.
- Bake for 30 minutes or until the top has a nice orange color.
- Serve with heavy cream or ice cream. Add some extra nuts if you wish.
enjoy!
Picture and text by Twincitiesherbs.
Source
https://www.nantucketconservation.org/properties/cranberries
https://www.nutrition-and-you.com/pears.html
https://www.seriouseats.com/2014/11/what-to-do-with-cranberries.html